5.10.1 Install KVM
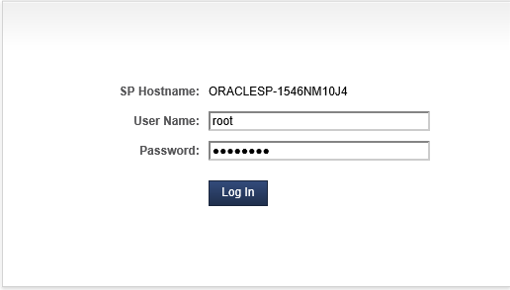
- Log in to the ILOM as root user.
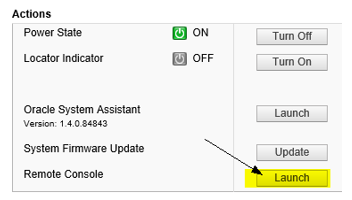
- Launch the remote console.
- On the main Summary page, select
Launch next to remote console.
- Select Continue on the JAVA security warning pop-up.
- On the main Summary page, select
Launch next to remote console.
- Connect the Oracle Linux ISO Image.
Note:
If firmware upgrade is required, apply same procedure.- In the KVMS menu, select
Storage option.

A window entitled Storage Devices appears.
- Click Add and navigate to the location of the ISO on the local workstation.
- Select the ISO and then click Select.

The ISO file will be included in the list of available storage devices. - Select it in the Storage Devices window and then
click Connect.

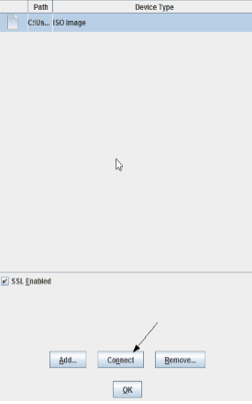
Message when the ISO is connected will be displayed.
- In the KVMS menu, select
Storage option.
- Click OK to confirm and close the window.
- Shut down the server gracefully.
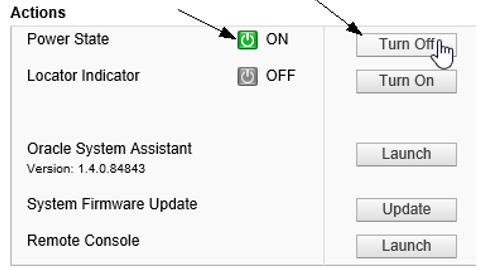
- On the System Summary page, click Turn Off
next to Power State in the
Actions pane. Click OK
at the confirmation prompt.
Note:
- This performs a graceful shutdown of the operating system prior to powering off the host server. Wait for the indicator to signify that the server is powered down before proceeding to the next step.
- If at any point the internet connection on the local workstation is lost or the browser being used is closed and the OSA has not yet been updated, the Oracle System Assistant Updater ISO must be remounted using the previous steps.
- On the System Summary page, click Turn Off
next to Power State in the
Actions pane. Click OK
at the confirmation prompt.
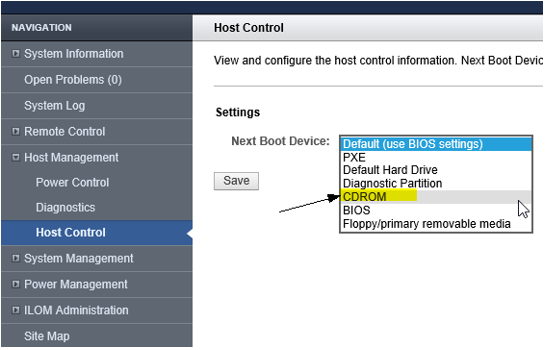
- Set CDROM as the next boot device.
- Under the Host Management tab, select Host Control option.
- From the drop-down menu for Next Boot Device,
select CDROM option and then, click
Save.
- Power ON the server.
- On the System Summary page, click Turn On next to Power State in the Actions Pane to boot into the Oracle System Assistant Updater ISO.
- Click OK at the confirmation prompt.
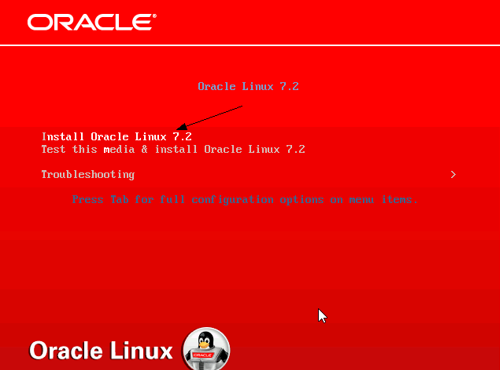
- Oracle Linux OS installation.Go back to the window that contains the Remote Console. If the window was closed, re-launch the console in the Actions Pane.The system will boot into the installation.
- Select Install Oracle Linux xx
and Enter.
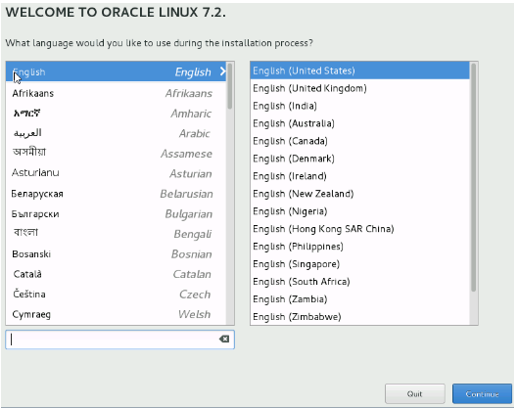
- Select Language and click
Continue.
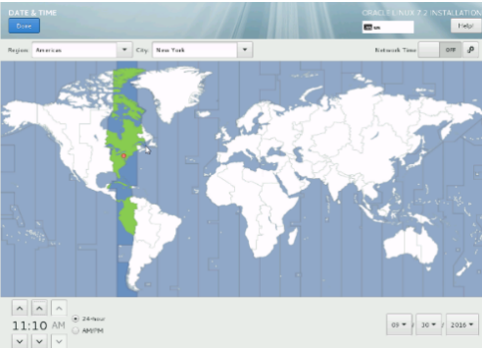
- Select Date and Time, confirm and then, click
Done.
- Select Software selection with the following
options.
- Under Basic Environment, select Server with GUI
- Under Add-ons for
Selected Environment, select:
- Virtualization Client
- Virtualization Hypervisor
- Virtualization Tools
- Compatibility Libraries
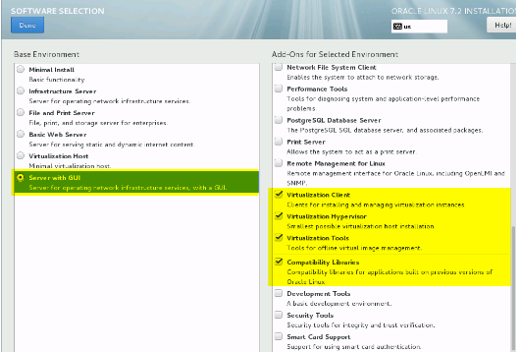
Confirm and then click Done.
- Select Installation Destination.
- Select all hard drives to be installed.
- Under Other Storage
Options, ensure Automatically
configure partitioning is selected.
c. Click Done.
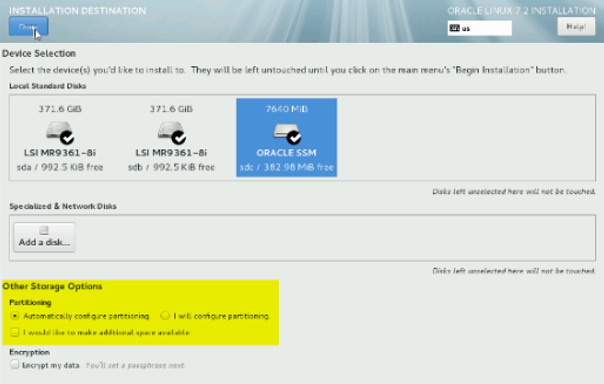
When prompted with INSTALLATION OPTIONS screen, select Reclaim space.

When prompted with RECLAIM DISK SPACE screen, select Delete all, followed by Reclaim space.
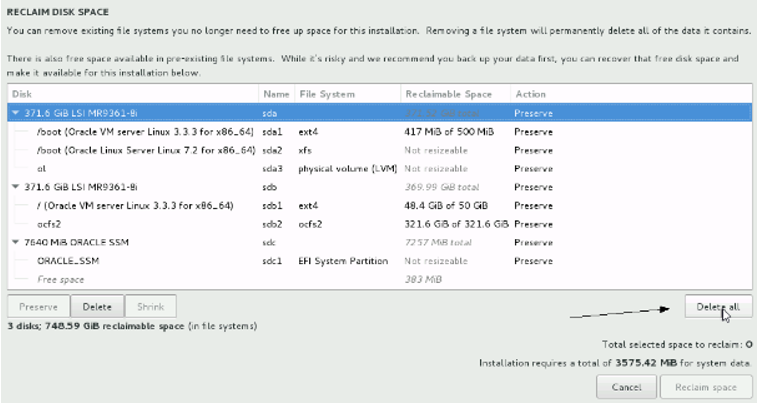
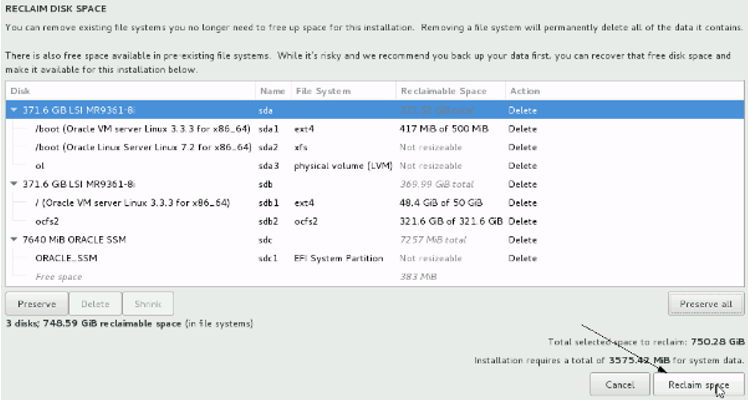
- Select Install Oracle Linux xx
and Enter.
- Reduce Home space on KVM (IDIH Database).
Note:
- This is an optional step.
- The steps from 7 to 12 only apply for KVM that will store the VM for IDIH Database.
- Select Installation Destination.
- Select all hard drives to be installed.
- Under Other Storage Options, ensure
I will configure partitioning. - Click Done.
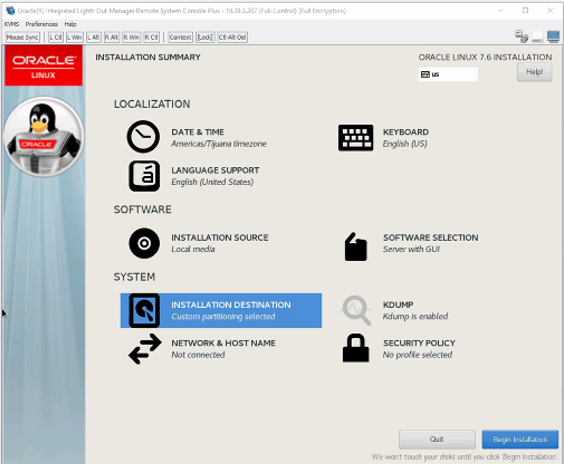
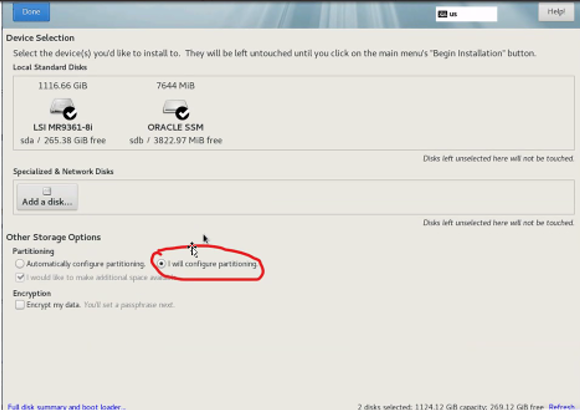
- Select Click here to create them
automatically.
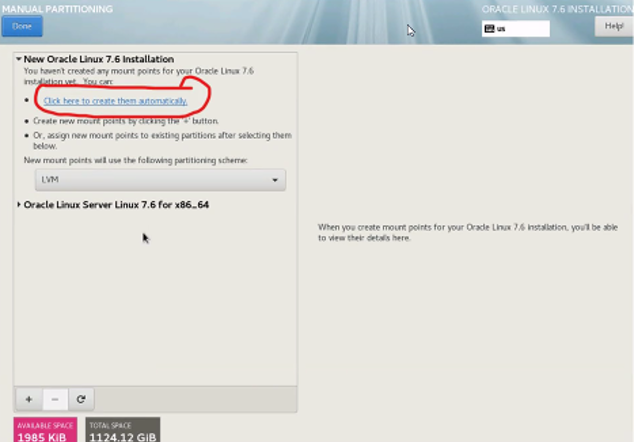
Note:
Modify home to 800Gi and click Update Settings.
Note:
The desired capacity field is customizable. In the above scenario, 800GB has been allocated to /home directory out of 1TB space. It is expected to retain about 200GB of free space out of total memory. This space can later be utilized for adding ephemeral disk. - Click Accept Changes and
Done.
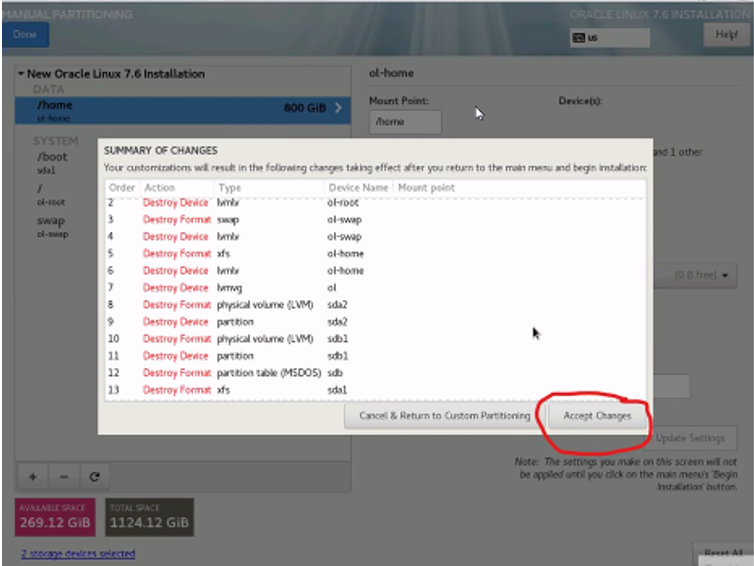
- Run installation on KVM.
- Verify Installation Source
Auto-detected should be automatically
selected with the correct image.
Note:
Verify the media if needed, but it takes a very long time to do so.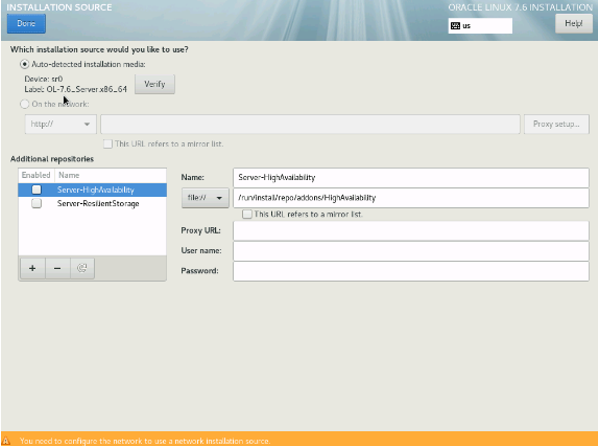
- Select Network and host
name.
Note:
Update server Host Name, but do not consider about networking at this time, as it will be configured later. Click Done after editing the host name.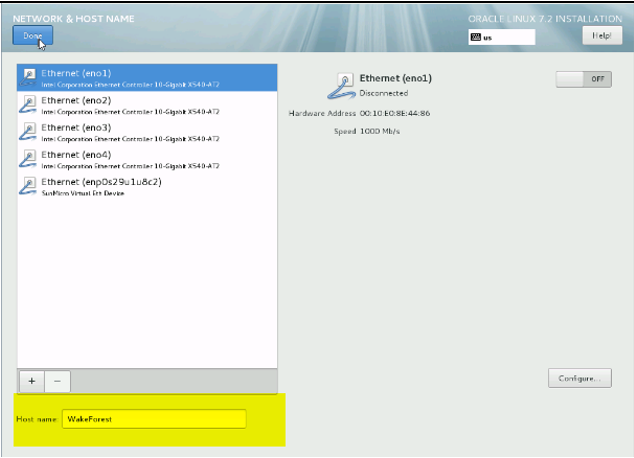
- Verify Installation Source
Auto-detected should be automatically
selected with the correct image.
- Begin installation.
- Click Begin Installation to start the
install.
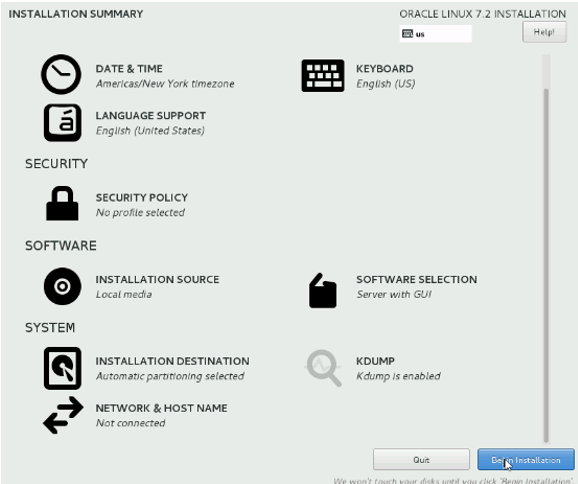
Installation will begin.
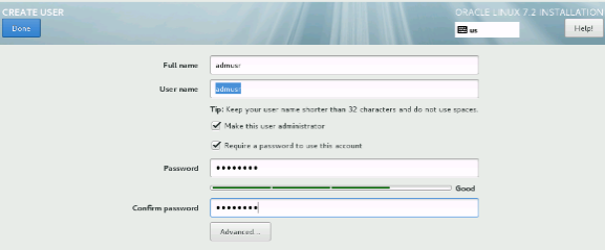
If needed, select and enter information for root password and user creation.
- Create an Administrative user. (NextGen)
- Click Begin Installation to start the
install.
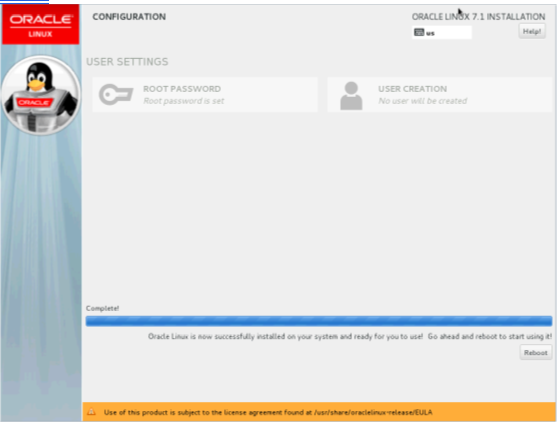
- Reboot after installation.When OL7.x installation is complete, and you are prompted, reboot server to start OL7.x.
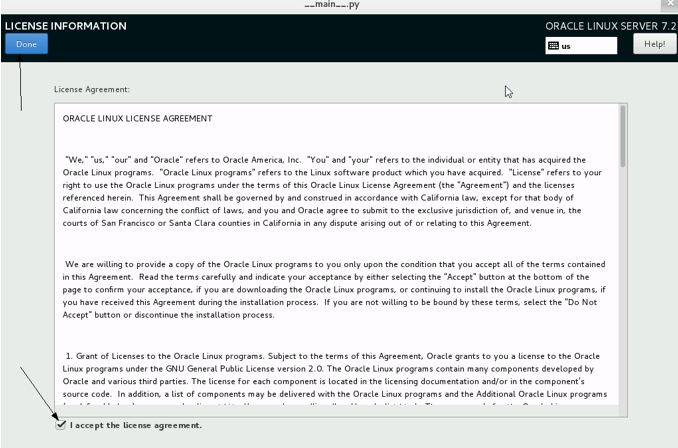
- Accept the license.
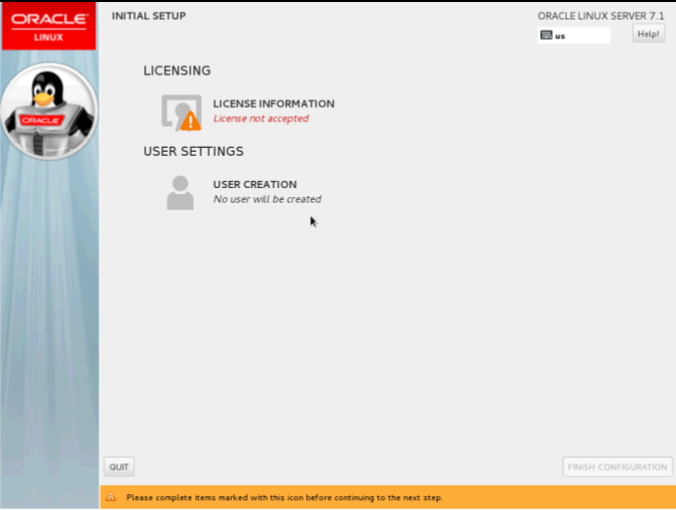
Then, select finish installation.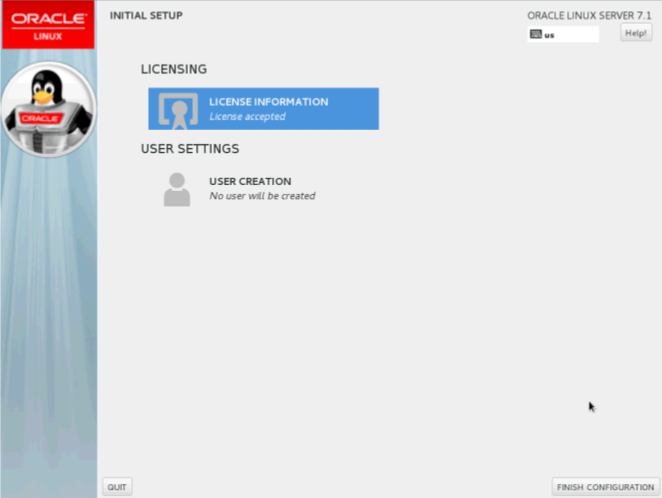
- Disconnect the ISO from storage.From KVMS, and then storage, select the ISO and then select disconnect.
- Revert KVM Hypervisor host interface naming convention to ETHx.
- Edit
/etc/default/grubusing VI editor.$ cd /etc/default $ sudo vi grub - Add the following to the GRUB_CMDLINE_LINUX parameter:
rhgb quiet net.ifnames=0
Recreate the grub2 config file, run
grub2-mkconfig -o
                                /boot/grub2/grub.cfg
- Restart server, run
shutdown -r now
After server restart, devices should be shown as ETHx.
- Edit
- Create KVM Hypervisor HOST MGMT interface.
- Create bond0 interface configuration file
(
/etc/sysconfig/network-scripts ifcfg-bond0):$ sudo vi /etc/sysconfig/network-scripts/ifcfg-bond0DEVICE=bond0 TYPE=Bonding BOND_INTERFACES=eth0,eth1 ONBOOT=yes NM_CONTROLLED=no BOOTPROTO=none BONDING_OPTS="mode=active-backup primary=eth0" - Create eth0 interface configuration file
(
/etc/sysconfig/network-scripts ifcfg-eth0):$ sudo vi /etc/sysconfig/network-scripts/ifcfg-eth0DEVICE=eth0 TYPE=Ethernet ONBOOT=yes NM_CONTROLLED=no BOOTPROTO=none MASTER=bond0 SLAVE=yes - Create eth1 interface configuration file
(
/etc/sysconfig/network-scripts ifcfg-eth1):$ sudo vi /etc/sysconfig/network-scripts/ifcfg-eth1DEVICE=eth1 TYPE=Ethernet ONBOOT=yes NM_CONTROLLED=no BOOTPROTO=none MASTER=bond0 SLAVE=yesIdentify VLANs that apply for the system VM (IDIH).
According the architecture OAM & XMI could be a unique VLAN.Table 5-13 VLAN for System VM
VLAN Name VLAN ID (example) OAM/Mgt 1982 XMI 1983 IMI 405 INT 406 - Create
bond0.<vlan> OAM/Mgmtinterface configuration file (/etc/sysconfig/network-scripts ifcfg-bond0.<vlan>):$ sudo vi /etc/sysconfig/network-scripts/ifcfg-bond0.1982DEVICE=bond0.<vlan> TYPE=Ethernet ONBOOT=yes NM_CONTROLLED=no BOOTPROTO=none VLAN=yes IPADDR= <OAM/Mgmt IP> NETMASK= <OAM/Mgmt netmask> GATEWAY= <OAM/Mgmt gateway>Save.:wq! - Create
bond0.<vlan> OAM/Mgmtroute file (/etc/sysconfig/network-scripts/route-bond0.<vlan>) default through<bond0.<vlan> gateway>$ sudo vi /etc/sysconfig/network-scripts/route-bond0.1982 default via 10.x.x.x.Save.:wq!$ sudo more route-bond0.1982 default via 10.x.x.x. - Bring KVM hypervisor host
OAM/Mgmtinterfaces into service … ifup eth0 ifup eth1 ifup bond0 ifup bond0.<vlan>
- Create bond0 interface configuration file
(
- Create interface bridges.Create XMI interface bridge (
/etc/sysconfig/network-scripts ifcfg-br_XMI):$ sudo vi /etc/sysconfig/network-scripts/XMIDEVICE=br_XMI TYPE=Bridge BOOTPROTO=none ONBOOT=yes NM_CONTROLLED=noNote:
Repeat this step for all identify interfaces. For IDIH, we need XMI,IMI and INT interfaces. - Create VLAN interfaces and bond them to the appropriate bridge.Create guests XMI vlan interface (
/etc/sysconfig/network-scripts ifcfg-bond0.<XMI Vlan>)$ sudo vi /etc/sysconfig/network-scripts/ifcfg-bond0.1983ONBOOT=yes NM_CONTROLLED=no BOOTPROTO=none VLAN=yes BRIDGE=XMI TYPE=Ethernet DEVICE=bond0.1983Note:
Repeat above step for all identify interfaces. For IDIH, we need XMI,IMI and INT interfaces. - Verify interfaces and restart the network.
- Verify that all interfaces have been created with
lscommand.$ sudo ls -l /etc/sysconfig/network-scripts/Example:

- Execute the
following:
$ sudo service network restart
- Verify that all interfaces have been created with
- Create image repository.
- Verify disk space.
$ df –h - Create an images directory called
repositoryfor IMGs and ISOs in/homepartition.$ cd /home $ sudo -i $ mkdir repository
- Verify disk space.
- Copy image to the repository on the management server.Copy one of the two image types to the
.qcow2directory created.Note:
- The image pack for OCPM is located on the Oracle Software Delivery Site.
- Copy IDIH Oracle,Mediation and application images to the repository.
- Launch the virtual manager from the ILOM console.virt-manager from the OS (virt-manager and its dependencies are included in Oracle Linux ISO and installed on the host).
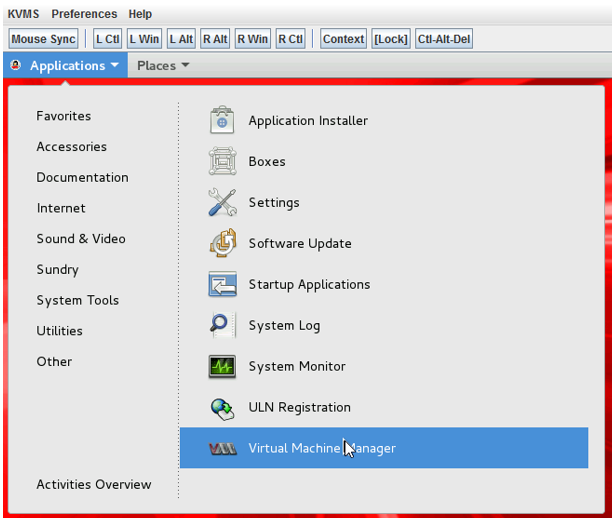
- Resize ORA (database) ova image on KVM.
- Resize ova from KVM to 120G. Run the following
commands:
cd /home/repository/qemu-img resize <image_name.qcow2> +<New_Size>cd /home/repository qemu-img resize ORA-82_32_0.qcow2 +56G - Verify actual size.
Apply command, virtual size to 120G.
[root@MXMERM01DRA01S05KVM03 repository]# qemu-img info ORA-82_32_0.qcow2 image: ORA-82_32_0.qcow2 file format: qcow2 virtual size: 120G (68719476736 bytes) disk size: 20G cluster_size: 65536 Format specific information: compat: 1.1 lazy refcounts: false [root@MXMERM01DRA01S05KVM03 repository]# - Initiate VM using the following
command:
[root@MXTIJM01DRA01S05KVM03 admusr]# virsh start TIJDRA01S05PCIDHD01 - Validate SDB is attached to VM. Login to Database VM and run the
following command:
$ sudo df -h
- Resize ova from KVM to 120G. Run the following
commands:
- Create VM.
- From the Virtual Machine Manager, select the Monitor ICON to create the
new virtual machine.
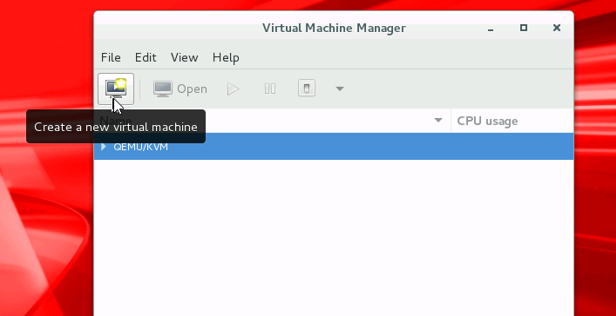
- Select Import existing disk image and click
forward.
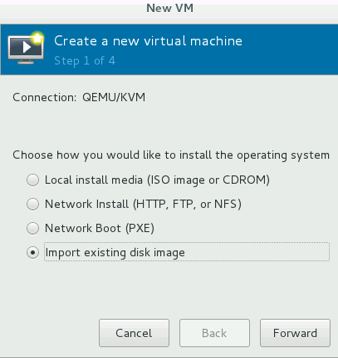
- Next, select the path where the
.qcow2image resides. Browse local to add the repository.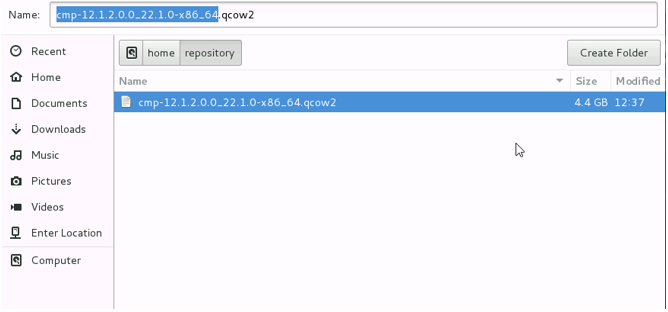
OPTIONS
OS type = generic
Version = generic
Select forward when complete
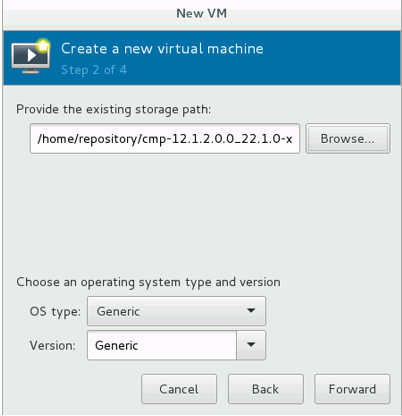
- Next, select the memory and CPU settings. Refer to pining
tool to setup correct information.
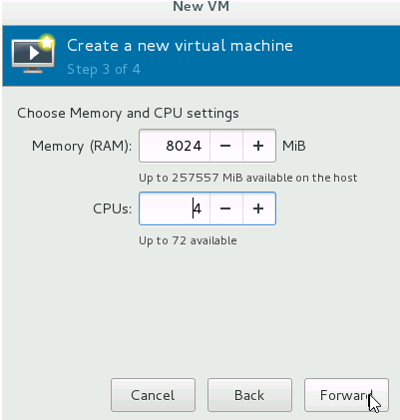
- Name the Virtual Machine and click Finish.
- Choose Customize configuration before install.
- Select XMI Bridge from drop down list.
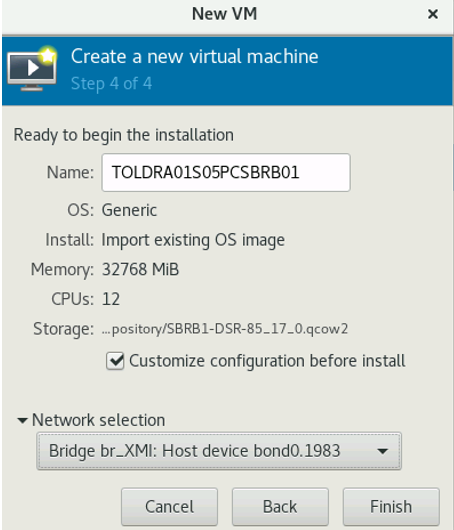
Note:
In case the bridges are not listed, it is recommended to check the network parameters configured in the KVM.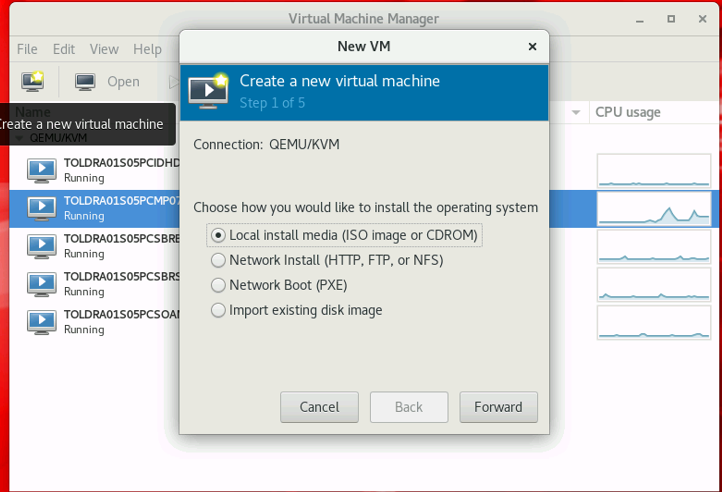
- From the Virtual Machine Manager, select the Monitor ICON to create the
new virtual machine.
- Create VMs using
.qcow2image.- Click Add Hardware, select
Network.
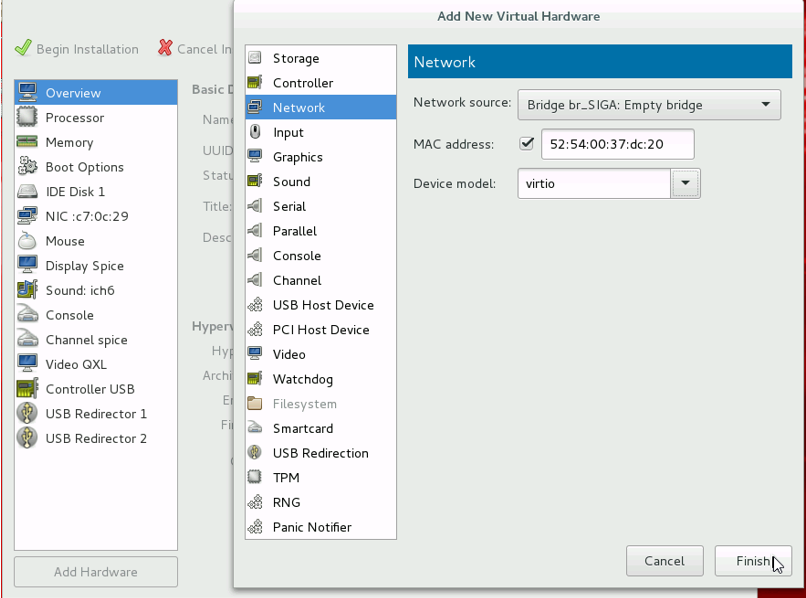
Interfaces for IDIH VMs:
Oracle: XMI and INT
Mediation: XMI, INT and IMI
Application: XMI and INTNote:
Ensure that all 3 IDIH VMs are created and corresponding interfaces have been added to them (as listed above). The interfaces naming convention XMI, IMI, INT must be used in place of eth0, eth1, eth2. This change must be done in 70-persistent-net.rules file. Check HWaddr of each interface using ifconfig command and edit the file to change interface names accordingly. Ensure that interface names are not interchanged while editing the file. Caution is advised.Table 5-14 IDIH VM Interfaces
IDIH VM interfaces XMI eth0 IMI eth1 IN eth2 PARAMETERS:
Network source = XMI (select appropriate network source from the dropdown)
Device Model = virtio
- Click Finish.
Add all interfaces as needed. After adding the other networks, you will see the NICs appear.

- Click Begin Installation.
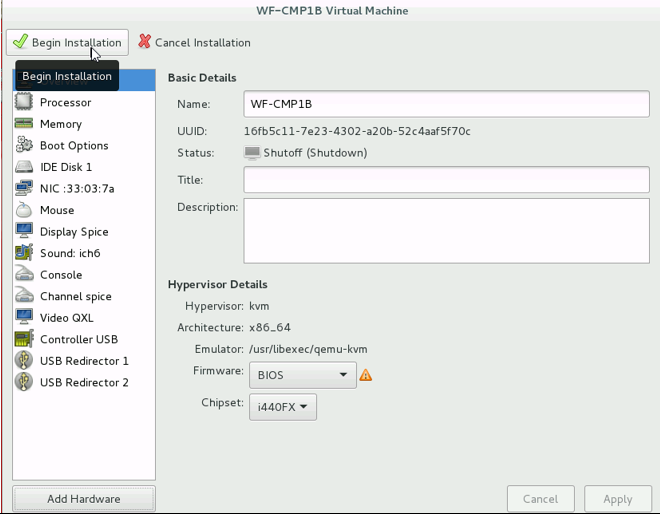
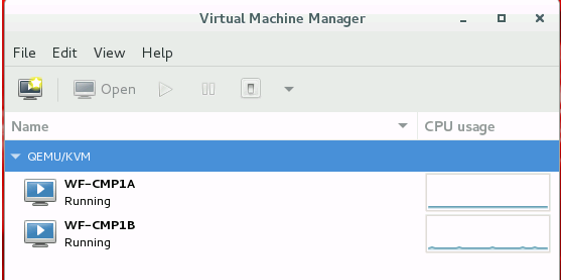
Installation takes a few minutes. From the Virtual Machine Manager, you will see the newly created VM.
- Click Add Hardware, select
Network.