Working with Benefit Details Navigation Collection Using the PeopleSoft Fluid User Interface
This topic discusses how employees use the PeopleSoft Fluid User Interface to perform benefits self service activities using the Benefit Details Navigation Collection.
PeopleSoft HCM provides two navigation options for Benefit Details while using Employee Self Service:
Navigation Collection
Note: The navigation collection has been replaced by the Benefits Details tile dashboard.
Tile Dashboard
For more information on the Benefit Details tile dashboard, refer to Working With Benefit Details Tile Dashboard Using The PeopleSoft Fluid User Interface.
Note: Only users with the appropriate roles are allowed access to use the Benefit Details Tile Dashboard.
The Benefits fluid pages appear in a framework that includes the following:
An overall page title of “Benefit Details”.
The common employee self service header.
The header includes the employee’s name, job title, and a related actions icon. The related actions icon provides access to additional self service transactions.
A panel on the left with tabs for accessing specific pages, called the Navigation Collection.
A supplemental panel on the right with links to resources.
For general information about fluid pages in PeopleSoft HCM, see Understanding PeopleSoft Fluid User Interface Homepages
|
Page/Tile Name |
Definition Name |
Usage |
|---|---|---|
|
HC_EBEN_SS_NAVCOLL_FL (cref for the tile) W3EB_ENR_TILE_FLU (page for dynamic data) |
Access benefits self service transactions. |
|
|
BEN_SUMM_GRID_FL |
View information about current benefits. |
|
|
W3EB_SEL_EVNT_FLU |
Initiate processing for a life event that affects benefits. |
|
|
W3EB_DEPBNSMRY_FL |
Update information about dependents and beneficiaries. |
|
|
Benefits Enrollment pages: |
BNE_SEL_EVENT_FL BNE_CARD_SUMM_FL |
View all currently active benefits-related enrollment events. View enrollment summary information and the benefit plans you are eligible to elect from. |
|
BAS_STMT_LIST_FL |
View a list of benefits enrollment preview and confirmation statements. |
|
|
Affordable Care Act: |
ACA_EE_YE_FORM_FL |
View the Form 1095-C generated each year and submitted to the IRS. |
|
Affordable Care Act: |
ACA_SS_CONSENT_FL_GBL |
Access the consent form to grant or withdraw consent to receive the Form 1095-C for the current year in an electronic format. |
Employees use the Benefit Details tile to access the navigation collection for benefits self service transactions.
Navigation:
The Benefit Details tile is delivered as part of the Employee Self Service Homepage, but the location can change if you change the delivered home pages or if employees personalize their home pages.
This example illustrates the Benefit Details tile for the tablet.
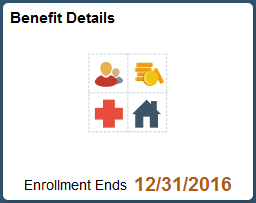
Click the Benefit Details tile to access the Benefit Detailspage.
During open enrollment period, live content will be displayed on the tile giving the open enrollment’s end date.
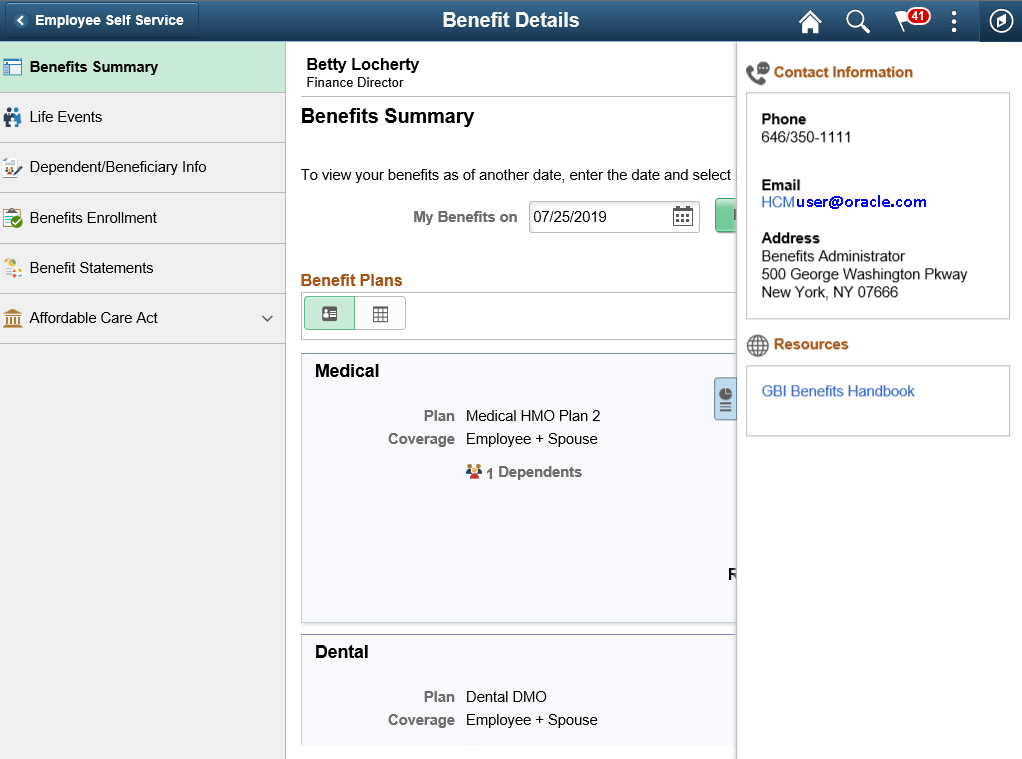
Use the Benefits Summary page (BEN_SUMM_GRID_FL) to view summary information about benefits.
Navigation:
Click the Benefit Details tile on a PeopleSoft Fluid User Interface homepage.
The Benefit Details tile is on the delivered Employee Self Service home page.
This example illustrates the Benefits Summary page, in card view, for the tablet.
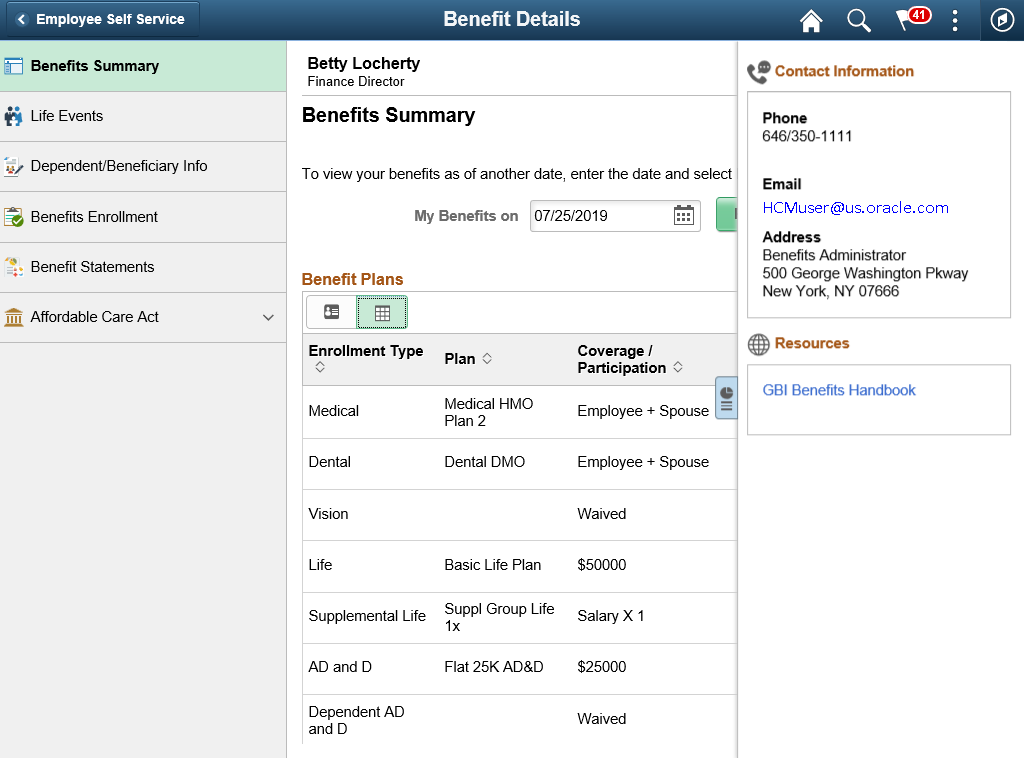
This example illustrates the Benefits Summary page, in grid view, for the tablet.
This example illustrates the Benefits Summary page for the smartphone. The first image, shows the open left panel, the second image, shows both the panels collapsed, and the third image has the right panel expanded.
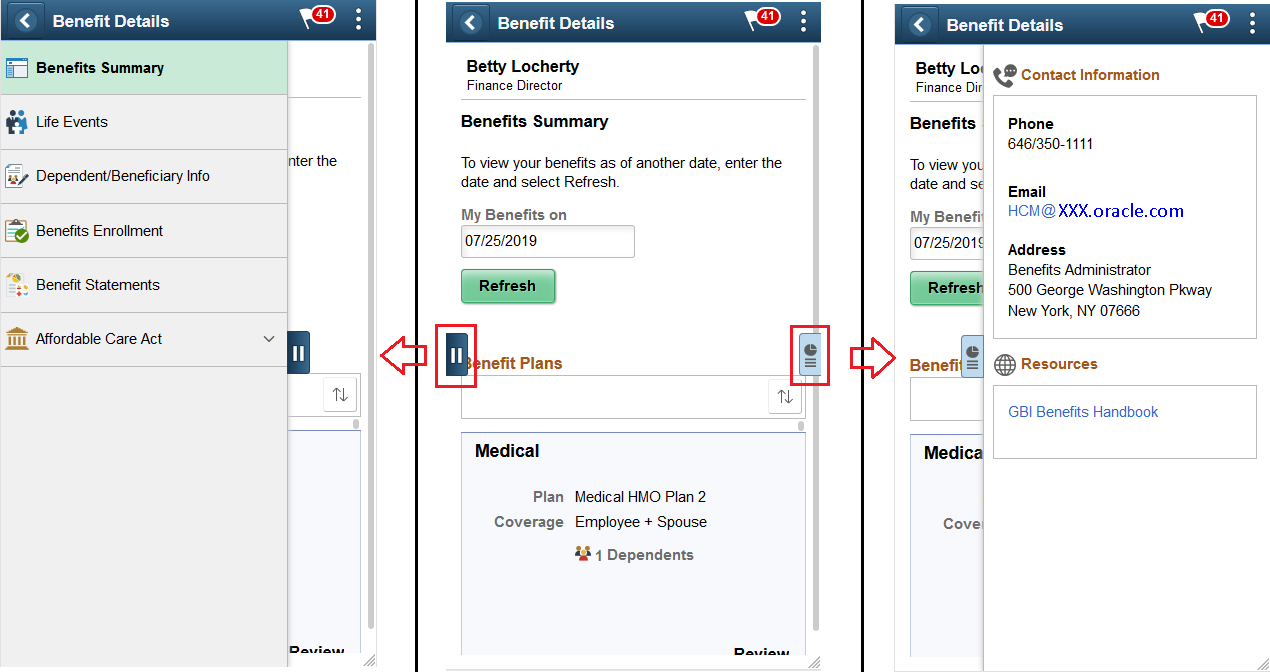
Note: To configure the display of the Contact and Resources panel in the Benefits Details page, see Enrollment Contact Assignment Page.
Field or Control |
Description |
|---|---|
My Benefits on |
By default, the page displays benefits as of the current date. To view benefits as of a different date, choose a new date and click the Refresh button. |
Benefits Plans |
You can choose to see your benefit plans in either the card or grid view. In the card view, each benefit plan card shows the plan type, employee’s coverage or participation information, and the number of dependents/beneficiaries. You can click the card to access corresponding benefit plan page to review the plan details. The grid view shows the enrollment types, a brief description of the benefit, the employee’s coverage or participation, number of dependents/beneficiaries and a Review button. |
For more information on how to review your benefit plans using the Benefits Summary page, refer Reviewing Benefit Plans Using the PeopleSoft Fluid User Interface.
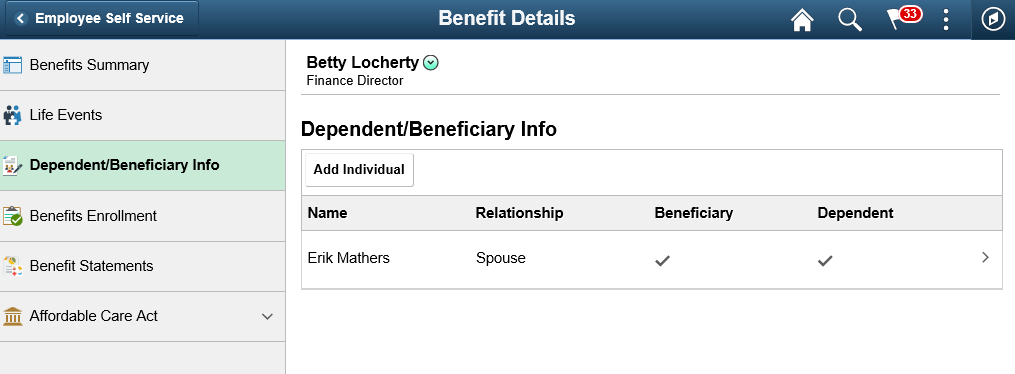
Use the Dependent/Beneficiary Info page (W3EB_DEPBNSMRY_FL) to update information about dependents and beneficiaries.
Note: Whenever an employee makes changes to the Dependent/Beneficiary Info page in Employee Self Service, the changes are automatically reflected in the administrator (Update Dependent/Beneficiary) pages.
If the administrator has set up the Dependent Workflow, he/she can select to receive an email notification when an employee modifies the Dependent/Beneficiary Info page.
Navigation:
Select the Benefit Details tile on a PeopleSoft Fluid User Interface Employee Self Service homepage, select the Dependent/Beneficiary Info tab.
This example illustrates the Dependent and Beneficiary Information page for the tablet.
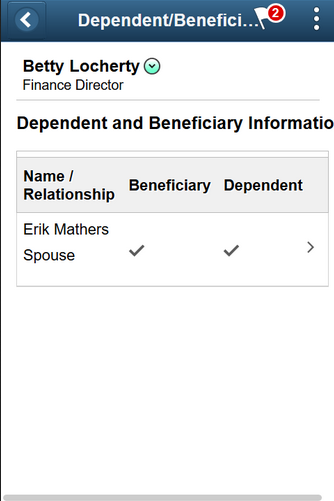
This example illustrates the Dependent/Beneficiary Info page for the smartphone.
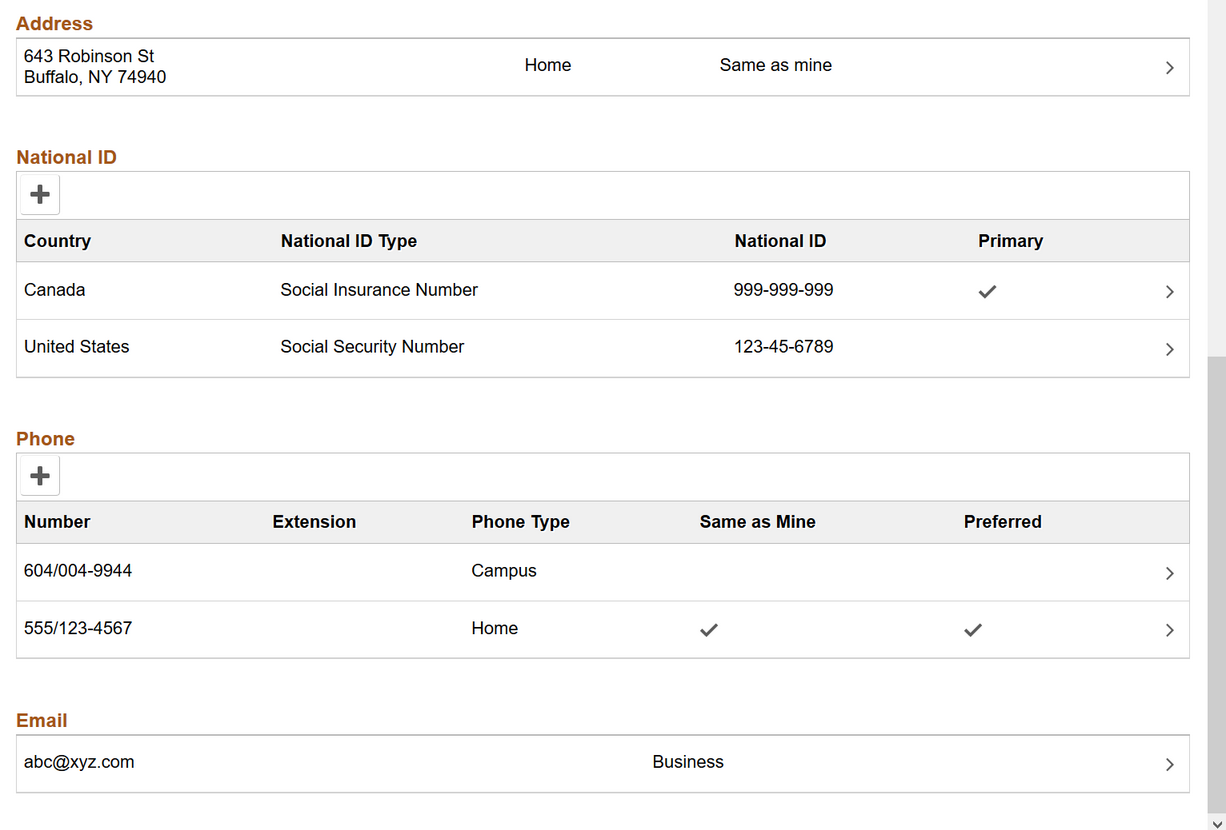
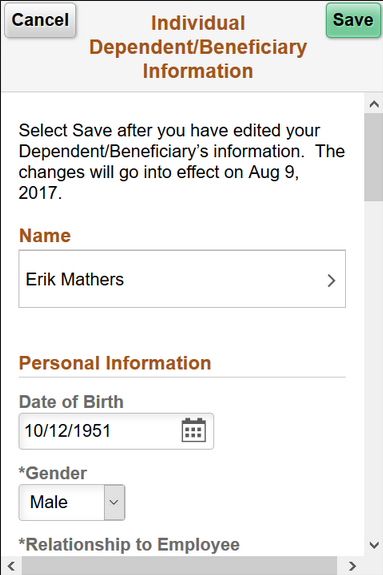
The following example illustrates the Individual Dependent/Beneficiary Information page for the tablet.
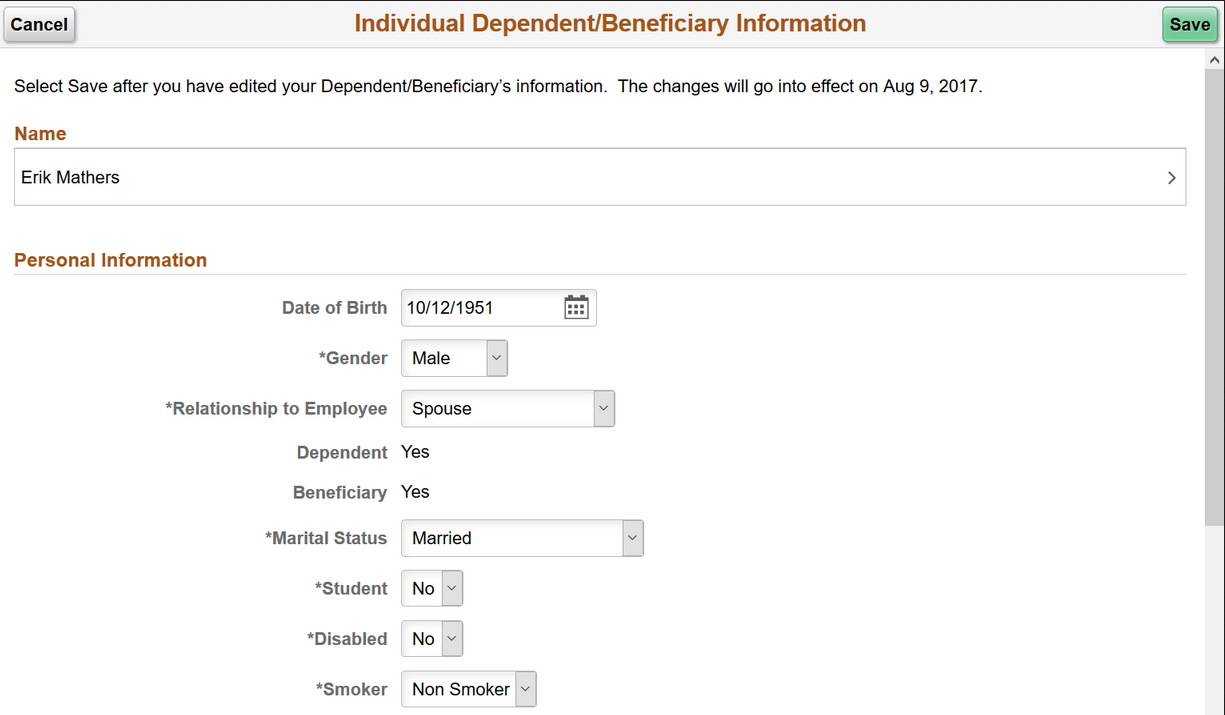
The following example illustrates the Individual Dependent/Beneficiary Information page for the tablet.
The following example illustrates the Individual Dependent/Beneficiary Information page for the smartphone.
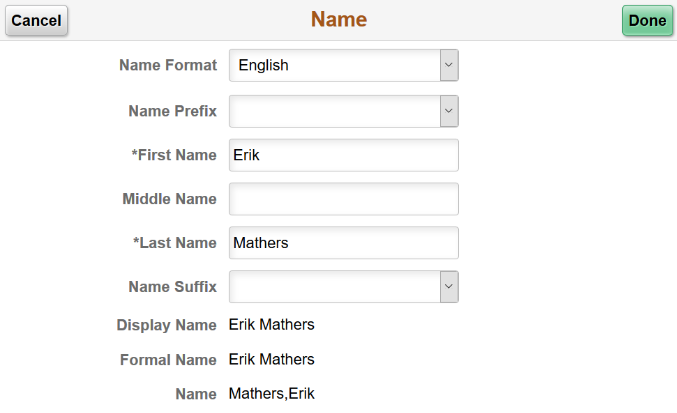
Name Modal Window
Select the Name field to modify the name of a dependent/beneficiary.
This example illustrates the Name modal window for the tablet.
Address Modal Window
The address of a newly added dependent or beneficiary defaults to the ‘Same as mine’ slider equals ‘Yes’, and the home address as given in the employee’s Personal Information is displayed in the grid.
If the employee's Personal Information has no home address, then no address is displayed on the grid. You can select the Add Address row to open the Address modal window and add an address.
In the Address modal window, with the ‘Same as mine’ slider equals ‘Yes’, you can select an existing address type of the employee.
You can choose ‘No’ on the ‘Same as mine’ slider to add a different address.
If the employee's Personal Information has a home address, you can select the Address row to open the Address modal window to modify the address.
This example illustrates the Address modal window for the tablet.

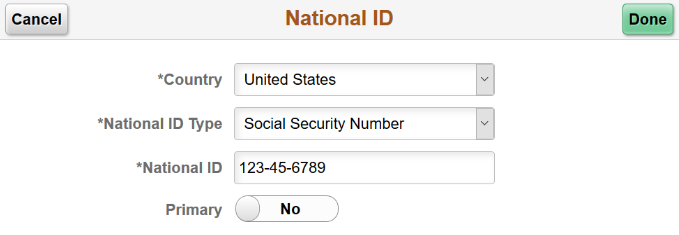
National ID Modal Window
Select the Add National ID button to add the national ID. Dependents and beneficiaries with citizenship in more than one country can have more than one national ID. Add an additional row when required.
Note: The national ID feature is supported only for the countries United States and Canada.
You cannot delete a national ID through Employee Self Service. Only an Admin user has the rights to delete an existing national ID.
This example illustrates the National ID modal window for the tablet.
Field or Control |
Description |
|---|---|
Country |
Select the country for which the national ID is entered. Note: The national ID feature currently supports only the countries United States and Canada. |
Primary |
When more than one national ID is added, use this option to indicate which national ID should be considered as the primary ID. By default, the first national ID entered is considered the primary ID. |
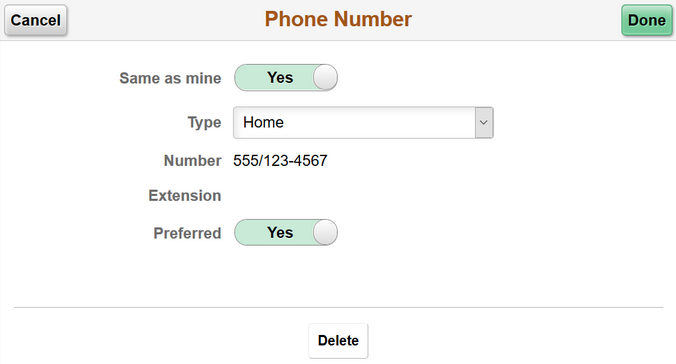
Phone Number Modal Window
Select the Add Phone button to add a phone number.
In the Phone Number modal window, the ‘Same as mine’ slider defaults to ‘No’. You can choose ‘Yes’ on the slider to add an already existing phone number in the employee’s Personal Information.
You can choose ‘No’ on the slider to add a new phone number for the dependent or beneficiary.
By default, the first phone number you add for the dependent/beneficiary is automatically set as their preferred number.
This example illustrates the Phone Number modal window for the tablet.
Field or Control |
Description |
|---|---|
Same as mine |
Choose Yes on the ‘Same as mine’ slider to select one of your already existing phone numbers for the dependent/beneficiary. To add a different phone number, choose No on the ‘Same as mine’ slider. |
Type |
For a ‘Same as mine’ equals ‘Yes’ phone number, you can choose any available phone type the employee has on his/her Personal Information. If you choose No on the ‘Same as mine’ slider, you can add any available type from the drop-down list. |
Preferred |
By default, the first phone number you add is selected as a preferred number. You can select ‘Yes’ on the ‘Preferred’ slider to set a different phone number as your preferred number. Note: Only one phone number can be chosen as the preferred number. |
Delete |
Use the Delete button to delete a phone number. |
Email Address Modal Window
Select the Add Email button to add an email ID.
his example illustrates the Email Address modal window for the tablet.
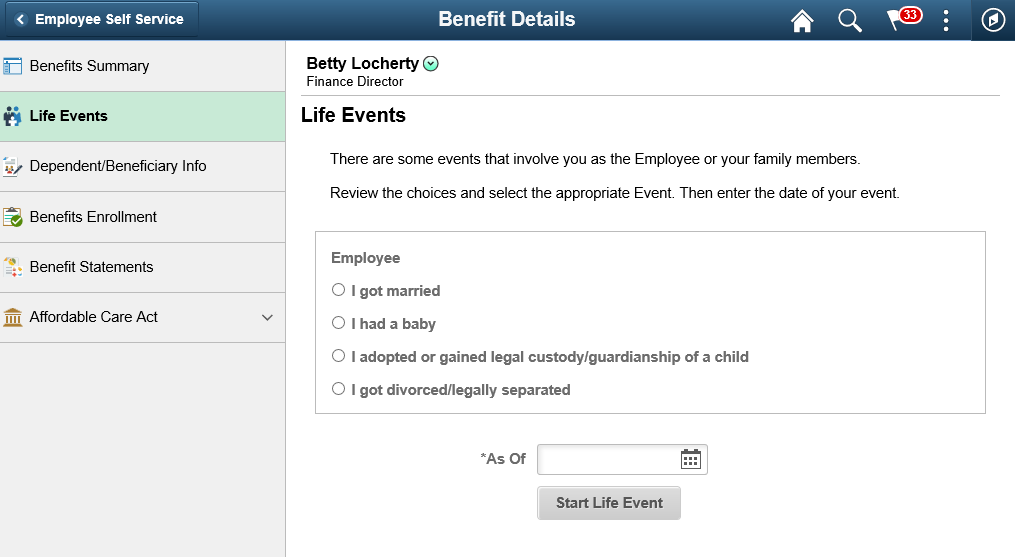
Use the Life Events page (W3EB_SEL_EVNT_FLU) to initiate processing for a life event that affects your benefits.
For the video feature overview on Fluid Life Events, see
Video: PeopleSoft Fluid Life Events .
Navigation:
Click the Benefits tile on a PeopleSoft Fluid User Interface home page, then click the Life Events tab on the Benefits page.
This example illustrates the Life Events page for the tablet.
This example illustrates the Life Events page for the smartphone.
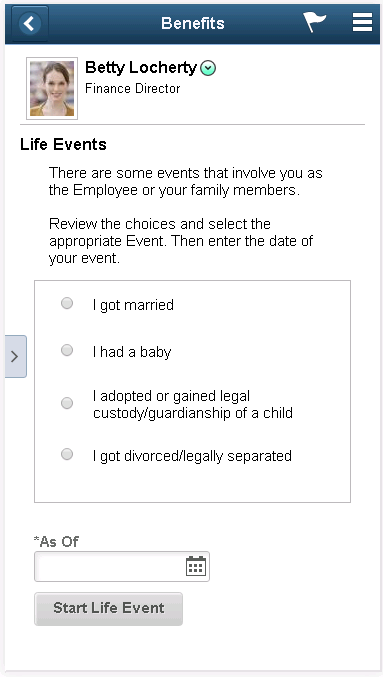
This page lists the same life event options that an employee sees on the classic life events pages.
When you select the type of life event, the page displays a message with information about the time period within which the life event information must be submitted (for example, within 31 days of the event).
Next you enter the event date and click the Complete Life Event button. The system then displays the classic life event pages where you complete the transaction.
For information about the pages used for the four delivered life events, see the following topics:
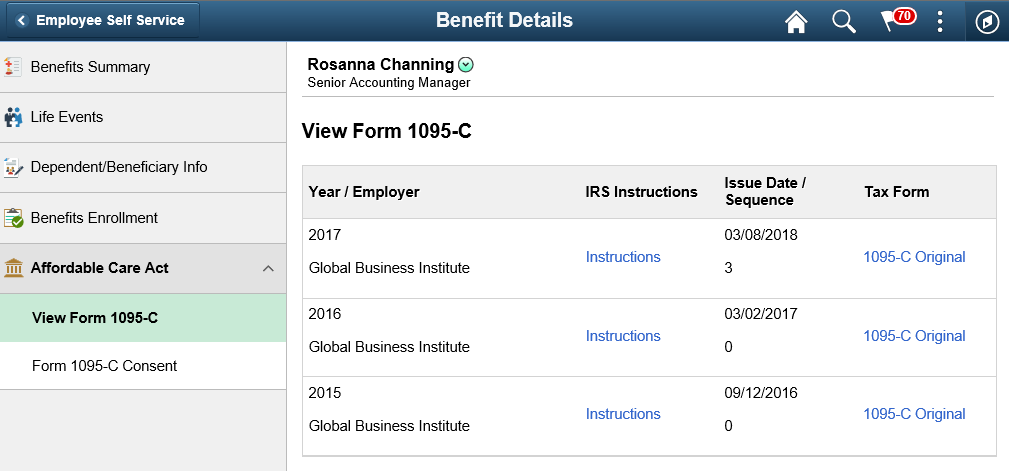
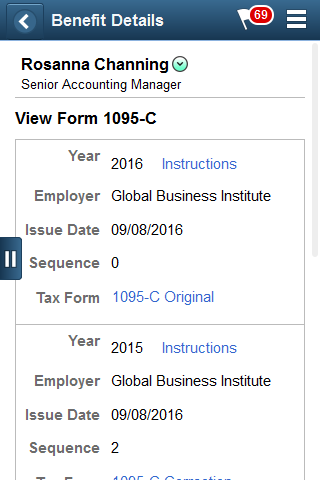
Use the View Form 1095-C page (HC_ACA_EE_YE_FORM_FL) to view the Form 1095-C generated each year and submitted to the IRS.
Navigation:
Click the Benefits tile on a PeopleSoft Fluid User Interface Employee Self Service homepage, click the Affordable Care Act tab on the Benefits Details page, and then click the View Form 1095-C Consent tab.
This example illustrates the View Form 1095-C page for the tablet.
Field or Control |
Description |
|---|---|
IRS Instructions |
Click this link to open the filing instructions of the Form 1095-C for the corresponding year. |
Issue Date/Sequence |
Displays the date on which the corresponding form was available in Self Service and the sequence of the form. |
Tax Form |
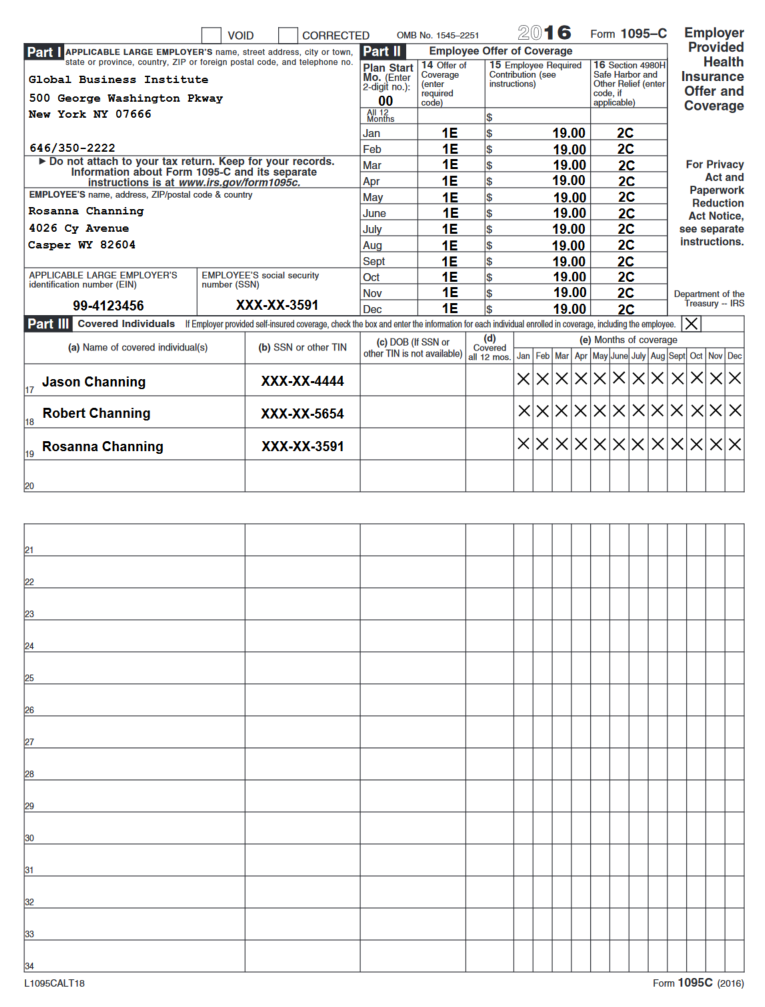
Click this link to open the PDF format of Form 1095-C. There are three kinds of tax forms which could be available for the employee: Original, Reissue and Correction. |
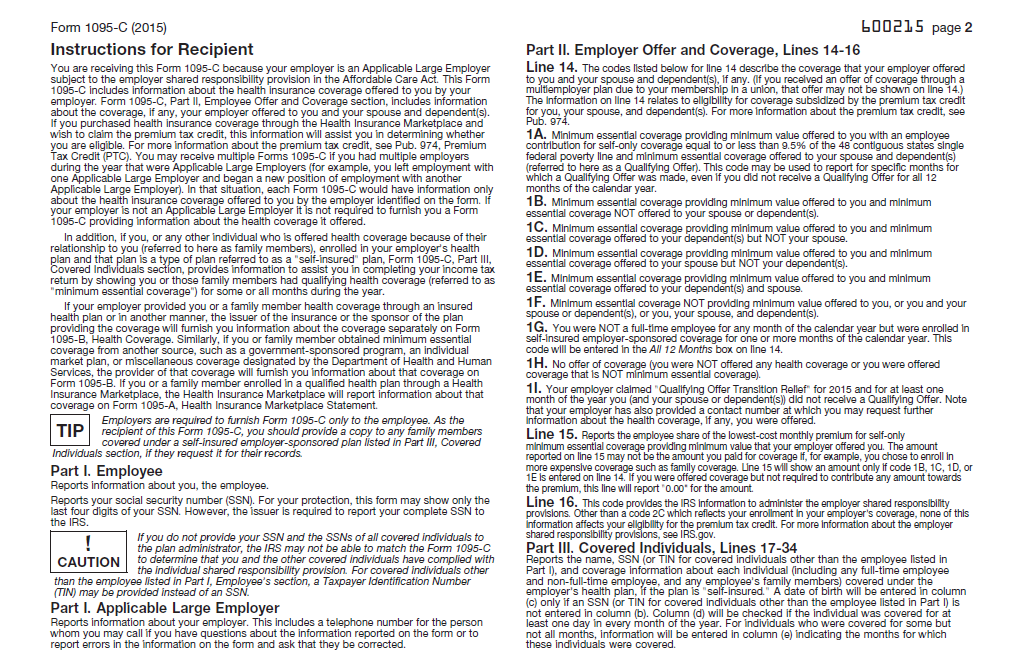
This example illustrates the IRS Instructions page which opens when you click the Instructions link on the View Form 1095-C page.
This example illustrates the Tax Form – Form 1095-C which opens when you click a Tax Form link on the View Form 1095-C page.
This example illustrates the View Form 1095-C page for the smartphone.
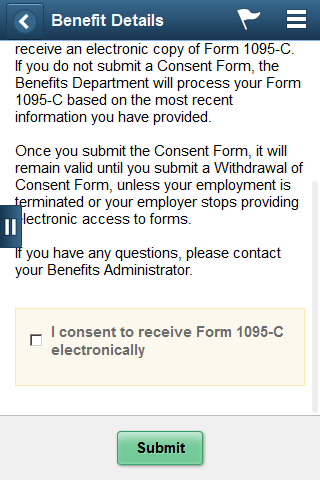
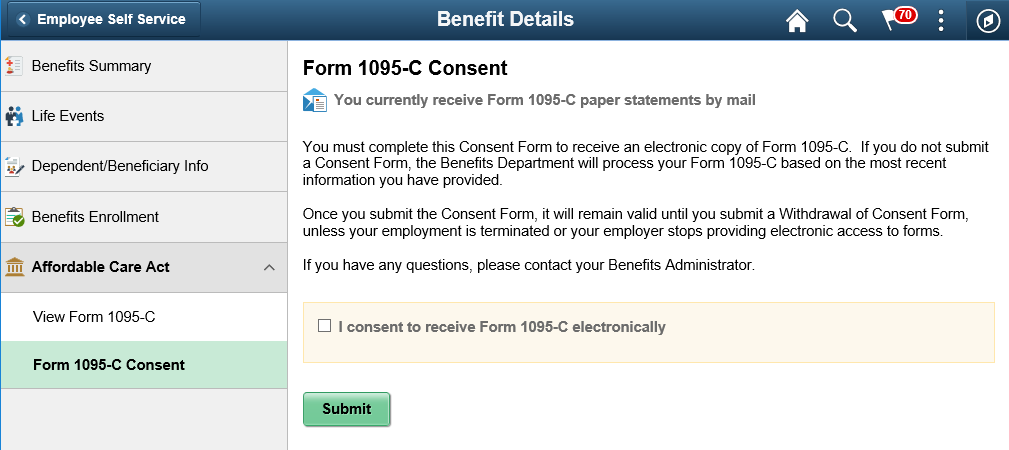
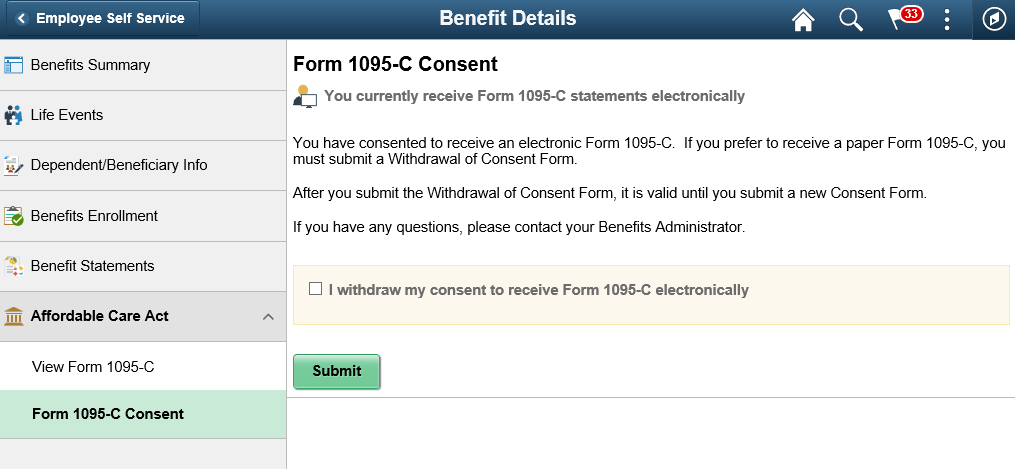
Use the Form 1095-C Consent page (ACA_SS_CONSENT_FL_GBL) to access the consent form to grant or withdraw consent to receive the Form 1095-C for the current year in an electronic format.
Navigation:
Click the Benefits tile on a PeopleSoft Fluid User Interface Employee Self Service homepage, click the Affordable Care Act tab on the Benefits page, and then click the Form 1095-C Consent tab.
This example illustrates the Form 1095-C Consent page for the tablet.
This example illustrates the Form 1095-C Consent - Withdraw page for the tablet.
This example illustrates the Form 1095-C Consent page for the Smartphone.
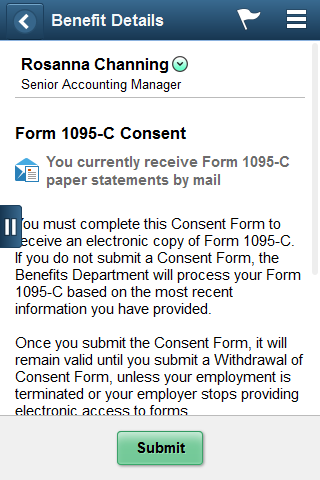
This example illustrates the Form 1095-C Consent page for the Smartphone displaying the checkbox at the bottom of the page.