Attaching Receipts in PeopleSoft Fluid
Receipts can be attached to an expense report at the header level, line level, or both. This topic discussed the pages used to attach receipts.
Receipt attachments can be included in My Wallet and expense report transactions. Fluid expenses allows you to load a receipt by taking a picture using a smartphone device and upload the image from your device, or from your local and network drive if you are using your computer. You can also load receipt images received from text messages.
When uploading documents to an expense report header or line, you can select more than one document when using PeopleTools 8.59 or higher.
The Attachments page can look and operate slightly different depending on whether you access it from an expense report header or an expense report line, on a desktop or smartphone, and from the My Wallet or Expense Entry pages.
|
Page Name |
Definition Name |
Usage |
|---|---|---|
|
EX_ER_ATTCH_HR_SCF |
Attach one or more documents to the header of an expense report. |
|
|
EX_ER_ATT_LN_SCF |
Attach one or more documents to an expense report line. |
|
|
EX_ER_ATT_LN_SCF |
Attach one or more documents to an expense line using a smartphone. |
|
|
EX_MY_RCPT_SCF |
Select one or more images receipts and add it to a wallet entry or expense report. |
The pages and steps used to attach receipts depends on which component you're using.
Attach a Receipt from the My Wallet Entry Page
Navigation:
.
On the My Wallet Entry page:
Select the Attach Receipt section. The expense application will save your wallet entry before opening the new page for uploading the receipt.
Select an upload option:
Add Attachment: Use this option to upload an existing receipt image from your device. If your device has the capability to take a picture, you can take the picture of your receipt and upload it directly into the system. The source image can be uploaded from your device image library, drop box or your local drive if you are using tablet or desktop.
Add from My Receipts: Use this option to upload receipt images saved in the My Receipts page. The attachments saved in the My Receipts page are images received as text messages.
Note: The Add from My Receipts option is available only if the Twilio feature for text messages is turned on for the Business Unit which the user belongs to.
Note: You can upload multiple files at a time depending on configured attachment upload limit. To configure attachment upload limit, see Installation Options - Multiple Attachments Page.
Select Done when you have completed the upload. The system will save your data and return you to the Wallet Entry page. The counter for the Attach Receipt file will be updated with the number of file uploaded.
After you have uploaded the attachment, you can preview the attachment by selecting either the image preview or the image file name. The image preview is available only if the file is a image type. For non-image file types, a standard default icon is displayed.
Note: You can also upload a receipt using the Attach action button on the My Wallet page. The Attach button turns green, which indicates that you are in the attachment mode for uploading a receipt file. Select the wallet entry on which you want to add the receipt image. The steps to upload the receipt is the same as discussed above.
Attach a Receipt to a Line from the Expense Entry Page
Navigation:
From the Expense Report page, select Add Expense.
From the Expense Details page, select the Add action button to add a new expense entry.
From the Expense Entry page:
Select the Attach Receipt section.
This example illustrates the fields and controls on the Attachments Expense Entry.
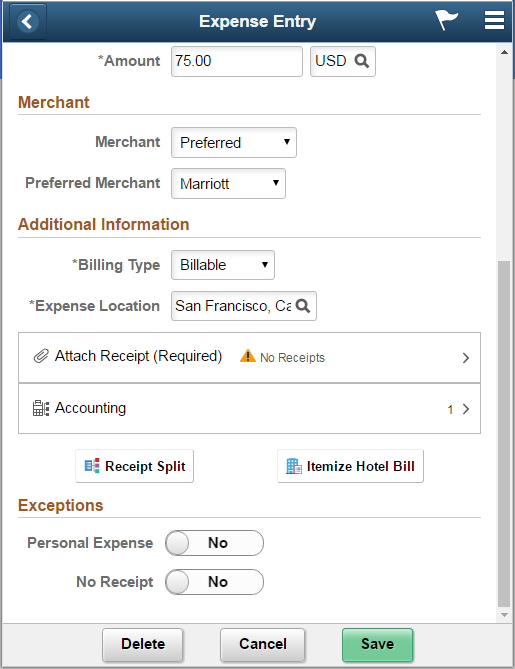
If your expense requires receipt, the Attach Receipt section indicates “Required”. The system also provides you with a warning indicator that you have not uploaded the receipt image.
Select an upload option:
Add Attachment: Use this option to upload an existing receipt image from your device. If your device has the capability to take a picture, you can take the picture of your receipt and upload it directly into the system. The source image can be uploaded from your device image library, drop box or your local drive if you are using tablet or desktop.
Add from My Receipts: Use this option to upload receipt images saved in the My Receipts page. The attachments saved in the My Receipts page are images received as text messages from Twilio. The number indicates the number of available receipt images in the My Receipts page.
Note: The Add from My Receipts option is available only if the Twilio feature for text messages is turned on for the Business Unit which the user belongs to.
Note: You can upload multiple files at a time depending on configured attachment upload limit. To configure attachment upload limit, see Installation Options - Multiple Attachments Page.
After you have uploaded the attachment, you can preview the attachment by selecting either the image preview or the image file name. The image preview is available only if the file is an image type. For non-image file types, a standard default icon is displayed.
To delete an attached file, select Edit, and then select the rows to delete. Select Delete button to delete the selected rows.
If the attachment file was imported from the Receipts page, on deleting the attachment, the file will be returned to My Receipts page.
Select Done when you have completed the upload. The system will save your data and return you to the Expense Entry page. The counter for the Attach Receipt file will be updated with the number of file uploaded.
Note: You can also upload expense receipt for one expense item at a time without having to open each expense entry by using the Attach action button on the Expense Details page. The Attach button turns green which indicates that you are in the attachment mode for uploading receipt file. Select the expense entry on which you want to add the receipt image. The steps to upload the receipt is the same as discussed above.
Use the Attachments page (EX_ER_ATTCH_HR_SCF) to attach one or more documents to the header of an expense report.
Navigation:
From the Expense Report Page, General Information section, select the Attach Receipt button.
This example illustrates the fields and controls on the Attachments page as displayed on a desktop.

This example illustrates the fields and controls on the Attachments page displaying the Attached Post Approval flag.

Expense Report
|
Field or Control |
Description |
|---|---|
|
Header Attachment |
Select Yes to indicate that a document is attached to the expense report. This option requires one or more attachments at the header level, and make attachments at the line level optional. This toggle appears only when the Receipt Required option is Always and the Enforce Receipt and Header Receipt for All Lines options are selected on the Receipts Required Page. If this toggle is Yes but you don't attach a document, you receive an error on the Expense Entry page and you cannot submit the expense report. See Correcting Expense Report Errors Using PeopleSoft Fluid. |
Attachment Details
Use this section to add attachments. Use the Expense Report History page, or expense reports that are pending payment, to add attachments post approval. This might be performed when a lost receipt is found.
|
Field or Control |
Description |
|---|---|
 |
Indicates that the attachments was added after the expense report was approved. Attachments can be added when the transaction is in an Approved, Staged, or Paid status. |
Use the Attachments page (EX_ER_ATT_LN_SCF) to attach one or more documents to an expense report line.
Navigation
From the Expense Entry page, select the Attach Receipt link.
This example illustrates the fields and controls on the Attachments page as displayed for a line and on a desktop.

Use the Attachments page to attach one or more documents to an expense line using a smartphone.
This example illustrates the fields and controls on the Attachments page as displayed on a smartphone.

Use the My Receipts page (EX_MY_RCPT_SCF) to select one or more images receipts and add it to a wallet entry or expense report.
Navigation:
Select the Add from My Receipts button on the Attachments page. On a large desktop, the My Receipts section displays on the right hand side on the Attachments page.
This example illustrates the fields and controls on the My Receipts page as displayed on a smartphone.

This example illustrates the fields and controls on the My Receipts page.
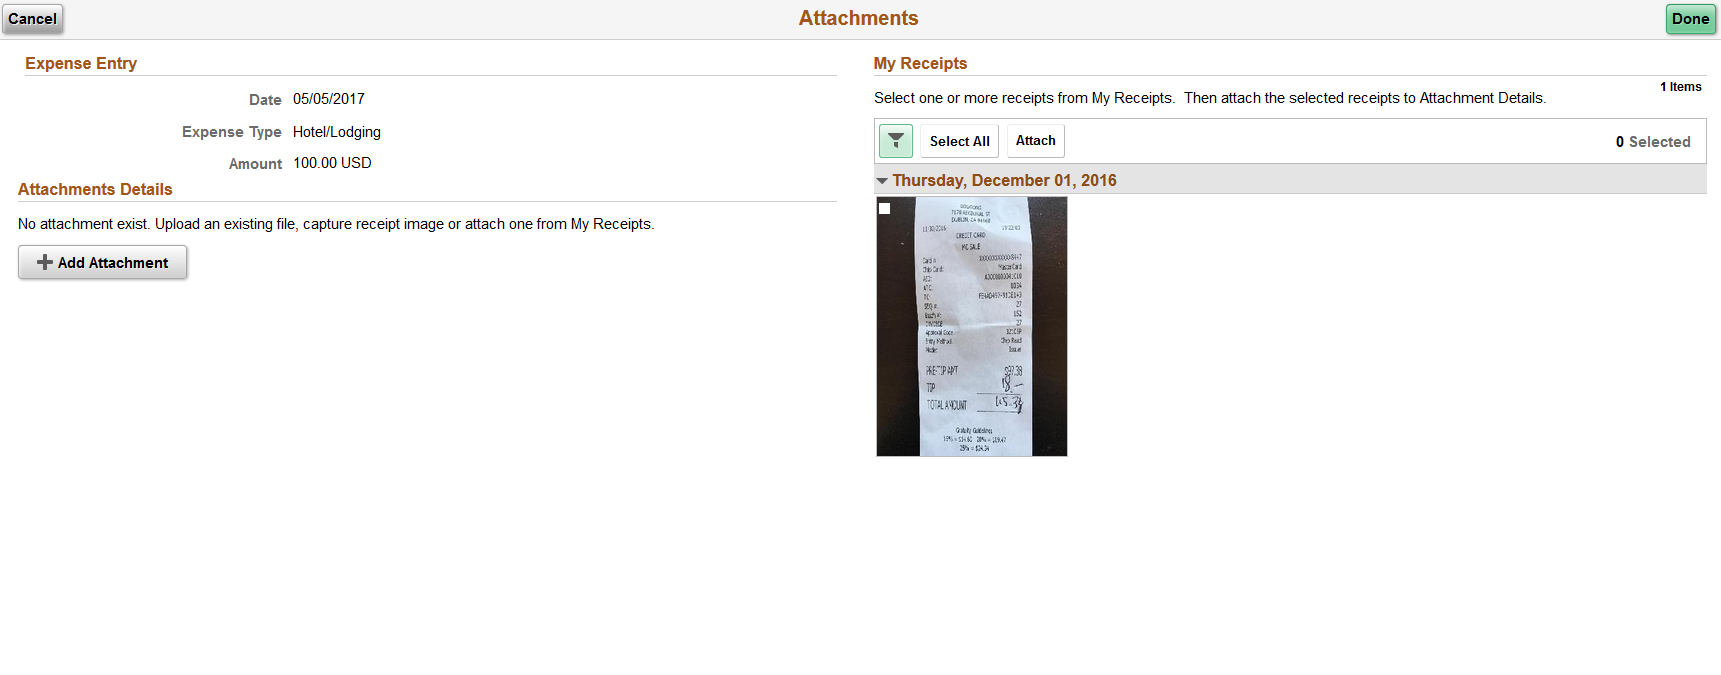
To attach an image to a wallet entry or expense report, select an image and then select Done. A user can filter the images based on the date received.