Creating Requisitions Using Express Entry
On login, requesters can click the Express Entry menu on the Create Requisition page to quickly start creating requisitions for catalog and special request items. This feature lets you directly create requisitions for the items if you know the details such as Item ID, Supplier, and UOM, rather than searching for them.
This topic discusses how to create requisitions using the Express Entry feature.
|
Page Name |
Definition Name |
Usage |
|---|---|---|
|
PV_MOB_EXPRESS_FL |
To quickly create requisitions for catalog and special request items by entering the details directly rather than searching for items. |
Use the Express Entry page (PV_MOB_EXPRESS_FL) to quickly create requisitions for catalog and special request items by entering the details directly rather than searching for them.
Note: The Express Entry menu is displayed only if you have selected the Express Entry- Visible check box on the eProcurement Requisition Navigation page, and the EXPRESSREQ_ENTRY role action is enabled on the Assign Role Actions To Roles page.
Navigation
.
Select a Requisition Type (Standard, Bill Only, and Bill and Replace) from the drop-down.
Note: If any item is already added to the Shopping Cart, the Requisition Type is grayed out. Remove the item from the cart to select the Requisition Type.
To configure Requisition Type, see ePro Installation Options Page.
Select Express Entry in the left pane.
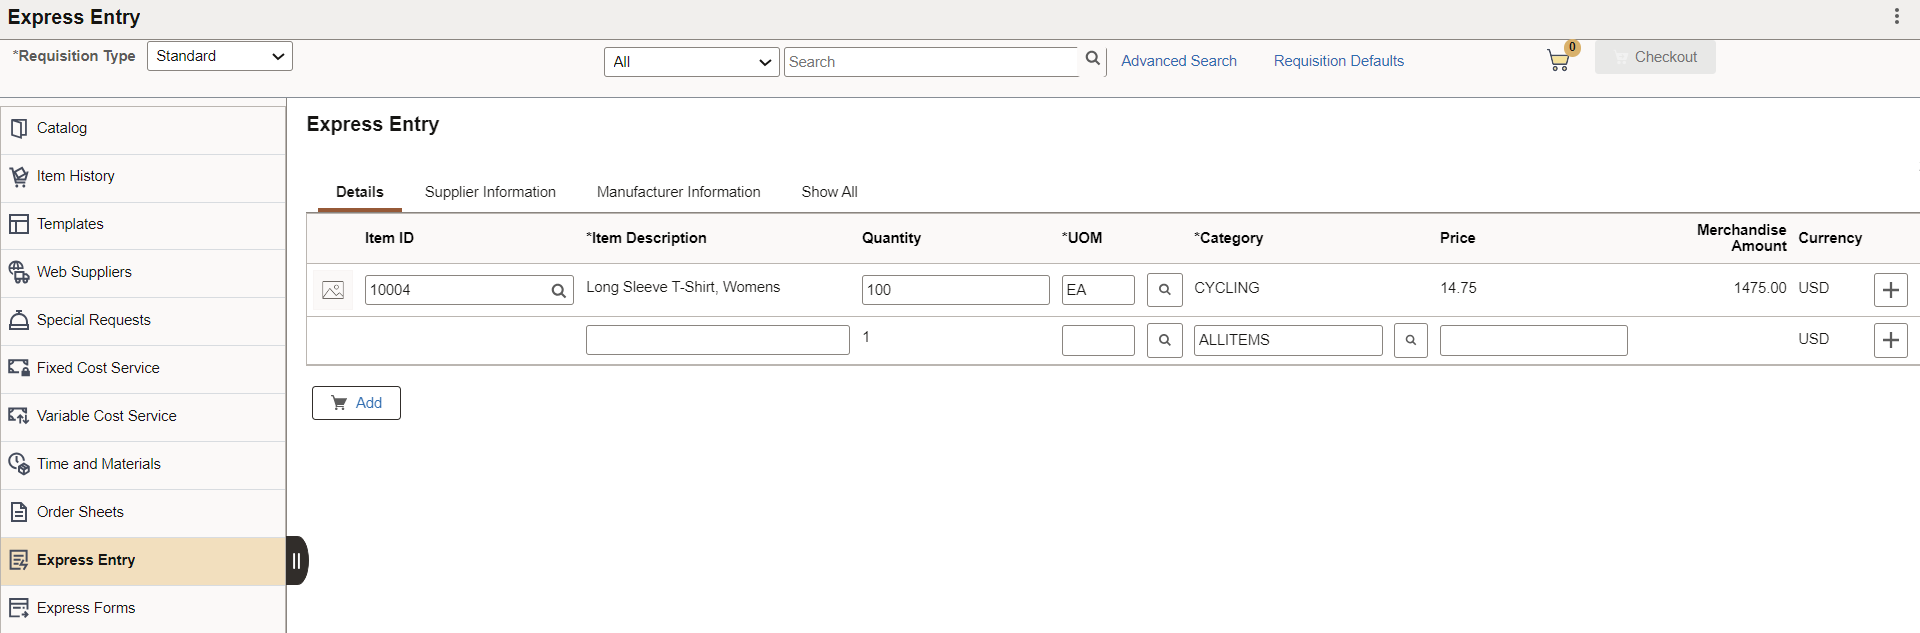
This example illustrates the fields and controls on the Express Entry Page.
|
Field or Control |
Description |
|---|---|
|
Details tab |
Displays the Item ID, Item Description, Quantity, UOM, Category, Price, Merchandise Amount, and Currency fields. As you enter or select an item ID, the other details such as Item Description, Quantity, and UOM fields populates the default values defined. You can modify the quantity and UOM fields if required. Note: If a category is configured as Amount Only, upon selecting that category for the Express Entry line, the quantity value is set to 1 and becomes display only for that line. For Amount Only lines, the Item ID field is also not available. |
|
Supplier Information tab |
Displays the Supplier ID, Supplier Name, Supplier Location, Supplier Item ID, and Supplier's Catalog fields. The tab populates the default values set up for the selected item. Note: If you change the supplier details, the other fields such as Supplier Item ID, Supplier’s Catalog, UOM, Manufacturer ID, and Manufacturer’s Item ID would also reflect the change. This is applicable only to item only lines. |
|
Manufacturer Information tab |
Displays the Manufacturer ID, Manufacturer's Item ID, UPN Type, and UPN ID fields. The tab populates the default values set up for the selected item. Note: The system first checks for the Item/Supplier manufacturing information and uses it if available. But if it does not exist, the system will use the manufacturing information defined at the item level. If both these details are not available, the Manufacturer ID and Manufacturer’s Item ID fields will be blank. |
|
Add |
Click this button to add all the items in the grid to the cart. |
If you enter a special request item, you will be able to enter all the details on the page, except the item ID field.
Note: The item details you entered on the Express Entry page remain intact even if you navigate to another page in the middle of the create requisition process.
After entering the required items, you can add them to the cart and proceed to the checkout process. Once items are added to the cart, the Express Entry page is cleared.
If you proceed to submit existing items while you have items on the Express Entry page, you get a message indicating that there are more items on the Express Entry page.
Once you submit the requisition, the Express Entry page removes the items that were not added to the cart.