Creating Requisitions Using Express Forms
Peoplesoft fluid requisition supports the SDF express forms.
To order express form items:
Create or edit a requisition.
Select Express Forms.
Click the link for the type of form that you want to order.
Enter the required details.
Save the request and access the Requisition Checkout page.
Note: You must select Visible checkbox for Express Forms on the eProcurement Requisition Navigation page to view it in fluid requisition. For additional information, see Setting Up eProcurement Requisition Navigation
|
Page Name |
Definition Name |
Usage |
|---|---|---|
|
PV_MOB_SRCH_EF_FL |
To create requisitions for ordering items. |
|
|
PV_MOB_NEW_CHEKOUT |
To review requisition details, make final adjustments, and place orders. |
|
|
PV_SCH_DIST_SCF |
To confirm requisition checkout information and edit additional details for a line, such as the buyer, supplier, and other line-specific information. |
Use the Express forms page (PV_MOB_SRCH_EF_FL) to create requisitions for ordering items.
Navigation:
Select a Requisition Type (Standard, Bill Only, and Bill and Replace) from the drop-down.
Note: If any item is already added to the Shopping Cart, the Requisition Type is grayed out. Remove the item from the cart to select the Requisition Type.
To configure Requisition Type, see ePro Installation Options Page.
Click the Express Forms menu in the left pane.
This example illustrates the fields and controls on the Create Requisition- Express Forms page.
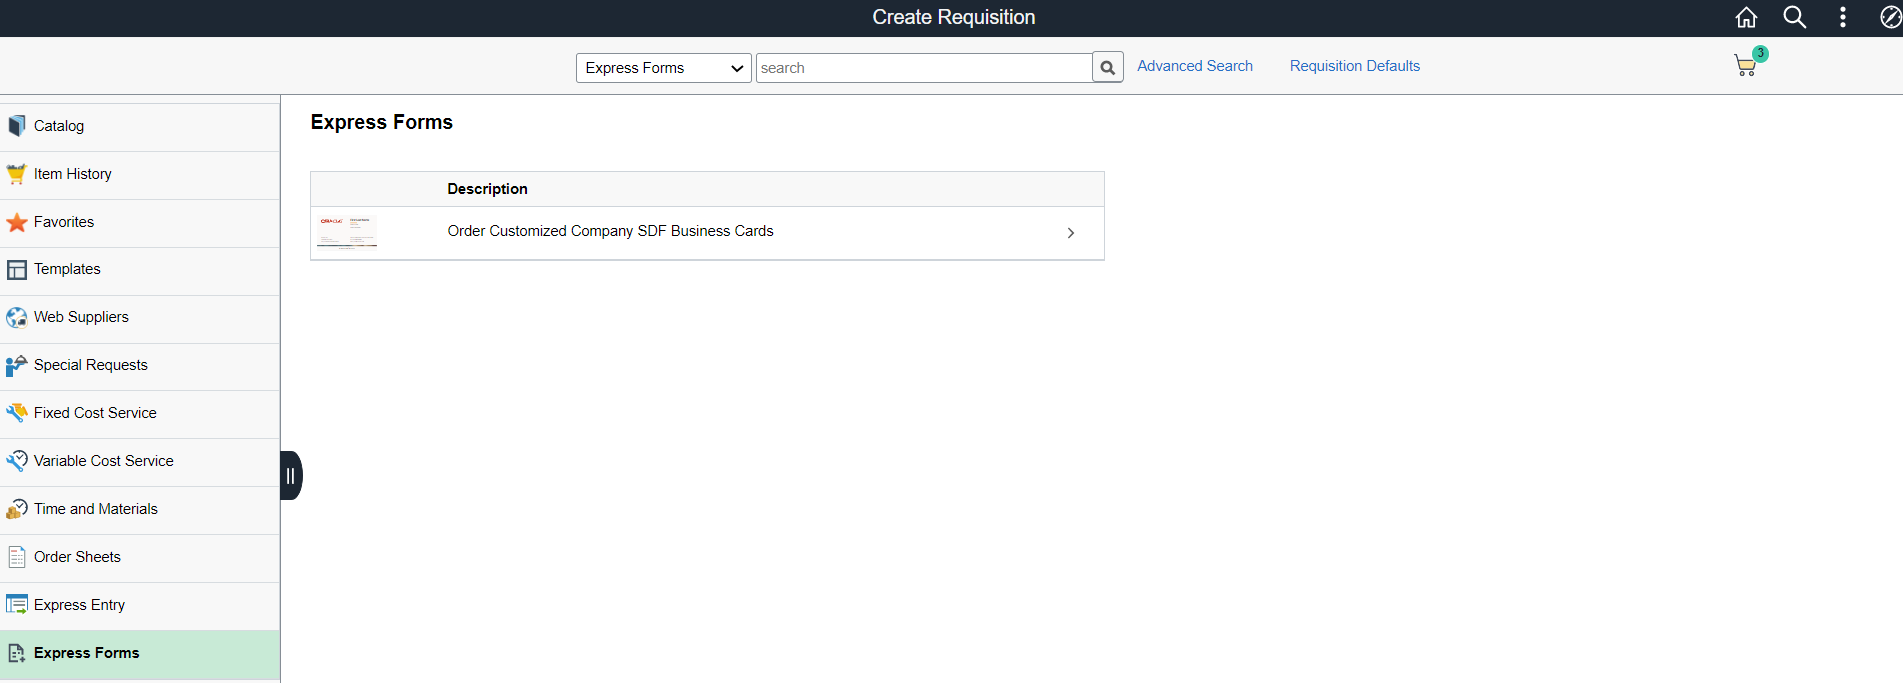
Click an express form to begin the requisition process.
This example illustrates the fields and controls on the Express Form page.
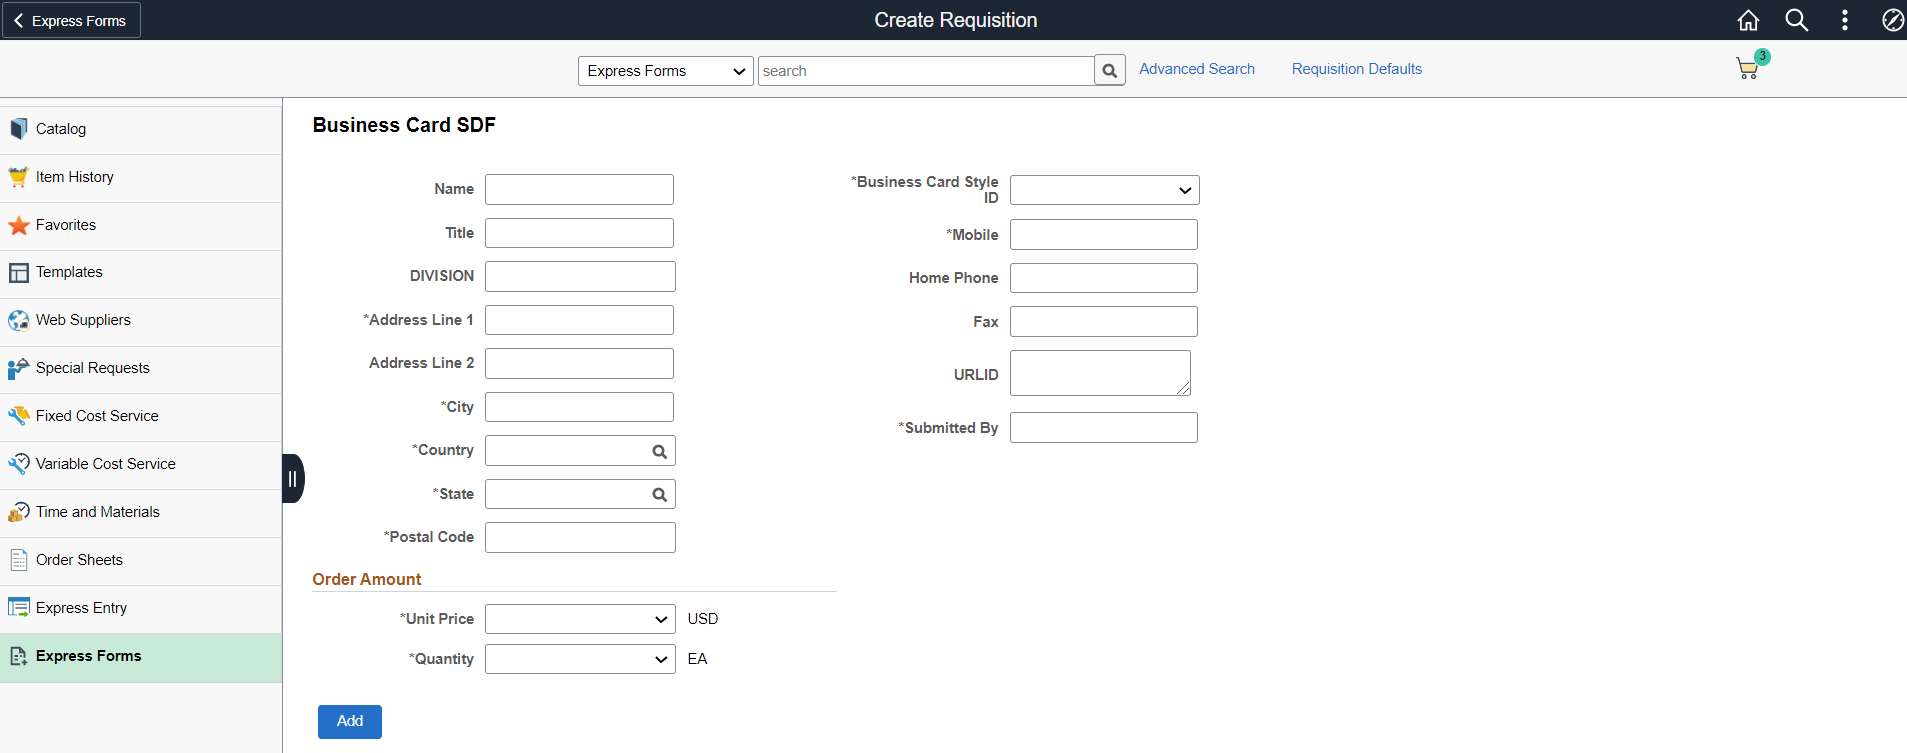
The page displays the fields defined in the Supplemental Data Form, except Unit Price and Quantity. The price and quantity fields are defined in the express form profile.
Enter relevant data for the express form and add it to the cart.
Use the Checkout page (PV_MOB_NEW_CHEKOUT) to review requisition details, make final adjustments to quantity, and place orders.
Navigation:
This example illustrates the fields and controls on the Checkout page
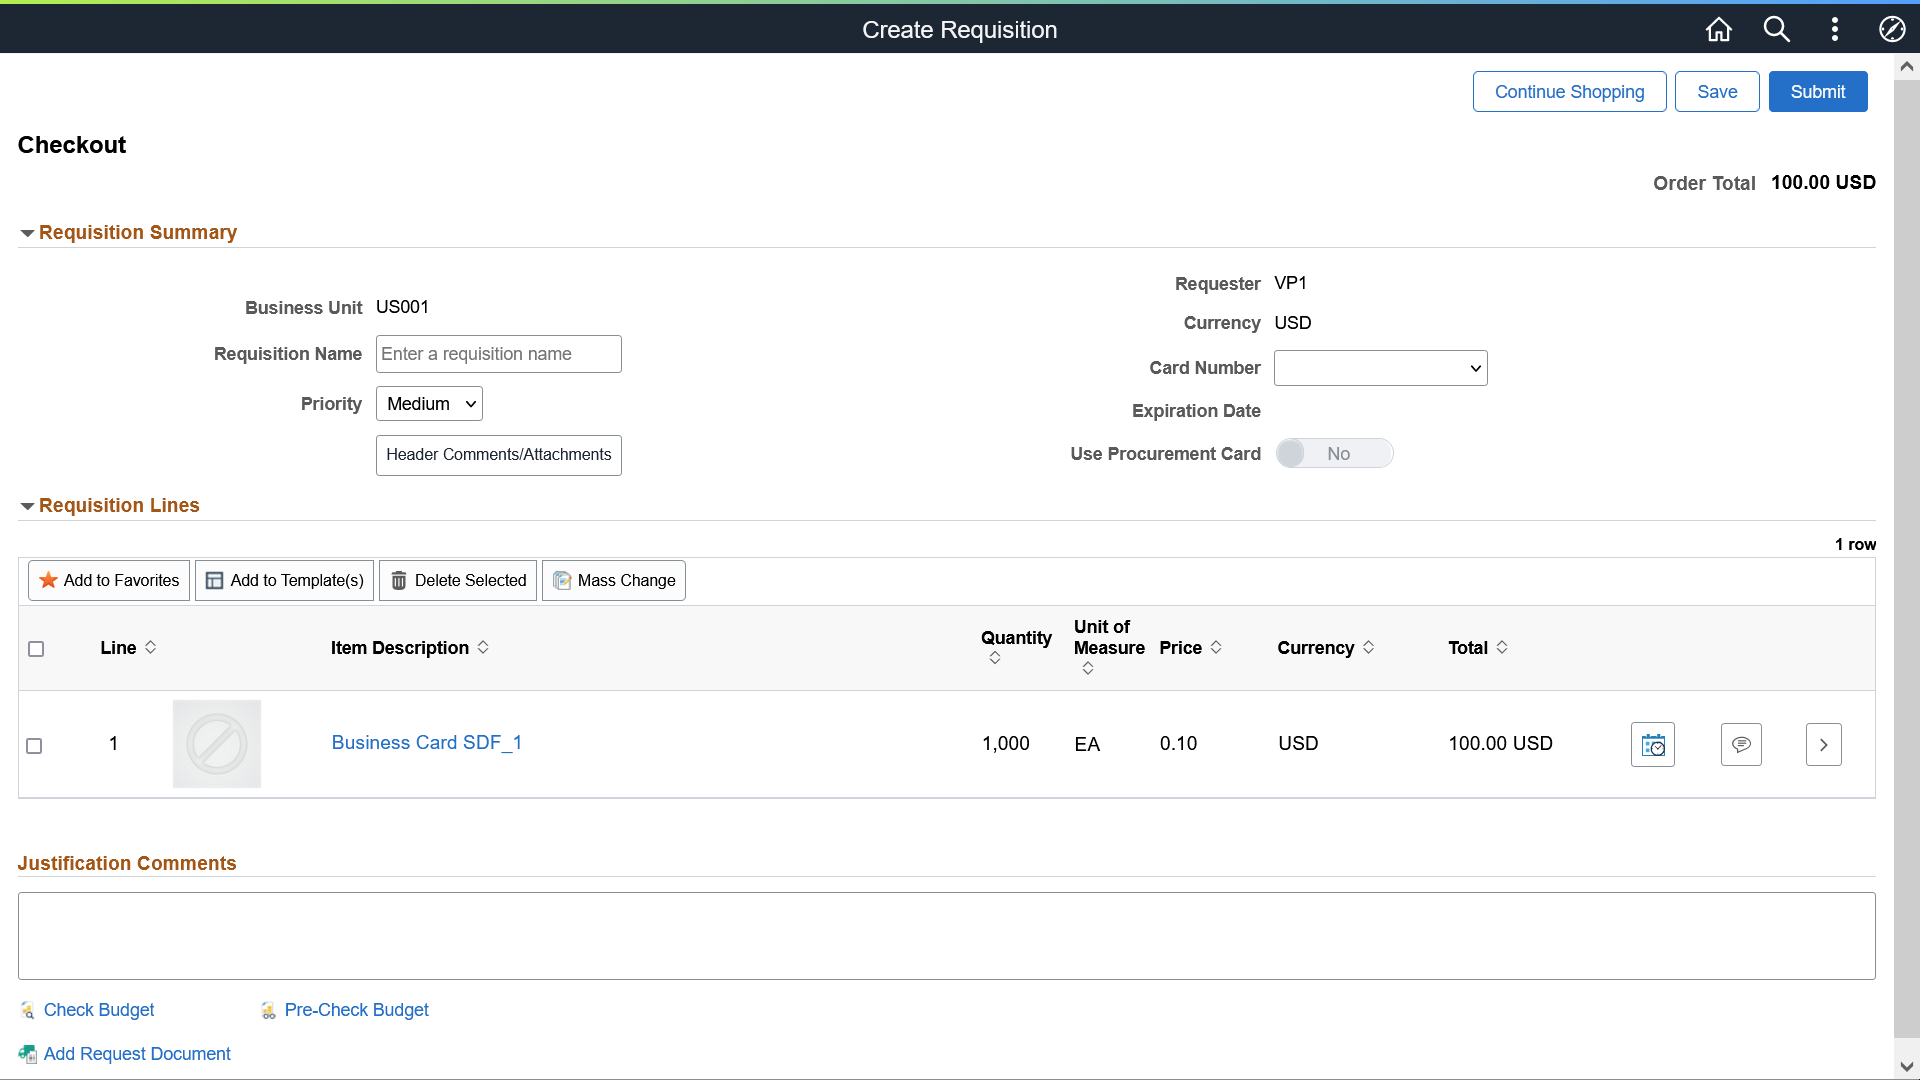
Note: You cannot perform the Add to Favorites and Add to Template(s) actions for an express form item. When you try to perform these actions, the system displays a message indicating that you cannot add the item. Also, for express form items, you cannot use the Item History option.
Click on the item description link to view the express form. While saving the data, it will be copied to the line comments. On the Checkout page, if you click the Edit Comments and Attachments icon, you can see all the data in the Comment Text field. The comments, which contain all the express form information, will be sent to the suppliers by default.
Use the Line Details page (PV_SCH_DIST_SCF) to confirm requisition checkout information and edit additional details for a line, such as the buyer, supplier, and other line-specific information.
Navigation:
Select the View Details icon for a line.
This example illustrates the fields and controls on the Line Details page
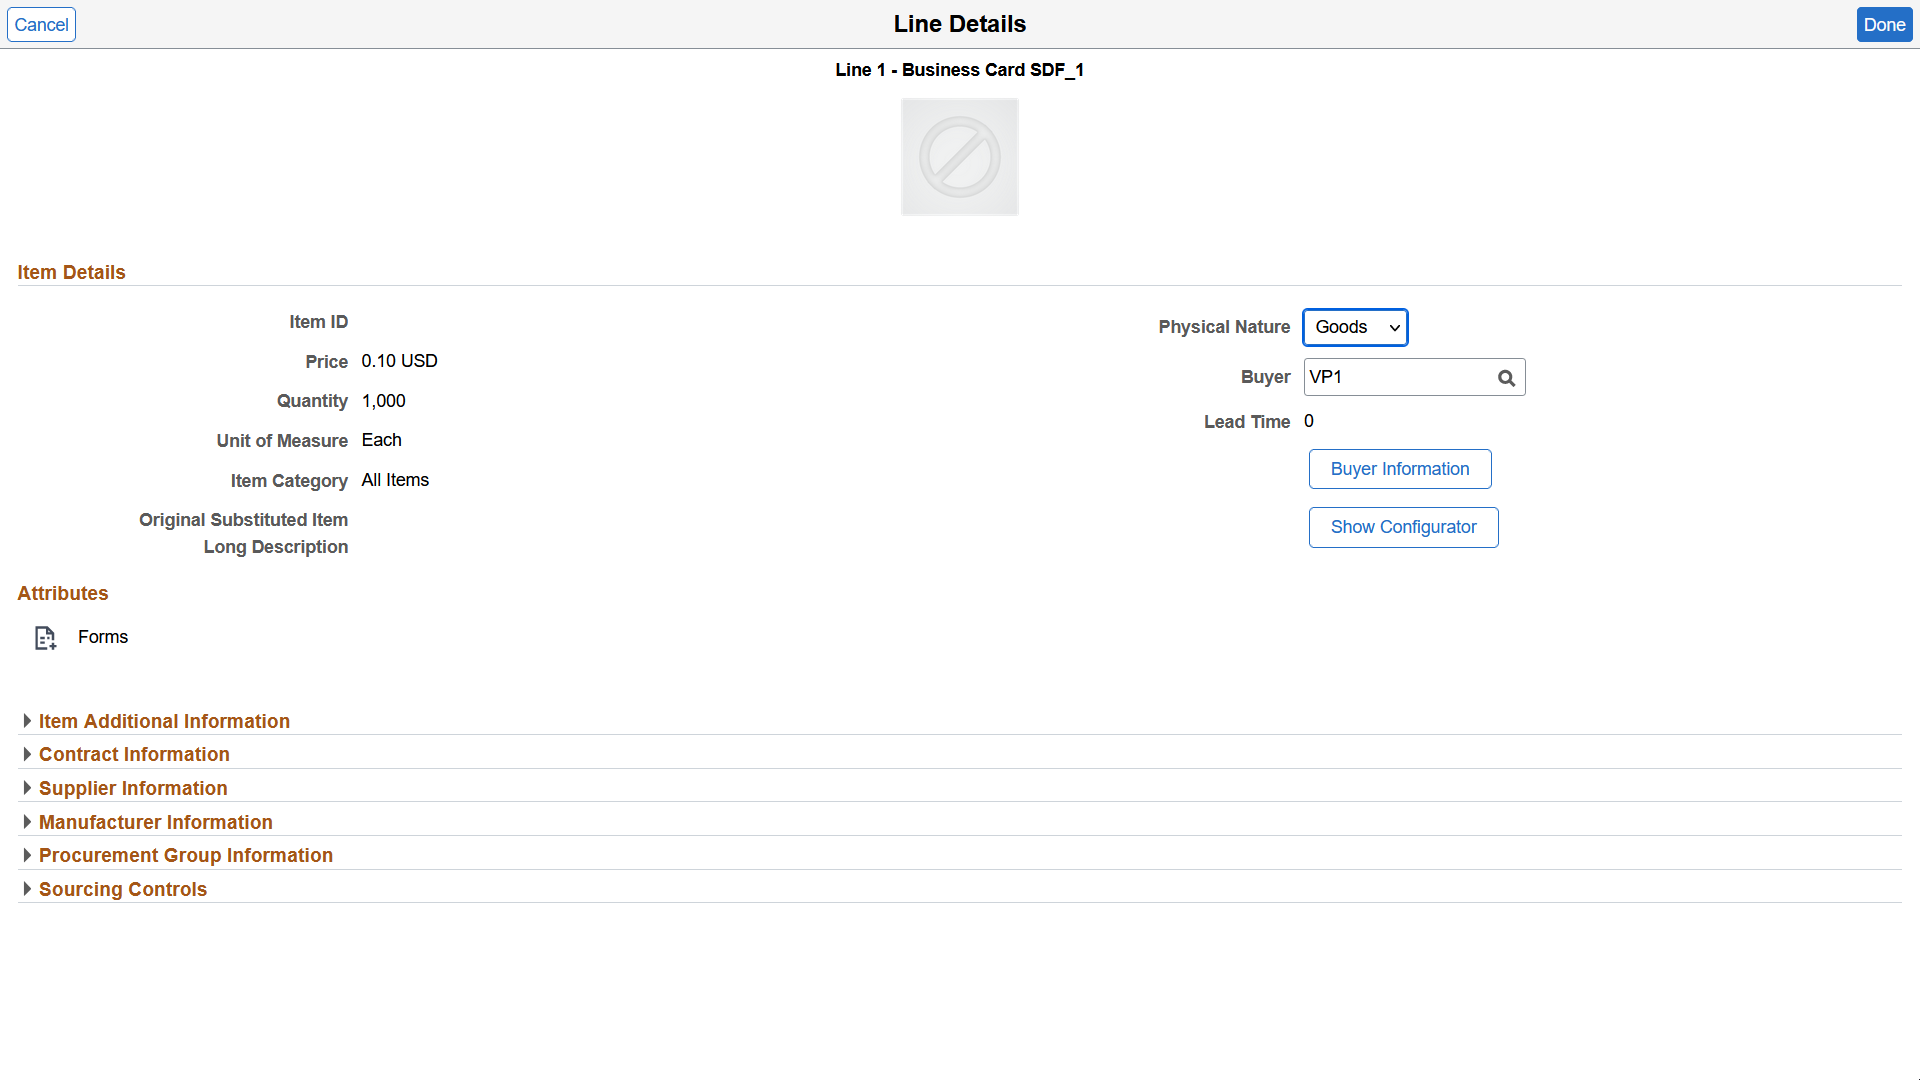
The Attributes section displays Forms to indicate that the requisition item is an express form.
After making the required changes, submit the requisition. On the confirmation page, you can click the Edit Requisition button to make further modification to the order details.