Setting Up User Preferences
This section provides an overview of using user preferences and discusses how to set up user preferences.
|
Page Name |
Definition Name |
Usage |
|---|---|---|
|
TL_TR_EE_PREF |
Enables employees to view and update their time reporting preferences. |
|
|
SCH_EE_PREF |
Enables employees to view and update their schedule related preferences. |
|
|
PT_WF_NOTIFY |
Enables employees to email managers, supervisors, or other employees when they change their user preferences. |
The User Preferences page is used by employees to set up their schedule and time reporting preferences, such as preferred shifts and times, and time related defaults to display on the Timesheet page.
When setting up or changing an employee's schedule, a manager can view an employee's schedule preferences in the Manage Schedules feature, and take that information into account for future schedule creation and changes.
When a manager is viewing or reporting time for an employee using the Timesheet page, certain time reporting preferences that the employee sets up will appear on the Timesheet page, such as Start Day of Week and Task Values.
Employees can also email managers, supervisors, or other employees when they change their user preferences.
Use the Time Reporting Preferences page (TL_TR_EE_PREF) to enable employees to view and update their time reporting preferences.
Navigation:
This example illustrates the fields and controls on the Time Reporting Preferences page. You can find definitions for the fields and controls later on this page.
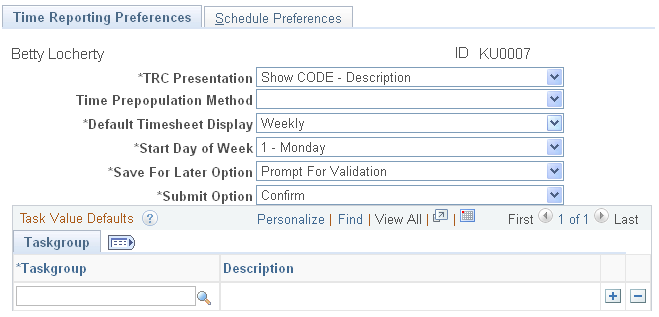
Employees use this page to set up and maintain their specific time reporting preferences and configuration options. The preferences that employees specify on this page will be reflected on various time reporting pages such as the Timesheet, Mass Time, Web Clock, and the Adjust Paid Time pages.
|
Field or Control |
Description |
|---|---|
|
TRC Presentation |
Select Show CODE - Description (the default setting), Show Description - CODE, or Show Description Only .This configuration option determines in what order the Time Reporting Code is displayed and sorted when viewing the Time Reporting Code field on the Timesheet, Mass Time, Web Clock, or Adjust Paid time pages. Note: When you select Show Description Only the system warns you if there is another TRC program with the same description. The system does not prevent you from saving this TRC Presentation option. |
|
Time Pre-population Method |
Select a value to automatically populate the employee Timesheet page with default information to use when reporting time. Valid values are Task Values, Prior period, and Schedule Information. Note: Under task value defaults, select the Taskgroup from which the Task Values can be defaulted on the Timesheet. On the second tab Task reporting elements, enter the task values you want to pre-populate on the timesheet and leave the rest empty save the page to populate the required field in Timesheet. This has no effect if the commitment accounting is used or not. When opening the page, the Timesheet will automatically populate an employee's default Taskgroup that is specified on the Maintain Time Reporter Data page. If an employee is a task template reporter, then when opening the Timesheet the system will look at the Employee User Preferences page to see if any default task values have been specified. If an employee is a task profile reporter, the Timesheet will just use what is defined as the default task profile either from Maintain Time Reporter Data or from the taskgroup displayed on the Timesheet, and not look at the User Preferences. Select Prior Period to provide default values from the prior period. This pre-population method works for employee access, not for manager access of an employee timesheet. Select Schedule Information to provide default values from the employee's current schedule. This pre-population method works for employee access, not for manager access of an employee timesheet. Blank (which is the default) to specify no default value. |
|
Default Timesheet Display |
Choose Daily, Weekly, or Time Reporting Period. Weekly is the default. This option determines if time displays on the Timesheet in a day, week, or time period format. |
|
Start Day of Week |
Select the default day for the week to start when using the Timesheet page. This field is applicable only when you select Weekly in the Default Timesheet Display field. |
|
Save for Later Option |
Specify whether timesheets are validated when a user selects the Save for Later button on a timesheet. Values are: Always Validate, Never Validate, Prompt for Validation. |
|
Submit Option |
This field specifies whether the system always displays a confirmation page when a timesheet is submitted successfully Choose Confirmto display the Timesheet - Submit Confirmation page when a timesheet is successfully submitted. Choose Skip Confirmation to never show the Timesheet - Submit Confirmation page. The Submit Option selection on the Time Reporting Template page overrides any selection made here. |
Note: If Time and Labor is not installed, the Time Reporting Preferences page is hidden.
Use this section with the time pre-population method of task values. You can enter one or more rows for the same taskgroup, or enter a set of default task values for different taskgroups.
When you enter a taskgroup, the display of fields is dependent on the time reporting templates associated with that taskgroup. If the elapsed and punch reporting templates have Task Profile selected, then no task values appear. If one or both of the time reporting templates designate Task Template, then the default task values can be used. If task values can be used, they depend on the task template ID associated with each taskgroup entered. The task template drives the display of the Task Reporting Elements and ChartFields folder tabs in this section. Task values entered on the Time Reporting Preferences page is only be utilized for timesheet display if the Time Prepopulation method is Task Values.
Use the Schedule Preferences page (SCH_EE_PREF) to enables employees to view and update their schedule related preferences.
Navigation:
This example illustrates the fields and controls on the Schedule Preferences page. You can find definitions for the fields and controls later on this page.
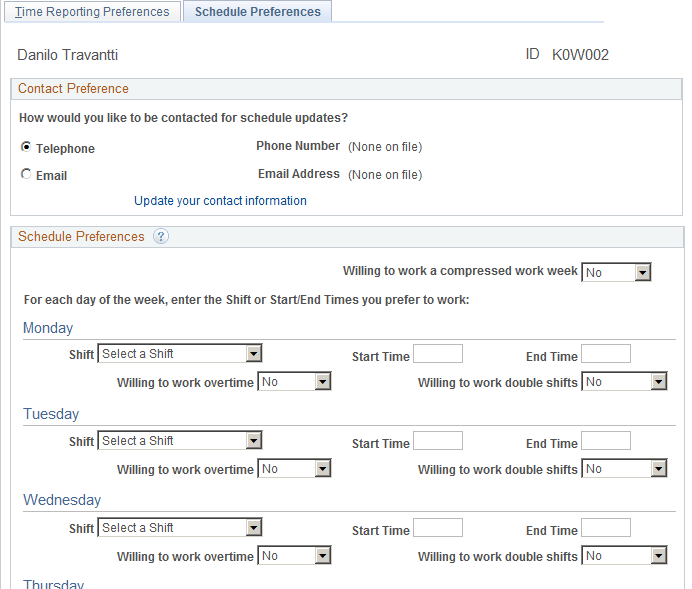
All fields on this page are optional, with the exception of the Telephone/Email option and the Willing to work fields. The Willing to work fields have a default value of No.
Contact Preference
The employee's preferred phone number and email address appear. To change them, access the Update your contact information link, which takes the user to the Personal Information page. Phone, email, and other contact information can be viewed and modified. The link to employee's contact information is only available for editing if eProfile is installed on the General Installation page.
Schedule Preferences
For each day of the week, enter the shift or start and end times you prefer to work.
|
Field or Control |
Description |
|---|---|
|
Willing to work a compressed work week |
Define whether or not you would be willing to work a compressed work week. |
|
Shift |
Enter the shift you prefer to work. This field is populated based on the particular EmplID. If the current user has a schedule assigned, the only shifts available in the drop-down list box are those shifts that correspond to the user's schedule ID and the SetID determined by the user's schedule group. If the user has no schedule assigned, the Shift ID field is hidden. Note: There is no validation between start and end times and shifts. No logic exists to verify that the times entered fall within the shift, if one is entered. |
|
Start Time, End Time |
Enter the start and end times you prefer to work. |
|
Willing to work overtime |
Enter whether you would be willing to work overtime. |
|
Willing to work double shifts |
Enter whether you would be willing to work a double shift. |
Use the Send Notification page (PT_WF_NOTIFY) to enables employees to email managers, supervisors, or other employees when they change their user preferences.
Navigation:
This example illustrates the fields and controls on the Send Notification page. You can find definitions for the fields and controls later on this page.
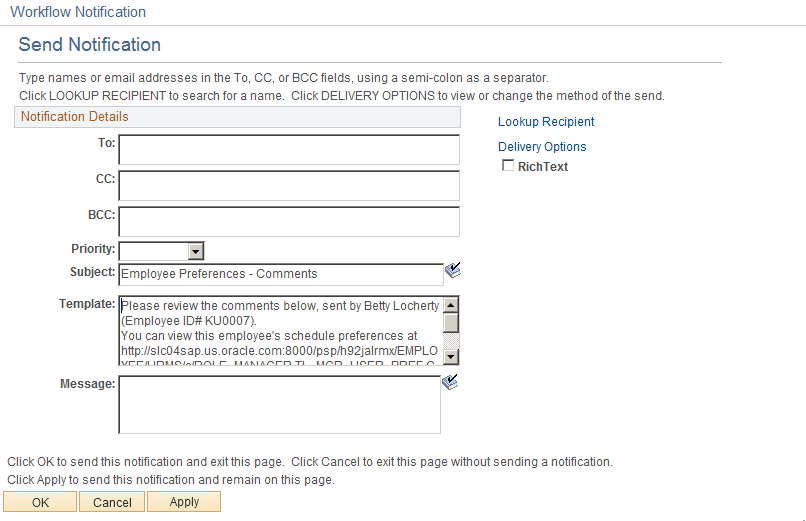
Select the Notify button to access the Send Notification Page. Use this page and the links provided to email managers, supervisors, or other employees when you change your user preferences.