Staging Items Manually for Putaway Processing
Although most putaway items are inserted into the interface staging tables (STAGED_INF_INV and STGCOST_INF_INV) automatically, you can use the Manually Stage Putaway page to insert items manually.
|
Page Name |
Definition Name |
Usage |
|---|---|---|
|
PUTAWAY_STAGE1_INV |
Add items manually to the staging interface table (STAGED_INF_INV). |
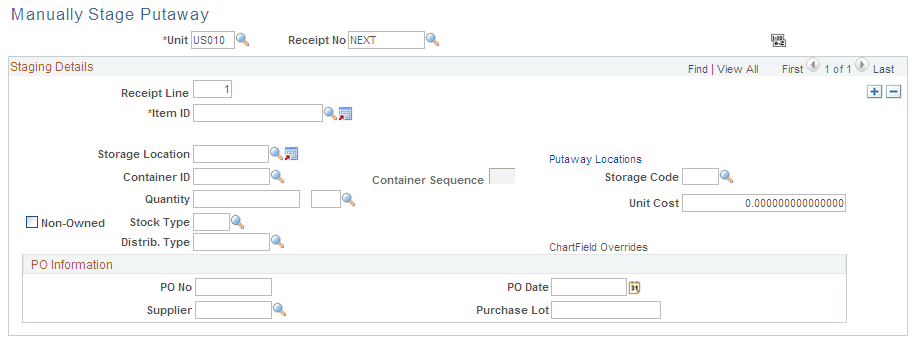
Use the Manually Stage Putaway page (PUTAWAY_STAGE1_INV) to add items manually to the staging interface table (STAGED_INF_INV).
Navigation:
This example illustrates the fields and controls on the Manually Stage Putaway page. You can find definitions for the fields and controls later on this page.
Field or Control |
Description |
|---|---|
Receipt No (receipt number) |
If you do not require receiver information, enter the installation default or leave this field blank. You can also enter NEXT to generate a unique number automatically. |
Sort |
Select to sort the information by receiver line number, or if there is no receipt line information, by item ID. |
Staging Details
Field or Control |
Description |
|---|---|
Receipt Line and Item ID |
Enter the receipt line number (if necessary) and the item ID for each receiver line. If you enter the installation default or leave the Receipt No field blank, you do not need to enter receipt line information. |
Putaway Locations |
Click to access the Directed Putaway Locations page, where you can view and select material storage locations that meet putaway rules that you established for the item or business unit. Enter the item, quantity, and UOM before you call directed putaway. |
Storage Location |
If you do not want the Load Staged Items process to assign a putaway location automatically, select an alternate storage location; otherwise, leave this field blank. |
Container ID and Container Sequence |
To assign multiple items to the same container in a business unit that generates container IDs automatically, enter NEXT as the container ID and enter the container sequence. The system assigns items with the same container sequence to the same container. For example, suppose that you are putting away two items and the business unit permits automatic generation of container IDs, assign these items to the same container by defining NEXT as the container ID and entering the same container sequence for both items. |
Unit Cost |
If the item is using actual or average cost, enter the unit cost. This field only appears if required. |
Non-Owned |
Select to indicate that the business unit does not own the item. If the item is non-owned, the putaway transaction is not costed. If the item uses average cost, the average cost calculations for this item are not affected. |
Stock Type |
Indicates the type of item (standard item or leased material, for example). This field is required for non-owned items. |
ChartField Overrides |
Click to access the ChartField Overrides page, where you can override credit accounting information for the received item. |
PO Information (purchase order information) |
If the item is from a PO, enter the information from the receiving paperwork. |
Note: If the business unit does not allow the automatic addition of new lots, you must create a new lot before using the Lot ID field on this page.