Using the Process Designer
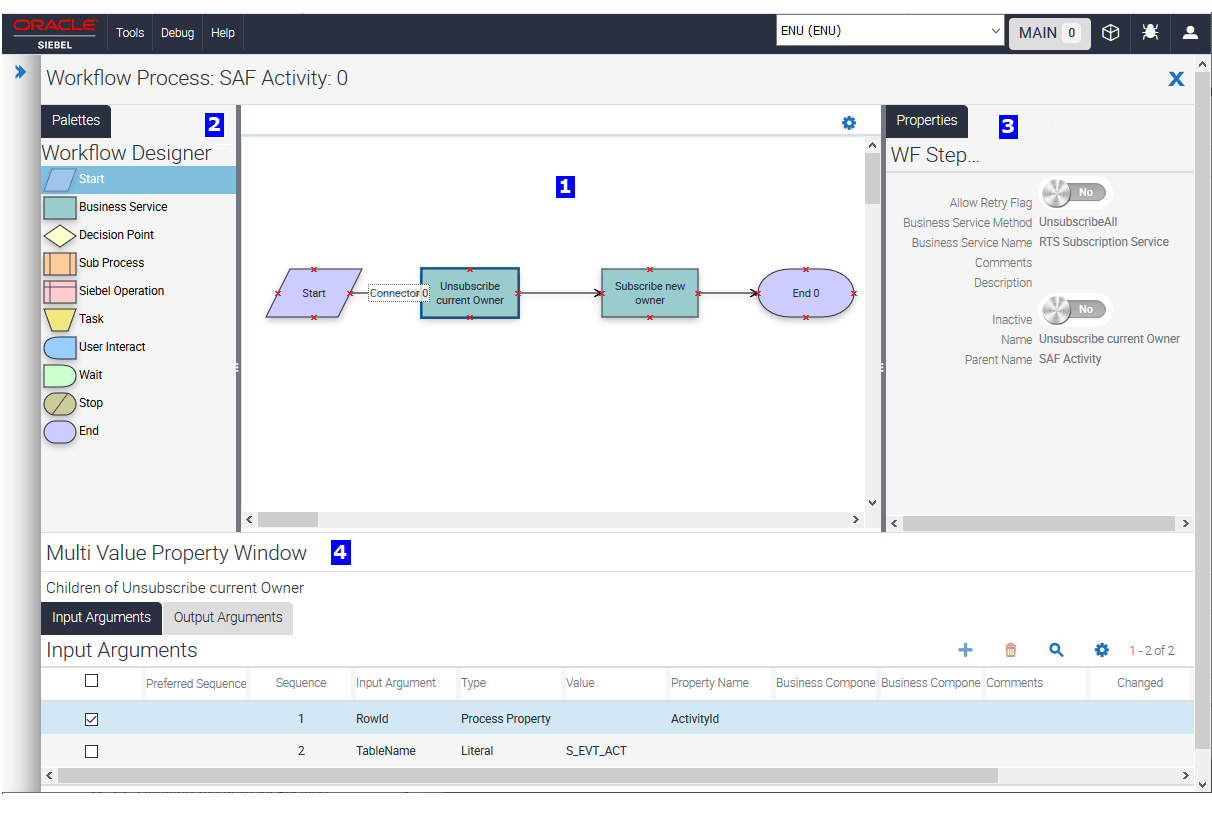
This topic describes the Process Designer and how you use it to define a Workflow Process. As shown in the following figure, the Process Designer contains the following elements:
-
Canvas. A work area where you create and define the Workflow Process. For more information, see Creating a Workflow Process.
Click the Workflow Process Canvas Menu (the cogwheel icon) to configure the following options for the canvas: Enable Dynamic Connectors, Connection Points, Show Grid, Snap to Grid, Zoom (in and out).
-
Palettes pane. A pane that contains icons that represent the various step types you can add to a Workflow Process. The step types are Start, Business Service, Decision, Sub Process, Siebel Operation, Task, User Interact, Wait, Stop, and End step. To add a step to a Workflow Process, select it from the palette, then drag and drop the step on the canvas. For more information, see Adding Workflow Process Steps.
To increase or decrease the size of the Palettes pane, drag the pane border to resize the pane. To hide the Palettes pane, drag the pane border to reduce the size of the pane so that it is essentially hidden.
-
Properties pane. A pane where you to define properties for an individual Workflow Process step or for the overall Workflow Process. For more information, see Defining a Property for a Workflow Process Step. The Properties pane is context-sensitive:
-
If you choose a step or connector, then the properties for the selected step or connector are shown in the Properties pane.
-
If no step or connector is selected, then the properties for the Workflow Process are shown in the Properties pane.
To increase or decrease the size of the Properties pane, drag the pane border to resize the pane. To hide the Properties pane, drag the pane border to reduce the size of the pane so that it is essentially hidden.
-
-
Multi Value Property Window (MVPW) pane. A pane where you to define multiple Process Properties for a Workflow Process and Input and Output Arguments for a Workflow Process step. For more information, see Using the Multi Value Property Window.
