Using Work Management in Global Payroll WorkCenters
Global Payroll WorkCenters can optionally use the Work Management Framework, which is an Enterprise Components feature.
This topic provides an overview of Work Management in Global Payroll WorkCenters, setup information, and an example of managing exceptions using Work Management.
The Work Management Framework provides actions and filters for pages within the My Work group box in WorkCenters, allowing users to organize and manage large volumes of transactions more efficiently.
It is important to understand the Work Management Framework from a high-level perspective before applying it to the Global Payroll WorkCenters. Review Understanding the Work Management Framework prior to reading the following information.
Global Payroll WorkCenter has implemented Work Management in the My Work group box to help administrators manage exceptions.They can assign exceptions to themselves in bulk, set follow-up dates, add comments, or mark invalid issues as inactive and remove them from the list. Filters make it easy to view transactions by status, such as unassigned, assigned to the current user, inactive, or all transactions. The history of actions taken on each exception is also available for review.
My Work Transactions Enabled for Work Management
Global Payroll provides setup for these My Work transactions in Global Payroll WorkCenter to support the Work Management feature.
Global Payroll WorkCenter:
|
Link ID |
Transaction Description |
|---|---|
|
GP_WC_ACTNOPY |
Active Employees without Gross |
|
GP_WC_IACTPY |
Inactive Employees with Gross |
|
GP_WC_NOBANKACCTS |
Missing Bank Accounts |
|
GP_WC_NEWHIRE |
New Hires |
|
GP_WC_TERMINATION |
Terminations |
|
GP_WC_PAYEE_ERROR |
Payee Messages |
For more information on enabling Work Management in additional My Work transactions, see Setting Up the Work Management to HCM WorkCenter Integration Process.
|
Page Name |
Definition Name |
Usage |
|---|---|---|
|
N/A |
Access and manage outstanding transactions in various views. |
Use the Global Payroll WorkCenter page when Work Management is enabled to access and manage outstanding transactions in various views.
Navigation:
Access the Global Payroll WorkCenter, select a transaction, such as Missing Bank Accounts from the My Work section.
This example illustrates the Global Payroll WorkCenter - Missing Bank Accounts page when Work Management is enabled.
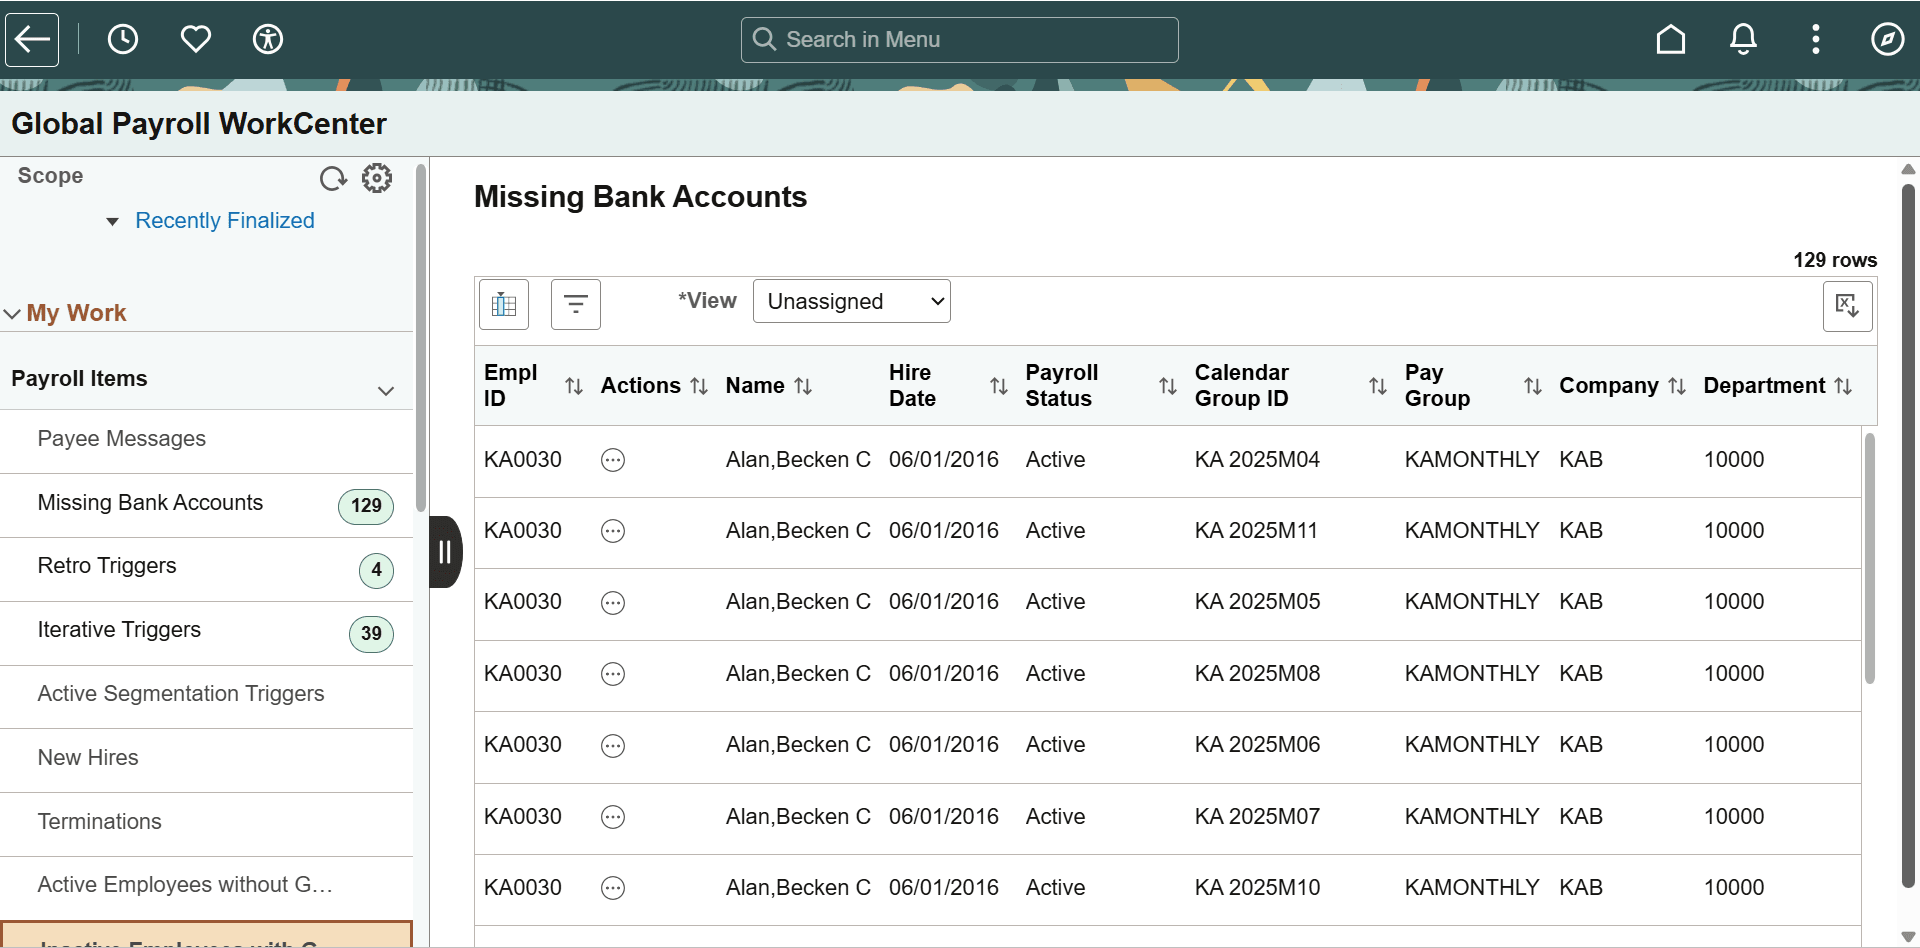
When Work Management is enabled for a My Work transaction, several changes appear on the corresponding page:
The Toggle button appears above the grid. Select the button to enable multi-row selection in the grid for performing bulk actions.
When selected, the Actions button is displayed above the grid, rather than alongside each row within the grid. Work Management actions are available for selection.
The View drop-down box appears above the grid.
One or more people can work on Work Management transactions. If another user acts on a transaction, you can view the transactions assigned to that person by changing your view to All Assigned. This view displays all transactions regardless of who it is assigned to. Select the Exception History action and view the name in the User Name column to discover who is working on a transaction.
Additional action options are added to the Actions button.
The existing Global Payroll related actions remain available. When Work Management is enabled, additional actions become available, depending on the option selected in the View field. For more information, see Understanding the Work Management Framework, Actions by View section.
The following example demonstrates how you may use the Work Management functionality to help manage the list that appears when you select a My Work page, such as Missing Bank Accounts.
Your first step might be to inactivate rows that are no longer valid, for example, the employee involved has left the company. To do this:
Select the rows in the Unassigned view. Select the Actions button and choose Mark as Inactive.
In the Exception Comments window, enter text to indicate why you are inactivating the selected rows.
Select Done.
When you switch to the Inactive view, the inactivated rows are displayed.
Next, you want to assign yourself some transactions to process. To do this:
Select the rows in the Unassigned view. Select the Actions button and choose Assign to Me.
In the Exception Comments window, verify the follow up date, which defaults from the Work Management page.
Enter a comment that describes your action.
Select Done.
When you switch to the Assign to Me view, the rows that you assigned to yourself are displayed, until the follow up date is reached. When the follow up date is reached, the system moves the transaction into the Unassigned view.