Setting Up Additional Name Information
Note: If you implement Campus Solutions and a separate instance of PeopleSoft Human Capital Management, read the relevant documentation about CS-HCM integration to understand the setup, functional, and technical implementation considerations. See:
Monitoring Integrations Using the Integrity Utility
Information Center: CS-HCM Integration for PeopleSoft Enterprise Campus Solutions in My Oracle Support (ID 2091799.2)
These topics discuss how to set up additional name information.
|
Page Name |
Definition Name |
Navigation |
Usage |
|---|---|---|---|
|
Name Format Tbl |
NAME_FORMAT_TBL |
|
Define name format types to use on name pages throughout Campus Solutions. |
|
Name Type Table |
NAME_TYPE_TBL |
|
Define name types and the order in which to use them. |
|
Name Prefix Table |
NAME_PREFIX_TABLE |
|
Set up or review name prefixes. |
|
Name Suffix Table |
NAME_SUFFIX_TABLE |
|
Set up or review name suffixes for prompting pages with names data. Alternatively, you can manually include the suffix after the individual's last name on those pages. |
|
Royal Name Prefix |
NM_ROYAL_PREFIX |
|
Set up royal designations to precede a name. |
|
Royal Name Suffix |
NM_ROYAL_SUFFIX |
|
Set up royal designations to follow a name. |
|
Name Title |
TITLE_TBL |
|
Set up titles to be included with names. Titles can be royal, political, religious, and so on. |
Access the Name Type Table page ( ).
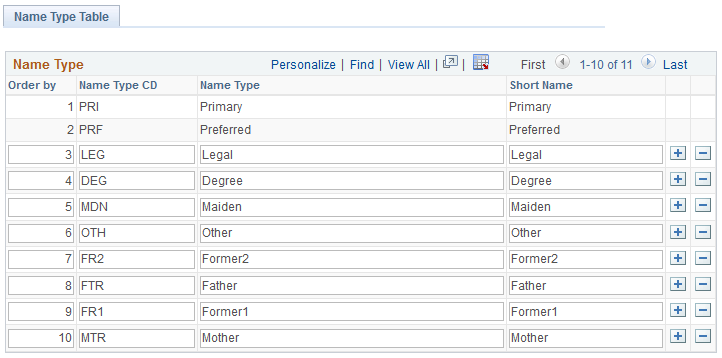
Image: Name Type Table page
This example illustrates the fields and controls on the Name Type Table page. You can find definitions for the fields and controls later on this page.
|
Field or Control |
Definition |
|---|---|
| Order By |
Enter the order in which the system should make this name type available. |
Note: You cannot edit the Primary and Preferred name types because they are system data.
Access the Name Prefix Table page ().
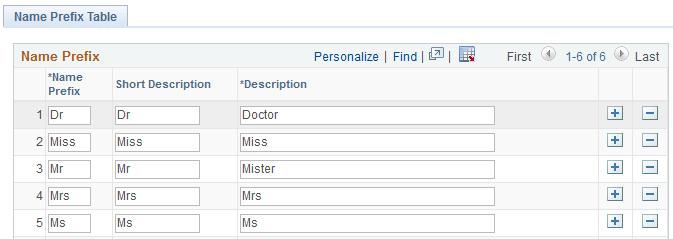
Image: Name Prefix Table page
This example illustrates the fields and controls on the Name Prefix Table page. You can find definitions for the fields and controls later on this page.
|
Field or Control |
Definition |
|---|---|
| Name Prefix |
Enter a name prefix. When you enter names for people in the Campus Solutions Personal Information pages, you can reference these standard name prefixes. The system displays the prefixes you enter here as part of the person's name. |
Note: Name prefixes are not effective-dated, nor do they have a status associated with them.
Access the Name Suffix Table page ().
The fields on this page are similar to the fields on the Name Prefix page. Refer to the Defining Name Prefixes topic.
Access the Royal Name Prefix page ().
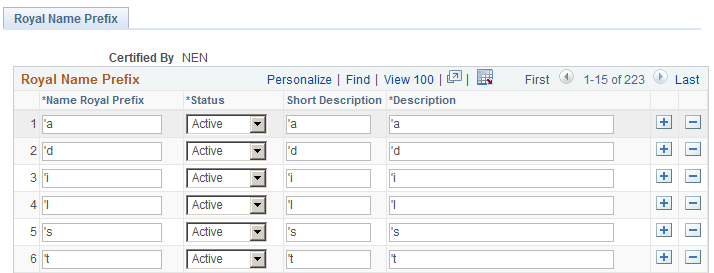
Image: Royal Name Prefix page
This example illustrates the fields and controls on the Royal Name Prefix Table page. You can find definitions for the fields and controls later on this page.
|
Field or Control |
Definition |
|---|---|
| Certified By |
The system displays the value you selected to access the page, such as NEN for Dutch prefixes. |
| Royal Name Prefix |
Enter a Royal Name Prefix, using up to 15 characters. |
| Status as of Effective Date |
Royal name prefixes are not effective-dated, so to retire a prefix code, change the status to Inactive. |
Access the Royal Name Suffix page ().
The fields on this page are similar to the fields on the Royal Name Prefix page.