- On the error page, click the certificate error icon (a red-colored shield with a cross mark on it) that appears in the address bar.
-
In the pop-up, click View certificates.
-
In the Certificate dialog, click the Certification Path tab.
-
Select the first entry in the list of certification paths.
-
Click View Certificate.
-
In the second Certificate dialog, click the Details tab.
-
Click Copy to File.
-
In the Certificate Export Wizard, accept the default settings, enter a meaning certificate name to export it to your local system, and click Finish. Now the certificate is exported successfully.
-
In the Certificate Export Wizard success message, click OK.
-
In the second Certificate dialog, click OK.
-
In the first Certificate dialog, click OK.
-
From the browser's menu, select Settings, then select Internet Options.
-
In the Internet Options dialog, click the Content tab.
-
In the Certificates section, click Certificates.
-
In the Certificates dialog, click the Trusted Root Certification Authorities tab.
-
Click Import.
-
In the Certificate Import Wizard, accept the default settings, select the certificate you exported in Step (8), and click Finish.
-
In the Security Warning message, click Yes.
-
In the Certificate Import Wizard success message, click OK.
-
In the Certificates dialog, click Close.
-
In the Internet Options dialog, click OK.
-
Restart the browser.
|
- On the Untrusted Connection page, click I Understand the Risks.
-
Click Add Exception.
-
In the Add Security Exception dialog, ensure that Permanently store this exception option is selected.
-
Click Confirm Security Exception.
|
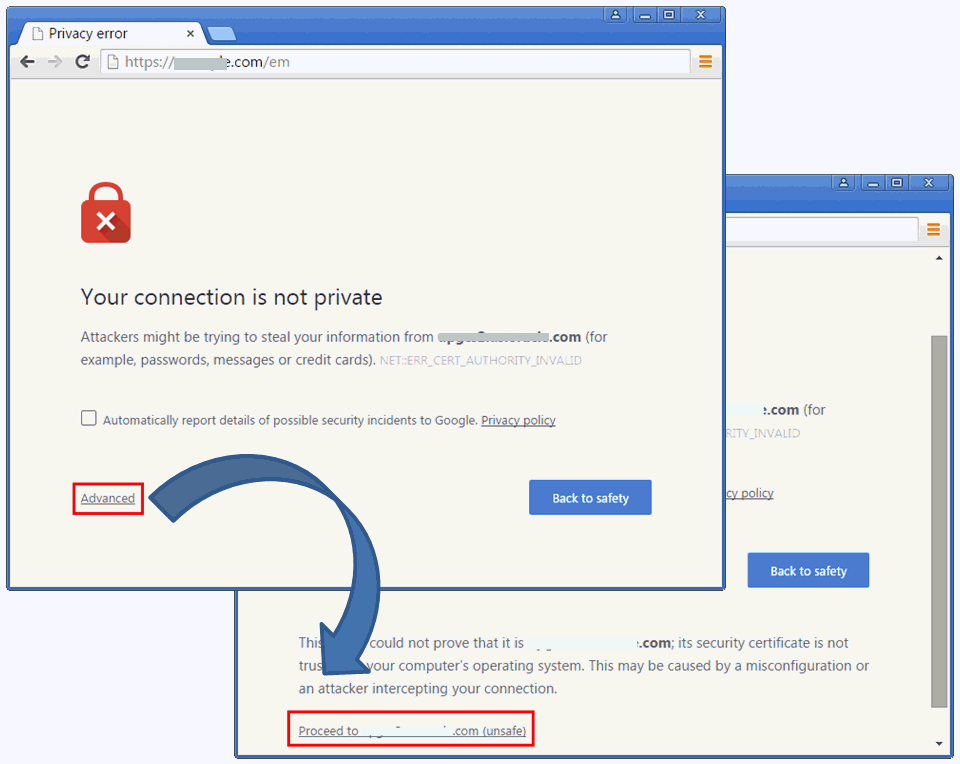
- On the Privacy error page, click Advanced. Then click Proceed to <host_name> (unsafe).
Screenshot?
-
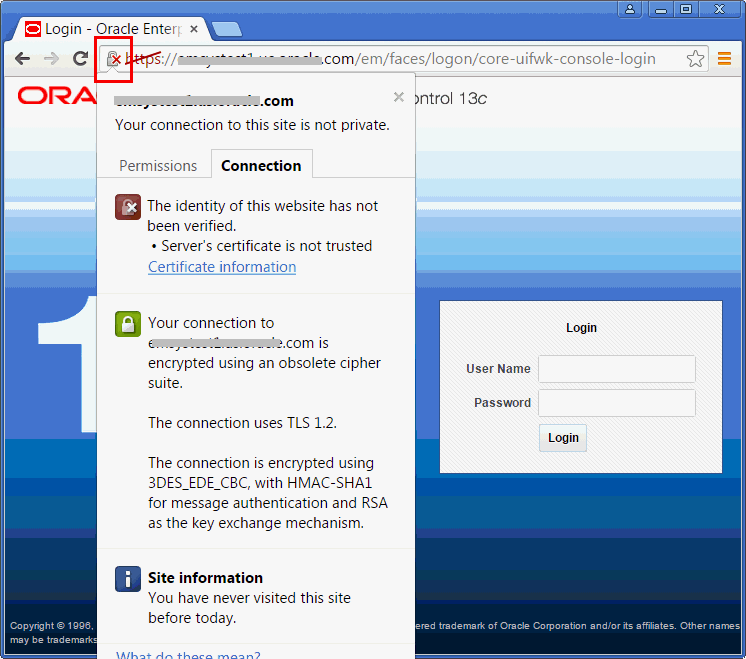
In the address bar of the Enterprise Manager Cloud Control Login page, click the red cross mark on the lock icon next to https.
Screenshot?
-
In the pop-up, in the Connection tab, click Certificate Information.
-
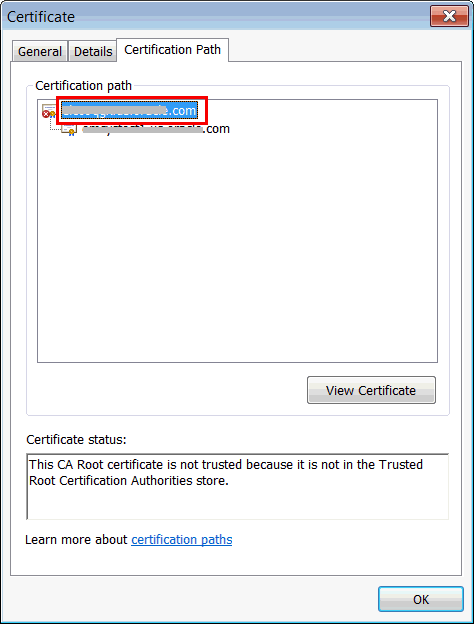
In the Certificate dialog, click the Certification Path tab.
-
Select the root node in the list of certificate paths.
Screenshot?
-
Click View Certificate.
-
In the second Certificate dialog, click the Details tab.
-
Click Copy to File.
-
In the Certificate Export Wizard, accept the default settings, enter a meaningful certificate name to export it to your local system, and click Finish. Now the certificate is exported successfully.
-
In the Certificate Export Wizard success message, click OK.
-
In the second Certificate dialog, click OK.
-
In the first Certificate dialog, click OK.
-
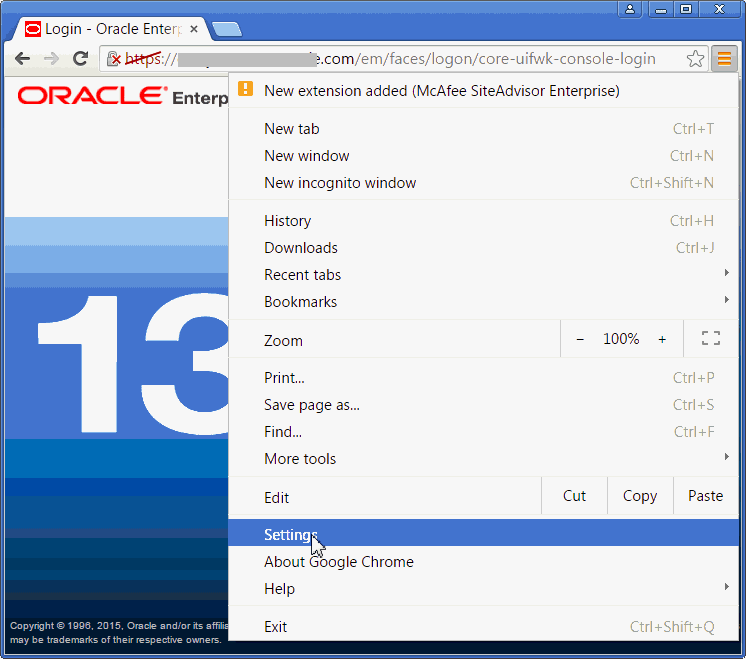
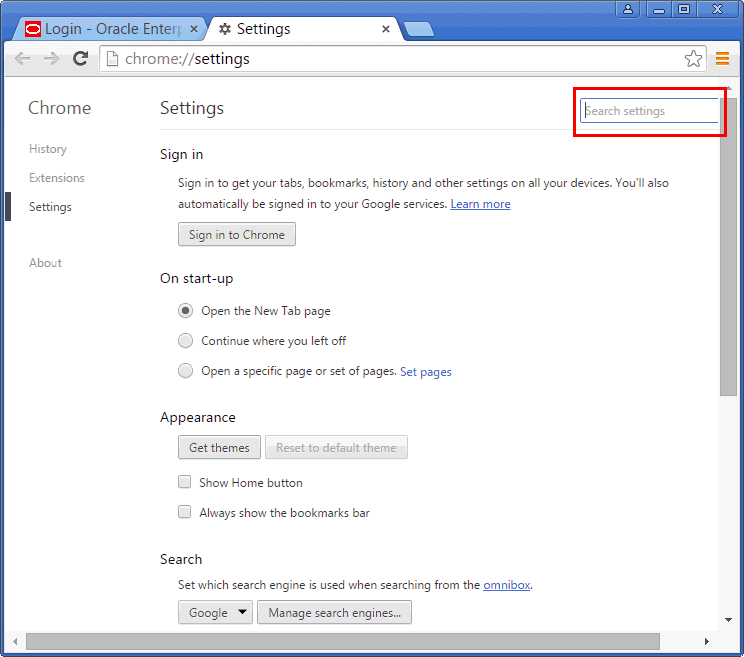
From the browser's menu, select Settings.
Screenshot?
-
On the Settings page, in the top-right Search settings field, enter Certificates.
Screenshot?
-
In the HTTPS/SSL section, click Manage certificates.
-
In the Certificate dialog, click the Trusted Root Certification Authorities tab.
-
Click Import...
-
In the Certificate Import Wizard, click Next, then select the certificate you exported in Step (9), accept the default settings, and then click Finish.
-
In the Security Warning dialog, click Yes.
-
In the Certificate Import Wizard success message, click OK.
-
In the Certificates dialog, click Close.
-
Restart the browser.
-
Now when you navigate to the Enterprise Manager Cloud Control Login page, you should see a green lock icon next to https in the address bar.
|