Provisioning Oracle Solaris 11
Lists the provisioning tasks.
The following information is in this section:
-
About Oracle Solaris 11 and Provisioning
-
Steps for Oracle Solaris 11 Provisioning Plan
-
Specifying Common Oracle Solaris 11 Parameters
-
Creating an Oracle Solaris 11 OS Provisioning Profile
-
Creating an Oracle Solaris 11 OS Configuration Profile
-
Provisioning an OS Using a User-Defined MAC Address
About Oracle Solaris 11 and Provisioning
Oracle Solaris 11 uses a new OS provisioning technology, called the Automated Installer. This feature replaces the older JumpStart Enterprise Toolkit (JET) technology that Oracle Enterprise Manager Ops Center uses to provision earlier versions of Oracle Solaris.
Oracle Enterprise Manager Ops Center reduces the complexity by using a local copy of the Oracle Solaris 11 Software Library on the Enterprise Controller and creating an Automated Installer server on the Proxy Controller for your use.
Note:
To provision an Oracle Solaris 11 operating system, the Enterprise Controller and Proxy Controller must both be running on an Oracle Solaris 11 operating system. The repository resides on the Enterprise Controller and the Automated Installer server resides on the Proxy Controller. When the Enterprise Controller and Proxy Controller are not running on Oracle Solaris 11, the Oracle Solaris 11 library and OS provisioning actions are not available.
Oracle Enterprise Manager Ops Center can create and run multiple installadm services on the same Proxy Controller, one for each solaris-auto-install mini root. For example, Oracle Solaris 11, 11.1, 11.1.6.4.0, or whenever the solaris-auto-install version increases in an SRU (Support Repository Update). An SRU is a package of bug fixes and updates that releases on a regular basis. SRUs eliminate the ad hoc patching from Oracle Solaris 10 and earlier versions of the operating system. Each Oracle Solaris SRU builds upon, and only contains the changes from, the preceding Oracle Solaris 11 update. Oracle Solaris 11 uses a 5-digit taxonomy to define the SRU. The digits represent Release.Update.SRU.Build.Respin. For example, Oracle Solaris 11.1.6.4.0.
The Oracle Solaris 11 network architecture is significantly different from previous releases of Oracle Solaris. The implementation, the names of the network interfaces, the commands, and the methods for administering and configuring them is different from previous versions of Oracle Solaris. These changes were introduced to bring a more consistent and integrated experience to network administration, particularly as administrators add more-complex configurations including link aggregation, bridging, load balancing, or virtual networks. In addition to the traditional fixed networking configuration, Oracle Solaris 11 introduced automatic network configuration through network profiles.
The OS Provisioning and OS Configuration profiles that you use for provisioning Oracle Solaris 11 contain all of the information needed, such as type of target, OS image, time zone and language setup disk partitions, naming services and network details. With Oracle Solaris 11, you can define link aggregations or IPMP groups for advanced networking.
You can provision Oracle Solaris 11 zones as part of the OS installation. After a system is bootstrapped with a minimized operating system, the operating system is installed from the Oracle Solaris 11 Software Update Library in Oracle Enterprise Manager Ops Center. The zones are provisioned during the initial system reboot after the base operating system is installed.
Steps for Oracle Solaris 11 Provisioning Plan
Steps to provision Oracle Solaris 11.
Note:
When you create the plan, both the OS Provisioning profile and the OS Configuration profile must have the same platform subtype, either Solaris SPARC or Solaris x86.
Prerequisites
Lists the prerequisites to follow before you provision the operating system.
Perform the following before you provision the operating system:
-
Verify that the Oracle Solaris 11 Software Library is configured on the Enterprise Controller and the package you want is available in the library.
If the image is not in the Oracle Solaris 11 Software Library, import the OS image.
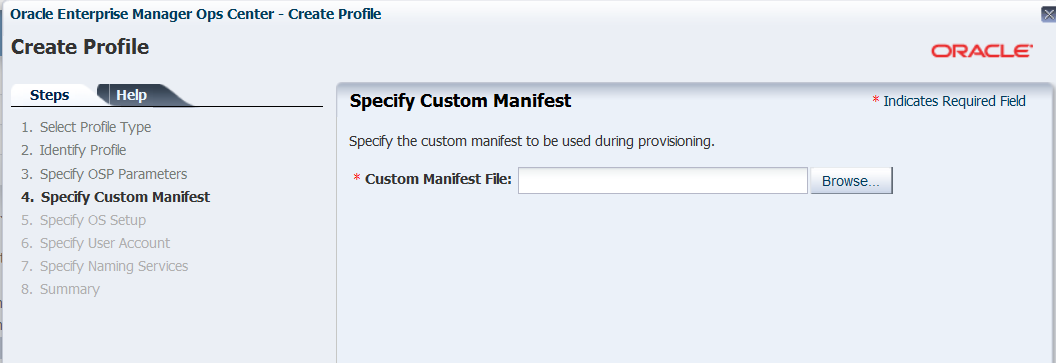
As an alternative, you can use a custom manifest. You do this when you want to install a site-specific file system or OS version.
Note:
Uploading the packages from Oracle to the library can take several hours.
-
(Optional) Edit an existing OS Provisioning profile or create a new profile.
-
Discover the service processors of the target systems.
-
Verify that any scripts the profile uses are in a directory that the Enterprise Controller can access. You can save scripts in a local directory of the Enterprise Controller, or in a directory that the Enterprise Controller mounts using NFS.
-
When you are provisioning a dynamic system domain of an M-Series server, the domain must have an IP address.
Note:
It is a good practice to place the systems that you are going to provision in Maintenance Mode so that you can take the system offline without generating alerts and incidents.
Steps to Provision Oracle Solaris 11
Procedure to provision Oracle Solaris 11 operating system.
- Create an Oracle Solaris 11 Provisioning profile.
- Create an Oracle Solaris Configuration profile.
- Create a deployment plan that uses Oracle Solaris 11 OS Provisioning and OS Configuration profiles, or verify that a plan and profiles are available and configured with the parameters you want to use.
- Discover the service processor of the target system.
- Place the asset in Maintenance Mode to prevent events related to a system going offline.
- Select the deployment plan and define the targets for the plan. The target must be an x86 server or WAN boot-capable SPARC server. Review the configuration parameters and make any last minute changes in the plan before applying the plan to the target system.
Set SRU Version
When you provision the operating system, you can use the same SRU version that you selected when creating a profile to be used for provisioning.
-
In the Navigation pane, click Administration, then click Enterprise Controller.
-
In the center pane, click the Configuration tab.
-
In the Configuration Management section, select OS Provisioning from the Subsystem drop-down list.
-
Scroll down to useSRUVersion. The value is set to false by default.
-
To set the same SRU version that you selected in the profile to be used for provisioning your operating system, set the value to true.
-
Specifying Common Oracle Solaris 11 Parameters
Oracle Solaris 11 uses some components for OS provisioning.
The following components are used for provisioning an operating system:
-
Oracle Solaris 11 Software Library: A local version of the software package repository. You can update the Oracle Solaris 11 Software Library, as needed, and then provision multiple systems without using a network connection to Oracle for each provisioning job.
-
Installation manifest: Defines the system configuration, including what software to install and details on the virtualized environments to provision. A default manifest is included with each Image Packaging System (IPS) software repository.
As an alternative, you can prepare a custom manifest, as described in
About Using a Custom Manifest to Provision an OSin Oracle Enterprise Manager Ops Center Configure Reference. -
DCHP or WAN boot connection
-
x86 client: Requires a DHCP connection.
-
SPARC client: Requires a DHCP or WAN boot connection. Oracle Enterprise Manager Ops Center automatically sets up WAN boot connection.
-
Note:
Oracle Solaris 11 only supports a ISC DHCP Server. Oracle Solaris DHCP Server is not supported.
Creating an Oracle Solaris 11 OS Provisioning Profile
You can create multiple profiles to respond to subtle variations in hardware attributes, software profiles, or your organization's requirements.
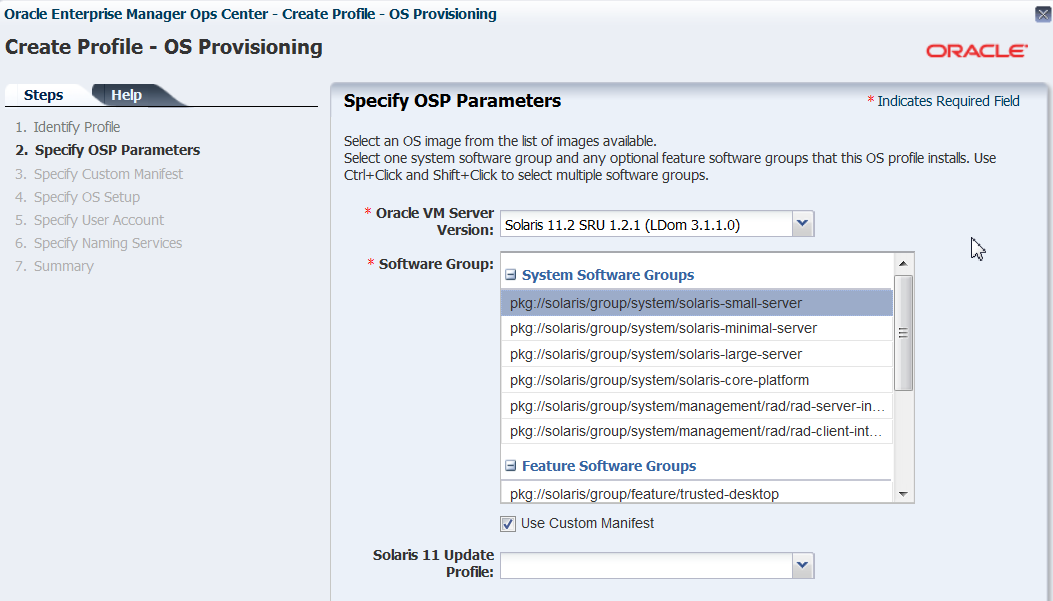
When you create an Oracle Solaris 11 OS Provisioning profile, you select the architecture, either SPARC or x86, to display the boot image and distribution for your architecture. You must provide non-root user credentials and root user credentials. You can only use non-root user credentials to login or SSH to the client after install.
Oracle Solaris 11 System Software Groups
Oracle Solaris 11 provides three system software group packages that install different sets of packages appropriate for a larger server, a smaller server or non-global zone, or a graphical desktop environment.
The boot image is associated with the software group.
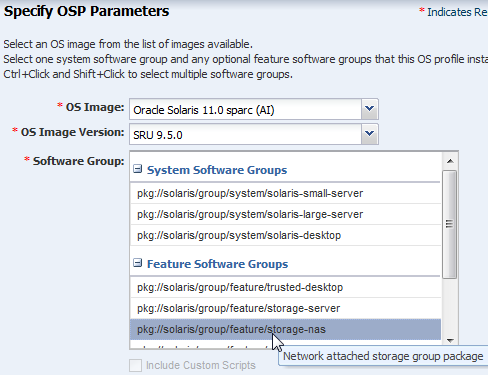
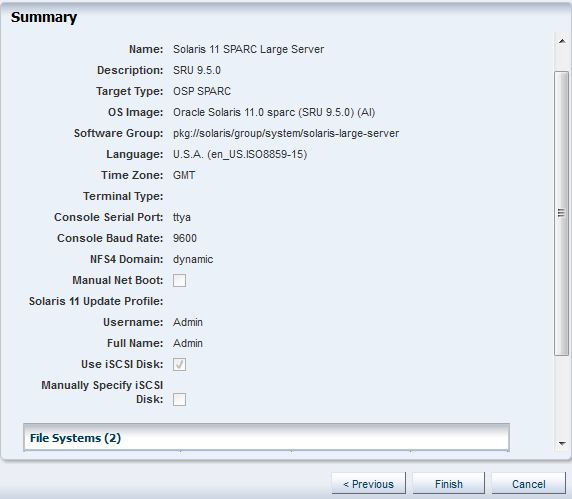
As shown in Figure 7-16, you must select one of the following software groups:
-
large-server: Provides common network services for an enterprise server. This group package also contains hardware drivers that are required for servers, such as InfiniBand drivers.
-
small-server: Provides a smaller set of packages to be installed on a small server or non-global zone.
-
desktop: Provides the GNOME desktop environment and other GUI tools such as web browsers and mail. It also includes drivers for graphics and audio devices.
See the Oracle Solaris 11 Package Lists documentation for a detailed comparison of the three packages and list of contents.
Oracle Solaris 11 Feature Software Groups
The boot image might have additional software groups that you can select, such as trusted-desktop, storage-server and storage-nas.
Each group has a tool tip that describes the group, as shown in Figure 7-17. You can select one or more of these groups.
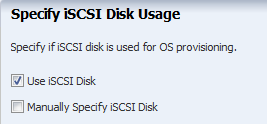
To install the operating system on an iSCSI disk, select the Use iSCSI Disk option when you create the profile, then specify the iSCSI disk settings. When you use this option, you must provide the following parameters when you deploy the OS Provisioning plan:
-
Storage server IP
-
SCSI disk LUN
Note:
When you specify the naming service in the OS Provisioning profile, each IP address in the Name Server field must be entered in a new row. IP addresses 0.0.0.0 or 255.255.255.255 are allowed. In the Domain Name Search List field, enter each domain name, such as 1domain.com and 2domain. com, on a new line.
Creating an Oracle Solaris 11 OS Update Profile for Provisioning
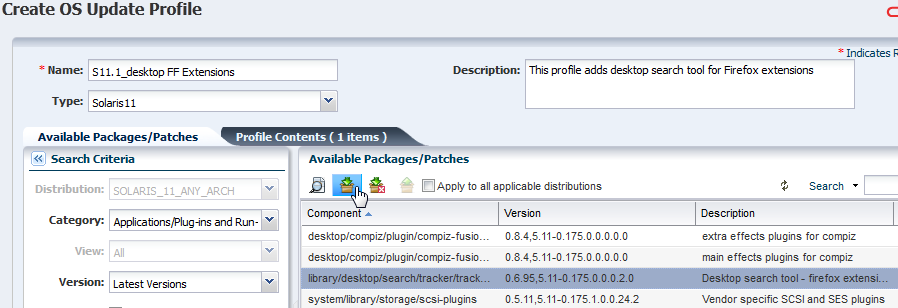
You can create an update profile to install a specific Oracle Solaris 11 version or package, uninstall a package, or install a script. First, create a user-defined Oracle Solaris 11 Update Profile to define the action. When you create or edit an OS Provisioning profile, you can add your OS Update profile.
This example shows how to create an OS Update profile that installs the Firefox Extensions package.
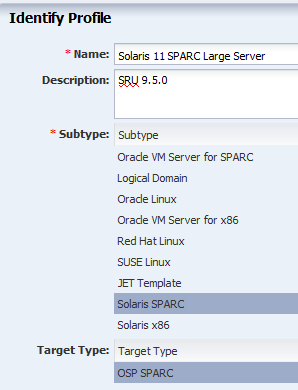
Creating an Oracle Solaris 11 Provisioning Profile
You can use the default profiles, copy a default profile to create a new profile, or create a new profile.
See the Oracle Enterprise Manager Ops Center Provisioning Oracle Solaris 11 Operating System document for how to create an OS provisioning profile, an OS Configuration profile, and a Provision OS deployment plan to complete a provisioning job.
This example shows how to create a new profile to provision a system with Oracle Solaris SPARC.
The profile appears in the center pane and in the Profiles and Policies section of Plan Management.
Creating an Oracle Solaris 11 OS Configuration Profile
The OS Configuration profile defines the networking configuration. You can use advanced networking configurations for Oracle Solaris.
When you create a configuration profile for Oracle Solaris, you can configure the following advanced networking options:
-
Link aggregation: Provides high availability and higher throughput by aggregating multiple interfaces at the MAC layer. Link aggregation enables you to combine the capacity of multiple full-duplex Ethernet links into a single logical link.
-
IP Multipathing (IPMP): Provides features such as higher availability at the IP layer. IPMP enables you to configure multiple IP interfaces into a single IPMP group.
You can implement both Link Aggregation and IPMP methods on the same network because they work at different layers of the network stack.
After you create the profiles, you create a deployment plan to apply the profiles. As part of applying the plan, you can change the options that you defined earlier in the profiles.
Note:
When you specify the network interfaces, select an interface for the controller from a list of 32 interfaces. The 32 interfaces that appear in the wizard are all possible network interfaces, not available interfaces. Your network administrator can give you the list of available networks. By default, the first interface listed is the boot interface.
Creating an OS Configuration Profile
Procedure to create an OS Configuration Profile.
-
Expand Plan Management in the Navigation pane, then select OS Configuration in the Profiles and Policies tree.
-
Click Create Profile in the Actions pane.
-
Name the profile and complete the profile description. A detailed description will help when determining which profile to use when several are available. Select Solaris x86 or Solaris SPARC from the Subtype and Target Type options, then click Next.
Figure 7-26 Identify Oracle Solaris 11 OS Configuration Profile
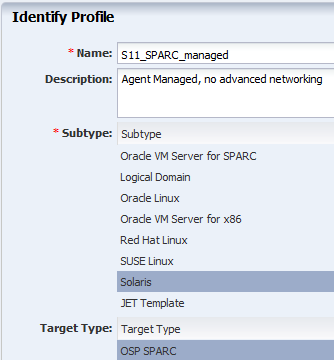
Description of "Figure 7-26 Identify Oracle Solaris 11 OS Configuration Profile" -
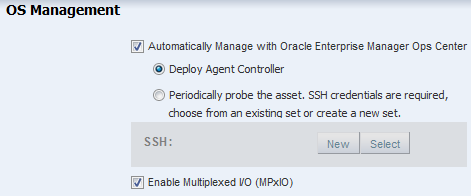
Click Next to accept the default selection to Automatically manage with Oracle Enterprise Manager Ops Center and Deploy the Agent Controller. This option provides the most robust management capabilities.
-
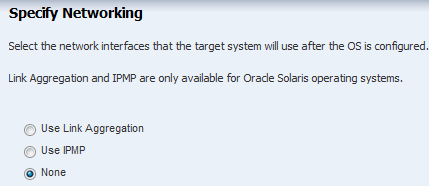
Specify the networking you want to establish for the target system.
-
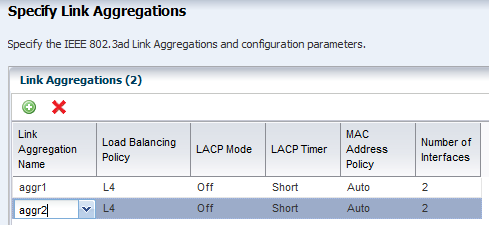
If you selected Link Aggregation in Step 5, complete the following steps for each link aggregation:
-
Specify the Link Aggregation parameters.
-
Specify the Link Aggregation interfaces for each Link Aggregation.
The 32 interfaces that appear in the list (net_0 - net_31) are possible network interfaces, not available interfaces. Contact your network administrator for a list of available interfaces.
Figure 7-30 Specify Link Aggregation Interfaces
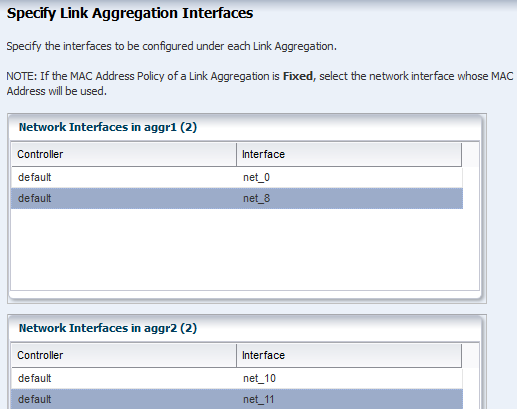
Description of "Figure 7-30 Specify Link Aggregation Interfaces" -
Go to Step 9.
-
-
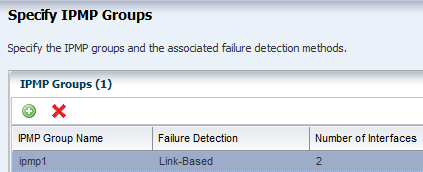
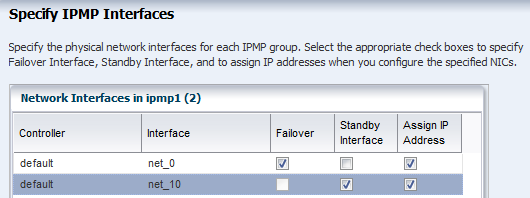
If you selected Use IPMP in Step 5, complete the IPMP parameters.
-
Complete the Failure Detection method, either Link-Based or Link Based + Probe Based, and the number of interfaces.
-
Specify the interface. Select the check boxes to define the IPMP configuration for Failover and Standby Interface. Select Assign IP Address to assign the IP address.
-
Go to Step 9.
-
-
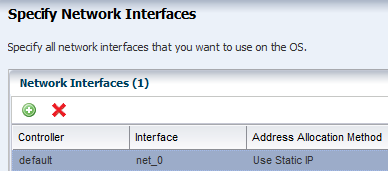
If you selected None for Networking in Step 5, define the network interfaces that you want to use on the operating system. The boot interface is typically net_0, as shown in Figure 7-33. You define the IP address when you apply the plan to a target system. Click the Add icon to add other interfaces.
-
Review the Summary page, then click Finish. The new configuration appears in the table in the center pane. Click the profile to view the details.

