Oracle® Enterprise Manager Ops Center
Add InfiniBand Switches
12c Release 3 (12.3.0.0.0)
E60006-01
June 2015
This guide provides an end-to-end example for how to use Oracle Enterprise Manager Ops Center.
Introduction
Oracle Enterprise Manager Ops Center supports the following types of network switches:
-
Sun Ethernet 10GbE Fabric Switch
-
Sun Data Center InfiniBand Switch
-
Cisco Catalyst 4948 Ethernet Switch
This document describes the procedure for discovering one or more Sun Datacenter InfiniBand switches. You discover the switches in these situations:
-
A new switch is installed in an existing data center that is managed by Oracle Enterprise Manager Ops Center. You must discover the switch so that it becomes a managed asset. You can use this procedure to submit a job that targets the asset at the specific IP address.
-
One or more switches are supporting a network in a data center when Oracle Enterprise Manager Ops Center is installed. You want to direct the product to discover all the switches. Because you know the subnet where the switches are attached, you can use this procedure to submit a job that targets any InfiniBand network switch on that subnet.
See Related Articles and Resources for links to related information and articles.
What You Will Need
You will need the following to deploy network switches:
-
A working network switch that a Proxy Controller can reach.
-
The credentials for the switch management controller's
ilom-adminaccount. If you have the Network Admin role, you can create new credentials. -
The specific IP address of the switch or the range of IP addresses.
-
A Proxy Controller must be able to reach the switch:
-
To discover a new switch in an existing site, connect the switch to a subnet that has a Proxy Controller.
-
To discover the switches in a new installation, add a Proxy Controller to the same subnet where the switches are located.
-
Deploying Switches
When you manage a network switch, the operation identifies the switch, checks its configuration, and makes its fabrics available in the Default Network Domain. To manage a network switch, you create a discovery profile and then use the Add Assets action.
Create the Discovery Profile for the InfiniBand Switch
The discovery profile can include a specific IP address and credentials to manage a specific network switch. If this information is not included, you can provide the specific information each time you use the profile, allowing the profile to be used more than one time.
-
In the Navigation pane, click Plan Management.
-
In the Profiles and Policies section, click Discovery.
-
In the Actions pane, click Create Profile.
-
Enter a name for the discovery profile and select the Networking type of asset. For InfiniBand, select Magnum Family Switches.
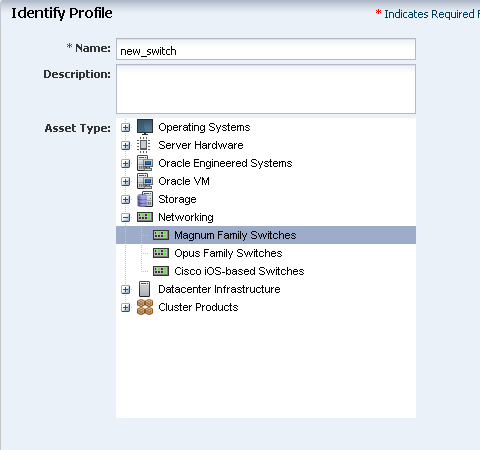
Description of the illustration disc_profile_ib_new.png
-
You have the option of adding tags to identify the new assets, according to your site's policy. Click Next.
-
In the Add IP Ranges step, you define the target of the discovery operation, that is, the network switch:
-
If you are discovering a specific switch and you know its IP address or its host name, click Next to skip this step and provide the IP address or host name when you use the discovery profile. If you prefer to set the IP address in the discovery profile, enter the IP address of the switch in the IP Ranges field.
-
If you are discovering a switch but do not know its IP address or host name, or you are discovering a set of switches that reside on a subnet, click the Add icon to display the Add IP Ranges window.
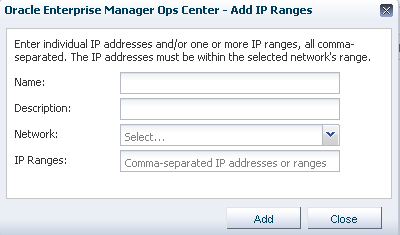
Description of the illustration disc_profile_ib_new_ipaddr.png
-
-
Add a name and description to identify the IP range, for example, a geography name.
-
In the Network list, select Automatic to route the job to the closest Proxy Controller.
-
Enter the IP range for the subnet that includes the network switches. During the discovery process, Oracle Enterprise Manager Ops Center searches the subnet for assets that are InfiniBand network switches. You can specify more than one subnet.
-
Click Add. When you are finished, click Next.
-
Authorize the discovery operation to probe the network switches. Provide the credentials to log in to the switch management controller's
ilom-adminaccount.Note:
Do not use therootaccount.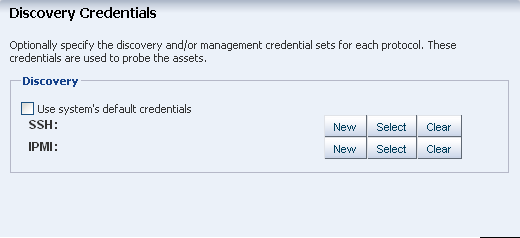
Description of the illustration disc_profile_ib_new_creds.png
-
If you are discovering a specific switch, click Next to skip this step and provide credentials when you use the discovery profile.
-
If you are discovering a set of switches, you can select the check box to direct Oracle Enterprise Manager Ops Centert to use the network switch's default credentials or you can provide credentials.
-
To specify
sshcredentials, click New in the SSH row.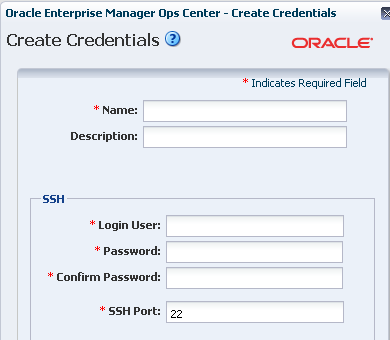
Description of the illustration disc_profile_ib_creds_ssh.png
-
To specify IPMI credentials, click New in the IPMI row.
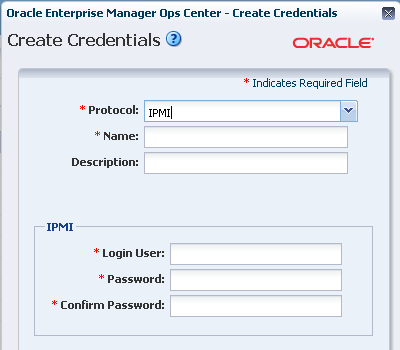
Description of the illustration disc_profile_ib_creds_ipmi.png
-
-
When you are finished, click Create to complete the new credentials and view the summary of the discovery profile. Click Finish to create the discovery profile.
The following is an example of a discovery profile for an InfiniBand network switch.
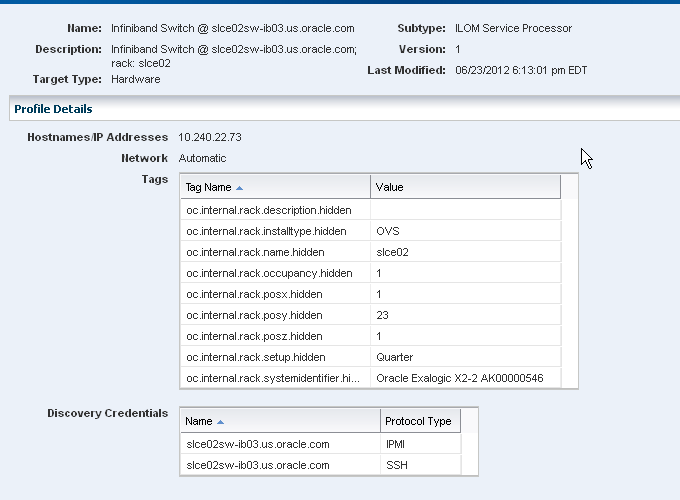
Description of the illustration disc_profile_ib.png
Use the Discovery Profile
-
In the Navigation pane, select All Assets.
-
In the Actions pane, click Add Assets.
-
Select Add and Manage Various Types of Assets via Discovery Probes.
-
Select the new discovery profile,
new_switch. -
To change or add IP addresses defined in the discovery profile, enter them in the Hostname/IP Address field.
-
To use the credentials in the discovery profile, click Select. If you did not specify credentials in the profile, click New to provide them now. You can also use the New button to override the credentials in the profile. Specify the credentials to log in to the switch management controller's
ilom-adminaccount.Note:
Do not use therootaccount. -
Click Add Now to start the discovery job.
When the discovery job is complete, the switches are displayed as managed assets in a way similar to the following:
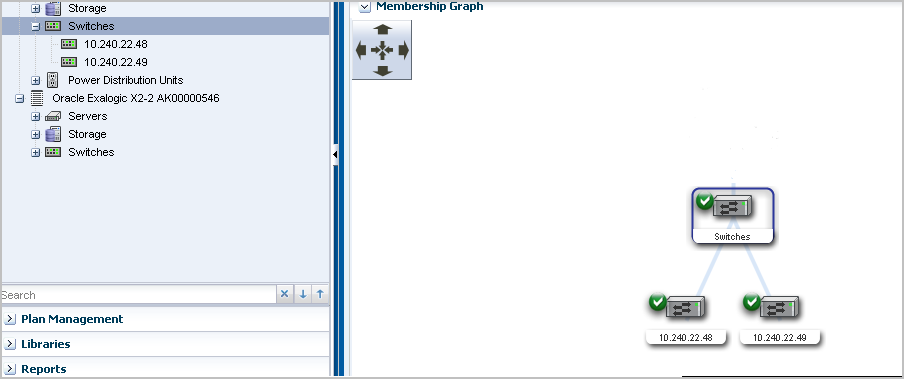
Description of the illustration switch_group.png
The tabbed windows in the center pane also contain information about the switches.
As part of becoming a managed network switch, any fabrics that existed on the network switch are also incorporated.
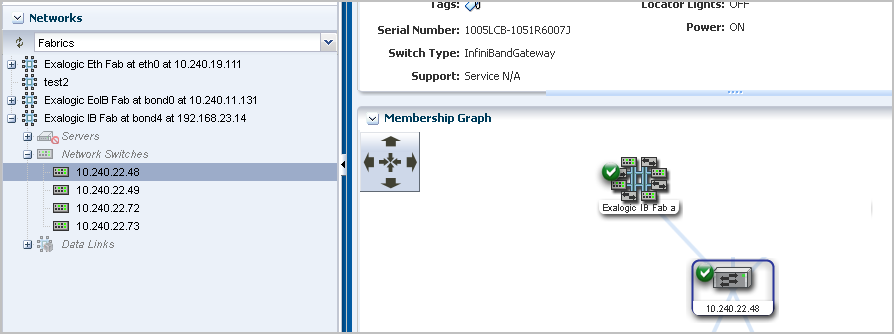
Description of the illustration switch_fabric.png
Hover the cursor over the fabric icon to see its details, similar to the following.
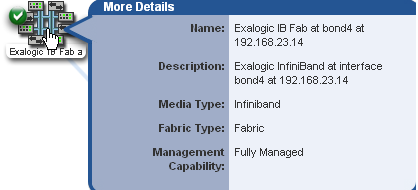
Description of the illustration switch_fabric_deet.png
What's Next?
The fabrics are available in the Default Network Domain. To change the network domain, use the Assign Fabric action.
To maintain network switches with firmware upgrades, you must acquire the firmware images and create a profile from the Update Firmware template. See Keep Your Firmware Up-to-Date in the Operate How To library at http://docs.oracle.com/cd/E59957_01/nav/operate.htm.
Related Articles and Resources
For instructions in performing actions or to learn more about the role of this feature, go to one of the following resources:
See the following for more information:
-
Manage Assetsof the Oracle Enterprise Manager Configure Reference for information about discovery procedures for different types of servers. -
Hardwareof the Oracle Enterprise Manager Operate Reference for information about managing and monitoring hardware assets. -
Operating Systems Provisioningof the Oracle Enterprise Manager Operate Reference for information about provisioning operating systems on hardware servers. -
Deploy Networks Workflowin the Deploy How To library at http://docs.oracle.com/cd/E59957_01/nav/deploy.htm
For more information about switches, see the product documentation:
-
For the Sun Ethernet 10GbE Fabric switch, see
http://docs.oracle.com/cd/E19934-01/index.html -
For the Sun Network QDR InfiniBand Gateway Switch, see
http://docs.oracle.com/cd/E36256_01/. -
For the Sun Datacenter InfiniBand Switch 36, see
http://docs.oracle.com/cd/E26698_01/
Documentation Accessibility
For information about Oracle's commitment to accessibility, visit the Oracle Accessibility Program website at http://www.oracle.com/pls/topic/lookup?ctx=acc&id=docacc.
Oracle customers that have purchased support have access to electronic support through My Oracle Support. For information, visit http://www.oracle.com/pls/topic/lookup?ctx=acc&id=info or visit http://www.oracle.com/pls/topic/lookup?ctx=acc&id=trs if you are hearing impaired.
Oracle Enteprise Manager Ops Center Add InfiniBand Switches , 12c Release 3 (12.3.0.0.0)
E60006-01
Copyright © 2007, 2015, Oracle and/or its affiliates. All rights reserved.
This software and related documentation are provided under a license agreement containing restrictions on use and disclosure and are protected by intellectual property laws. Except as expressly permitted in your license agreement or allowed by law, you may not use, copy, reproduce, translate, broadcast, modify, license, transmit, distribute, exhibit, perform, publish, or display any part, in any form, or by any means. Reverse engineering, disassembly, or decompilation of this software, unless required by law for interoperability, is prohibited.
The information contained herein is subject to change without notice and is not warranted to be error-free. If you find any errors, please report them to us in writing.
If this is software or related documentation that is delivered to the U.S. Government or anyone licensing it on behalf of the U.S. Government, then the following notice is applicable:
U.S. GOVERNMENT END USERS: Oracle programs, including any operating system, integrated software, any programs installed on the hardware, and/or documentation, delivered to U.S. Government end users are "commercial computer software" pursuant to the applicable Federal Acquisition Regulation and agency-specific supplemental regulations. As such, use, duplication, disclosure, modification, and adaptation of the programs, including any operating system, integrated software, any programs installed on the hardware, and/or documentation, shall be subject to license terms and license restrictions applicable to the programs. No other rights are granted to the U.S. Government.
This software or hardware is developed for general use in a variety of information management applications. It is not developed or intended for use in any inherently dangerous applications, including applications that may create a risk of personal injury. If you use this software or hardware in dangerous applications, then you shall be responsible to take all appropriate fail-safe, backup, redundancy, and other measures to ensure its safe use. Oracle Corporation and its affiliates disclaim any liability for any damages caused by use of this software or hardware in dangerous applications.
Oracle and Java are registered trademarks of Oracle and/or its affiliates. Other names may be trademarks of their respective owners.
Intel and Intel Xeon are trademarks or registered trademarks of Intel Corporation. All SPARC trademarks are used under license and are trademarks or registered trademarks of SPARC International, Inc. AMD, Opteron, the AMD logo, and the AMD Opteron logo are trademarks or registered trademarks of Advanced Micro Devices. UNIX is a registered trademark of The Open Group.
This software or hardware and documentation may provide access to or information about content, products, and services from third parties. Oracle Corporation and its affiliates are not responsible for and expressly disclaim all warranties of any kind with respect to third-party content, products, and services unless otherwise set forth in an applicable agreement between you and Oracle. Oracle Corporation and its affiliates will not be responsible for any loss, costs, or damages incurred due to your access to or use of third-party content, products, or services, except as set forth in an applicable agreement between you and Oracle.