Creating Instances Using Orchestrations with Custom Configurations
You can create orchestrations with custom configurations for multitier application deployment.
Prerequisites
For instances to be launched using the orchestration, you must define the following elements for the orchestration:
-
SSH key
-
Network configuration.
-
Storage volumes
You can also save the orchestration as a deployment plan for creating other orchestrations.
- Log in to the UI and go to the Self Service Portal.
- In the Self Service Portal, click the Home tab.
- In the Services section, click Request New Service.
- Click Select for creating an orchestration to create a set of instances with custom configurations for multitier applications.
The Request Orchestration wizard is displayed.
- In the Request Orchestration: General step, enter the following details:
-
Select the Oracle Compute Site.
-
In the Name field, enter a name for the orchestration.
-
(Optional) Provide a description for the orchestration.
-
Select None if you want to specify the orchestration elements in the wizard or you can select a saved JSON file for the orchestration or a deployment plan to create the orchestration.
-
Select to start the orchestration immediately or schedule when to start and end the orchestration.
Click Next.
-
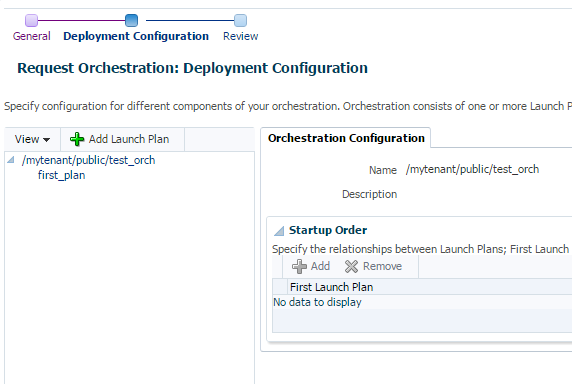
- In the Request Orchestration: Deployment Configuration step, click Add Launch Plan to define the configuration settings for one or more instances.
Specify the configuration for the different elements of your orchestration using one or more launch plans. A launch plan defines the configuration settings for one or more instances. An orchestration consists of one or more launch plans and their startup order.
- Enter a name for the launch plan and click Add.
The launch plan name you entered appears in the launch panel.
- Click the newly created launch plan.
The Launch Configuration and Common Settings tabs are displayed in the Deployment Configuration page.
- In the Launch Configuration tab, enter the following details:
- Specify the high availability policy for an orchestration, which affects how the orchestration is managed by the system. You can select Active, Monitor, or No High Availability.
- To deploy the launch plan on different compute nodes, select Deploy on Different Nodes. Otherwise, the launch plans may be deployed on the same nodes.
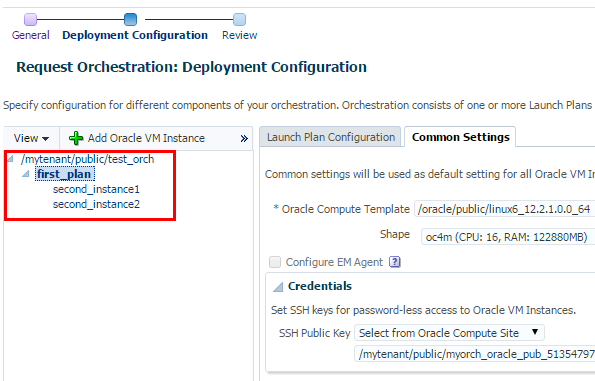
- In the Common Settings tab, enter the following details:
- Oracle Compute Template: Click the Search icon and select a template from the list.
- Shape: Select a shape from the drop-down list.
- Configure EM Agent: Select this option to configure the EM agent on the instances. This option is disabled if the tenant does not have access to the EoIB OMS and IPoIB instance storage networks that are required to deploy the management agent on the instances, and the selected template is not configured for the EM agent.
- Credentials: You can set the SSH key credentials for passwordless access to the instances. You can use any existing SSH key available in the tenant.
-
Select from Compute Site: Select any existing SSH keys from the list.
-
Enter Key: If you generated an SSH key pair, then enter the SSH public key.
-
Key is in a File: If you stored the SSH key in a file, then click Choose File and select the public key stored in a file.
-
- Network Configuration: Click Add to select one or more network interfaces that will be assigned to the instances. The networks can be either a tenant or service network.
Note:
-
If you have selected the Configure EM Agent option, you must add at least one network to your orchestration for it to successfully boot up.
-
If you have not selected the Configure EM Agent option, you must add at least two networks to your orchestration for it to successfully boot up.
-
- (Optional) Domain Name System (DNS) Configuration: Enter the DNS servers and search domains for the selected network.
- (Optional) Network Information System (NIS) Configuration: Enter the NIS Domain name and add the NIS servers list.
- (Optional) Storage Configuration: You can create and attach storage volumes to the instances. Click Create and enter the details of the storage volume such as name, size, and number of volumes.
- (Optional) Advance Configuration: You can specify additional attributes and tags to the instances. For attributes, click Add. In the Add Attributes window, specify the key and value for the attribute. In the Tags field, you can enter tags to identify the instance deployment request.
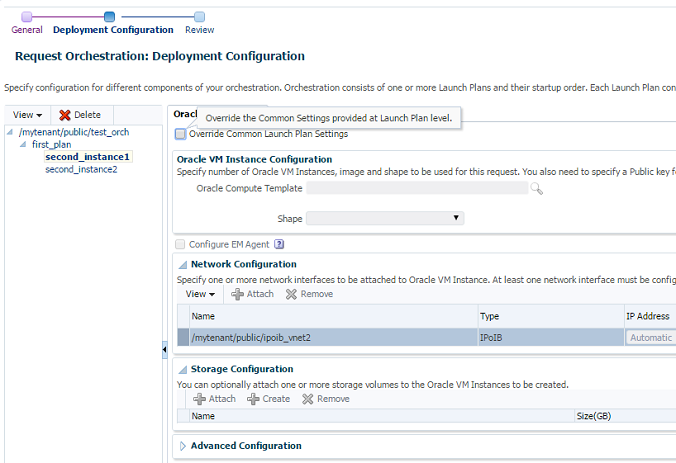
- After you have defined the launch plan, you can add one or more instances that can use this launch plan. In the left navigation pane, click Add Oracle VM Instance. In the Add VM Instance window, specify the name and number of the VM instances to be created. If you are adding more than one instance, then the name you specify will be used as a prefix to generate a unique name for each VM instance. Define configuration settings at the instance level and override the settings defined at the launch plan level.

Description of the illustration GUID-8C535BE8-537D-4965-A3C1-D9EAE2B06B45-default.pngYou can select each instance and override the common launch plan settings. - Click Next.
The Request Orchestration: Review page is displayed.
- To save the orchestration as a deployment plan that can be used for other orchestrations, click Save as Deployment Plan. You can also view the JSON format of the orchestration configuration. You can copy this orchestration to a file and save it for later use.
For more information about orchestration templates, see Orchestration Templates.
- Review the configuration parameters for creating the orchestration and click Submit to submit the orchestration request.

