Adding a Tabbed Container

The Tabbed Container groups components into multiple tabs. Each tab may contain one or more components.

By default, the container includes two tabs. The example below shows a Line Chart and a Results List included as separate tabs:
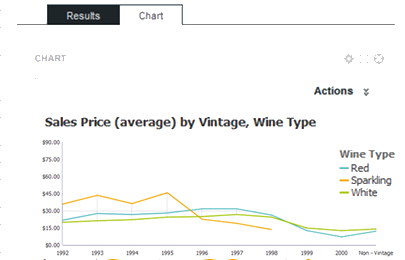

Tabbed Component Container

To add a Tabbed Container:

  1. In the Discover View of your project, click the Add Component icon in the right sidebar:
    Column Container component containing other components
    The Add Component panel appears.
  2. Select the Tabbed Component Container and click the + icon or drag it to the desired location on the page.
  3. Click the Options gear on the right side of the Tabbed Container menu bar to access the Component Edit View:
    Edit view of the Tabbed Component Container
  4. To add a new tab:
    1. In the New tab name field, enter the name of the new tab.
    2. Click Create new tab.
  5. To change the layout of a tab:
    1. Click the layout in the Tab Layout column.

      The Choose a Layout dialog appears.

    2. Select the layout to use.
    3. Click OK.
  6. To change the tab order, click and drag the handle on the left side to move each tab to the desired location.
  7. To delete a tab, click Delete tab for the tab.
  8. To rename a tab:
    1. Click the tab name.

      The tab name becomes an editable field.

    2. In the field, enter the new label for the tab.
    3. Click OK.
  9. To localize a tab name:
    1. Click the localization icon next to the tab name.
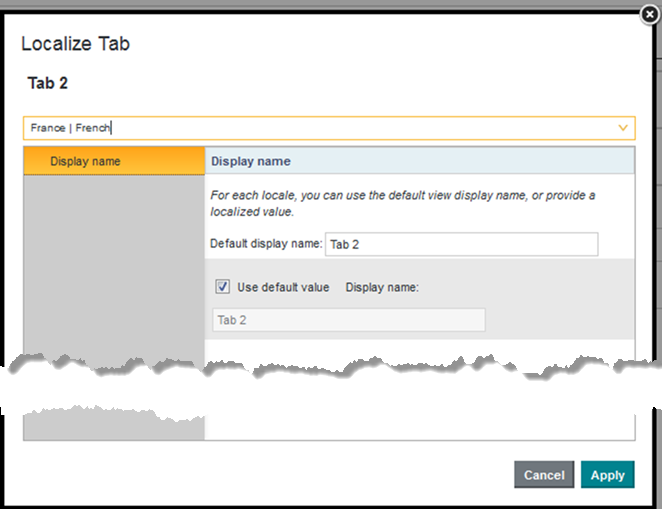
      The Localize Tab dialog displays:

      The Localize Tab.
    2. From the locale list, select the locale for which to provide a value.
    3. Deselect the Use default value check box.

      By default, each locale uses the display name configured in the Component Edit View.

    4. In the Display name field, enter the localized tab name.
    5. Click Apply.
  10. Click Save.
  11. Click Exit in the upper right corner.

After configuring the container, you can drag other components into it and configure them as normal.