Configuring images to display next to each record

You can configure the images that display next to each record in a Results List component.
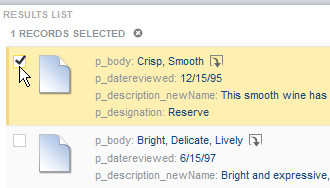
Excerpt from the Results List end user view showing a record with an image

Studio supports the following image sources:

Image Type Description
Icons selected from the image gallery This option is typically used when the icons represent a category or other high-level classification of the records.

Studio provides a basic set of icon images. You can also upload your own using .gif, .jpeg/.jpg, .bmp, and .png file types. When you upload images, they become available to use for any Results List component in the same project.

Images from a URL that you provide

This is typically used when most of the records in the system have associated images published to a Web or application server (for example, a unique preview image for products represented by each record). The URL can include tokens substitute in attribute values as parameters.

To configure images to display next to each record:

  1. In the component menu bar, click the Options icon to navigate to the Edit view:
    The Options icon.
  2. In the Edit view, navigate to the Images tab.
  3. To disable image display, select Type of image > None.

    This is the default configuration.

  4. To display an icon from the image gallery:
    1. Select Type of image > Icon from gallery.
    2. Click Select Attribute.

      The attribute selection dialog displays the attributes that can be used for the image selection. The attribute must have fewer than 15 values, and must be displayed on the component.

    3. Click the attribute to use and click Apply.
    4. To select an image for an attribute value, click Select.
      The Select Image dialog opens.
    5. Click the image you want to use or click No Image to disable images for a value.
      To upload your own image, click Browse, locate the image, and clickUpload. The uploaded image is added to a new My Images category on the Select Image dialog. If the image is too large, Studio crops it.
    6. Click OK.

      The list updates with the selected image.

    7. To select a different image for an attribute value, click the edit icon.
    8. To clear a selected image and display the default image, click the delete icon.
    9. Hide or change the default icon by clicking the None radio button below the attribute value list, or by clicking Change Icon.
  5. To display images from a URL:
    1. Under Type of image, select Thumbnail from URL.
    2. In the field, type the URL for the image file.
    3. To add attribute values as parameters in the URL, click Add URL Parameters.
    4. On the add parameters dialog, in the attribute list, check the check box next to each attribute to add.
    5. When you are finished selecting attributes, click Apply.

      The selected attributes are displayed in a table, with each attribute assigned an ID to use when inserting the attribute into the URL.

      The attributes are also inserted as query parameters, where the parameter name is the attribute key, and the parameter value is {IDNumber}, where IDNumber is the ID for that attribute. For example: http://www.mywines.com/images?Designation={0}

      By default, the value is encoded. To not encode the value, change the format to {{IDNumber}}. For example: {{0}}

      You can also use the ID numbers to insert the attribute values manually.

      For details on component hyperlinks and encoding inserted attribute values, see Configuring hyperlinks to external URLs.

    6. To remove a URL parameter from the table, click its delete icon.

      If the parameter is unedited, Studio also removes it from the URL. If you have edited the inserted query parameter or inserted the attribute value manually, you must manually remove it from the URL.

  6. Hide or change the default icon by clicking the None radio button or by clicking Change Icon.
    The default image setting determines the image to display if Studio can't find a configured image, or if the No Image option is selected for a value. You can also use this setting to display the same image for all records.