Creating signature layouts
Note: We're updating our help center to reflect the new Redwood experience. During the transition, some content reflects the previous version of the UI.
You can create and edit signature layouts in the component library that you can reuse with multiple emails.
To create a signature layout:
- Navigate to Assets
 > Components, then click Signature Layout.
 -
Create a Signature Layout
-
In the classic UI, click New in the upper-right corner to open the Email Signature Layout editor.
-
In the Redwood Experience, click Create in the upper-right corner and fill in the name and description in the create drawer
-
- Configure the Settings and Permissions
- In the classic UI, configure Settings and Permissions through Actions
 . Learn more about setting permissions.
 - In the Redwood Experience, configure the Settings and Permissions through their respective icons

- In the classic UI, configure Settings and Permissions through Actions
- Add the shared content. Learn more about Using the rich text editor.
- Link-based user fields: When inserting either the Website URL or the Personal URL user field, a window opens with the options to add display text for the link, and to track the link. Use the Track URL option to track link clickthroughs.
- Fields with optional labels: Not all fields need labels. Information such as telephone numbers are commonly preceded with a label. When you choose to insert a telephone-based field, the system automatically inserts a field label, and this field label can be edited as needed. If there is nothing on the user profile to fill this field, both the field and the field label will not appear on the email when it is sent out.
Example: Robert is sending an email, the signature layout has a mobile phone field inserted as well as a label that reads, "Mobile Phone." If Robert does not have a mobile phone number, the label "Mobile Phone" and the field will both be excluded from his signature.
- Punctuation: Be careful when inserting punctuation such as commas between the fields in the signature layout. If there is no content to populate a field, both the field and label will disappear, but any punctuation that you have added will remain. If you do use punctuation between fields, then ensure that all possible senders using that signature layout have all fields complete on their profile.
In the classic UI, to edit the HTML code, click Src.
User Fields provides a list of signature fields you can add to the signature. Similar to field merges, signature field values are determined by the user profile.
The following should be kept in mind when inserting user fields:
In the Redwood Experience, to edit the HTML code, press the <> icon.
To add User Fields, you can click on the User Fields icon in the sidebar menu.

- Click Save.
After you finish:
-
If your content could appear in an email, check the results of the responsive validation tool. The tool identifies issues that could prevent the content from adapting to different screen sizes. The tool checks for tables, images that might not scale, and long text strings.
 indicates that there are no responsive concerns.
 indicates that there might be responsive issues. Click the notification icon to review the issues. Learn some tips on how to keep your email responsive.
If an image was identified as not being responsive, double-click the image and choose the Responsive setting.
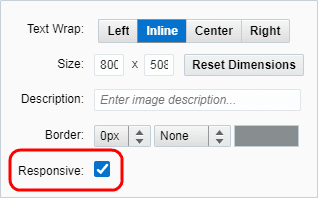
Learn more about keeping images responsive with this feature.
- If you need to edit the layout, see Managing signature layouts.
- Add the signature layout to an email.
Adding signatures to your email in the Design Editor