If you are loading data into a Cloud Storage Service using a Cloud Extract, you use BI Cloud Connector Console to synchronize deletes in the source system with deletes in the Cloud Extract data.
Before you start, log into BI Cloud Connector Console using the Web link and user name supplied to you by Oracle Cloud Support. You can also start BI Cloud Connector Console using a HTTP URL based on the following format: http://<FA OHS Host>:<FA OHS Port>/biacm.
To synchronize your Cloud Extract data:
- Select the Configure Cloud Extract link on the Tasks pane.
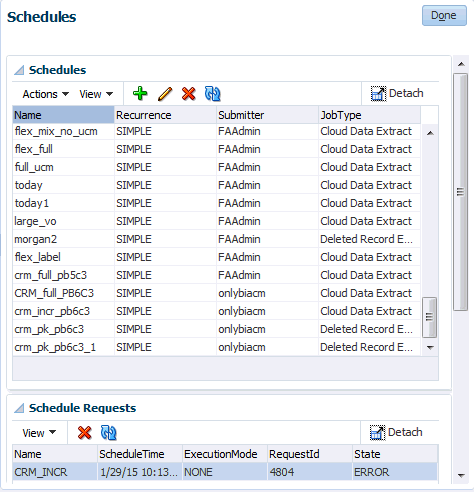
- Click the Manage Extract Schedules icon (

Description of GUID-DC8A2A2F-7AD5-406B-B7BD-90A7B433141B-default.gif) to display the Schedules dialog.

- Click the Add icon (
 ) to create a new schedule.
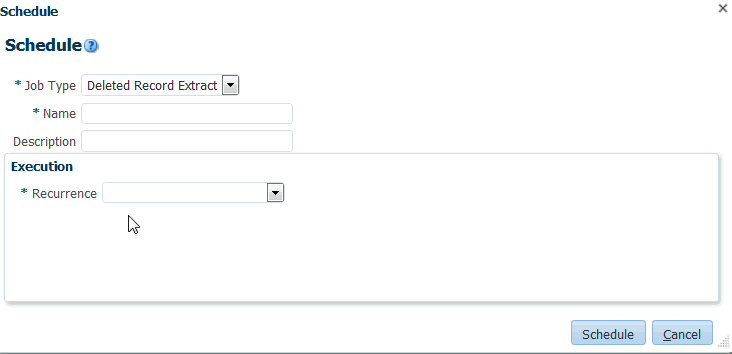
- Use the Name field to specify a short name to identify this schedule in BI Cloud Connector Console.

Description of GUID-70A2258F-37D7-4BBF-A19C-76F381D67AF9-default.gif
- Select ‘Deleted Record Extract’ from the Job Type drop down.
- Use the Recurrence drop down to specify when you want to synchronize the data.
You typically schedule the synchronization to run at a time when the load on the Fusion Applications source system is low, for example, during off-peak hours. In addition, you must schedule the synchronization so that it does not conflict with the Cloud Extract or the data load into the OTBI-Enterprise data warehouse.
- Save the details.

