![]() To define the dimension property mapping options:
To define the dimension property mapping options:
-
To import dimension properties from the flat file, interface table, or Oracle Data Relationship Management application, select the properties to import in the Shared Library column. You can double-click on a cell in the Shared Library or application column for a drop-down list of available properties.
Some cells may not display a default property, in this case, you can use the Property Selector dialog box to choose a property.
-
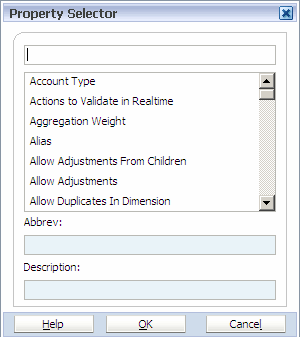
Optional: Right-click an empty cell and select Find Property.
The Property Selector dialog box is displayed.
-
Optional: Select Clear Before Importing or Allow Overwrites with Blank.
If “Clear Before Importing” is selected, values are cleared and match the import source exactly. If not selected, values are merged with existing values, and all existing values remain.
Note:
If you select the Clear Before importing check box when you set up some value (for example, 'A') as a member's UDA property value, modify the primary member UDA property value to a second value (for example, 'B') in an ads file, and change the shared member's UDA property value to a third value (for example, 'C') and then import the ads file by selecting the Clear Before Importing check box, the UDA property value is updated to 'C' in the primary and in the shared member. In this case, the final value takes precedence during the import.
If you clear the Clear Before importing check box when you set up some value (for example, 'A) as a member's UDA property value, modify the primary member UDA property value to a second value (for example, 'B') in an ads file, and change the shared member's UDA property value to a third value (for example, 'D') and then import the ads file by clearing the Clear Before Importing check box. the UDA property value is updated to A, B, C, and D in the primary and in the shared member. In this case, all property values are merged during the import.
If “Allow Overwrites with Blank” is selected, the value is overwritten even if the source value is empty.
-
Click Yes to import the profile into the Dimension Library.
Note:
For interface table import profiles, a Load ID Input dialog box is displayed. You can enter the load IDs, separated by a comma. See Entering Interface Table Load IDs for Import Profiles.
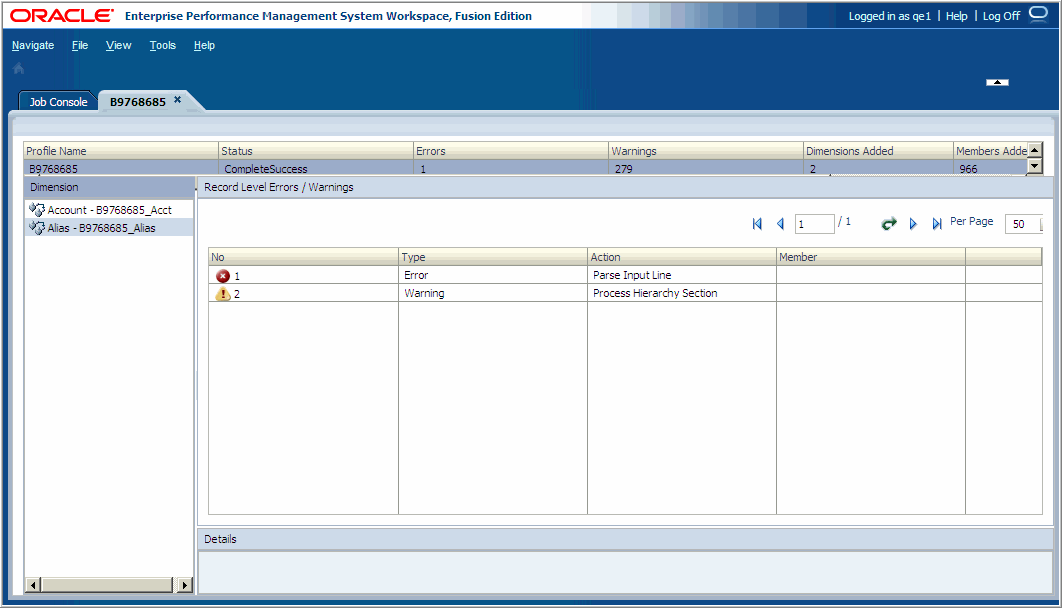
If you click the link to view the job in the Jobs Console, you can view the import results after the job completes. You can click
 to refresh the import status.
 -
When the import is completed, view the import results for warnings or errors.
If you imported dimensions into an application, the attachments area includes a link to a log file, otherwise the link displays the Import Results screen. For information on viewing job attachments, see Viewing Job Attachments. For information on viewing the import results, see Viewing Import Results.
Note:
The ImportErrorThreshold setting in the BPMA_server_config.xml file defines the maximum number of combined errors and warnings that can occur before a running import shuts down. The default value is 1000, however you can change the ImportErrorThreshold setting and increase the import error threshold. See Configuration Settings in BPMA_Server_Config.xml.
If you imported dimensions into an application, after the import is complete you can view and edit the dimensions in the application. Otherwise, you can view the dimensions in the Shared Library.