PCF ATS Installation Procedure
The PCF ATS installation procedure covers two steps:
- Locating and downloading the ATS images.
- Deploying ATS images.
Note:
For PCF to discover UDR and CHF, the nrf-clientservice pod of PCF is restarted as part of each test case.Locating and Downloading ATS Images
The steps to locate and download ATS Images are as follows:
- The ATS Images are
available on the OHC server. To download the ATS Images from OHC:
- Go to the URL, https://docs.oracle.com
- Navigate to Industries > Communications > Cloud Native Core.
- Click the Automated Testing Suite (ATS) Images link to download the zip file.
- Unzip the Images folder to access all the ATS Images.
-
The
ocats-pcfdirectory has a following file:ocats-pcf-tools-1.0.0.0.0.tgz - The
ocats-pcf-tools-1.0.0.0.0.tgzfile has following images and charts packaged as tar files:ocats-pcf-tools-1.0.0.0.0.tgz | |_ _ _ocats-pcf-pkg-1.0.0.0.0.tgz | |_ _ _ _ _ _ ocats-pcf-1.0.0.tgz (Helm Charts) | |_ _ _ _ _ _ ocats-pcf-images-1.0.0.tar (Docker Images) | |_ _ _ocstub-pkg-1.0.0.0.0.tgz |_ _ _ _ _ _ ocstub-go-1.0.0.tgz(Helm Charts) |_ _ _ _ _ _ ocstub-go-image-1.0.0.tar (Docker Images) - The user can copy the tar file from here to their K8s cluster where, they want to deploy ATS.
Deploying ATS in K8s Cluster
- Execute the command given
below to extract the tar file content.
tar -xvf
				  ocats-pcf-tools-1.0.0.0.0.tgz
The output of this command is:
ocats-pcf-pkg-1.0.0.0.0.tgzocstub-pkg-1.0.0.0.0.tgz - Go to the
ocats-pcf-tools-1.0.0.0.0folder and execute the command given below to extract the final helm charts and docker images of ATS.tar -xvf ocats-pcf-pkg-1.0.0.0.0.tgzThe output of this command is:
ocats-pcf-1.0.0.tgzocats-pcf-image-1.0.0.tar - Execute the command given
below to load the ATS image in your cluster and then, push it to your registry.
docker load
				  --input ocats-pcf-image-1.0.0.tar
docker tag registry-bastion-1:5000/ocats-pcf:1.0.0 <CUSTOMER_REPO>/ocats-pcf:1.0.0docker push <CUSTOMER_REPO>/ocats-pcf:1.0.0 - Execute the command given
below to untar the helm charts,
ocats-pcf-1.0.0.tgztar -xvf ocats-pcf-1.0.0.tgz - Execute the command given
below to update the image name and tag in the
ocats-pcf/values.yamlfile as required.For this, you need to open the
values.yamlfile and update the values ofimage.repositoryandimage.tag - Execute the command given
below to deploy ATS using the updated helm charts after performing
step 5.
helm
				  install <chart_directory> --name <release_name> --namespace
				  <namespace_name> -f <custom_values_filename>
For example:
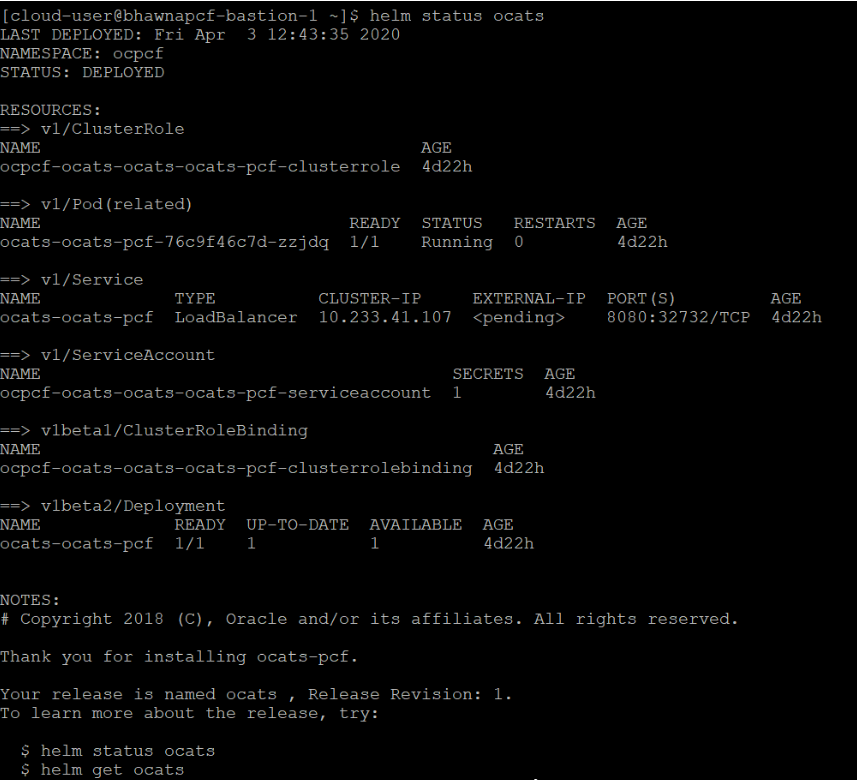
helm install ocats-pcf --name ocats --namespace ocpcf -f ocats-pcf/values.yaml - Execute the command given
below to verify ATS deployment .
helm status
				  <release_name>
Figure 3-4 Helm Status Image
- Execute the command given
below to view ATS and PCF in same namespace.
 kubectl
				  get po -n <ats-namespace>
Figure 3-5 Sample Screen: ATS and PCF Deployed in Same Namespace

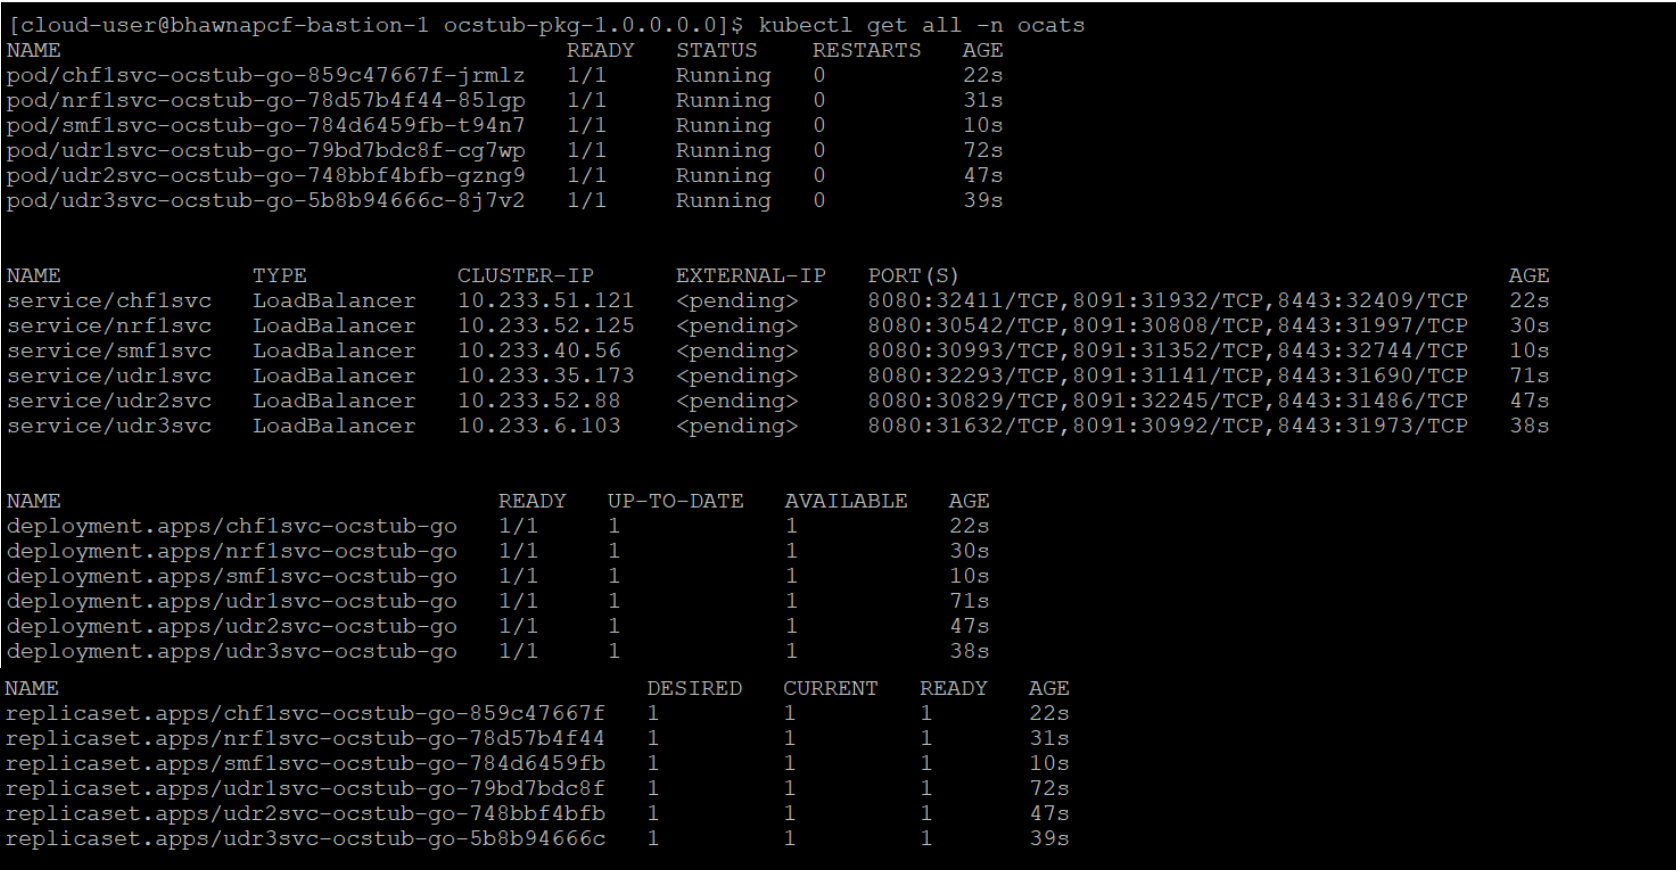
Deploying Stub Pod in K8s Cluster
Sample Screen: Stubs After Deployment
The steps to deploy Stub Pod in K8s cluster are as follows:
- Go to the
ocats-pcf-tools-1.0.0.0.0folder and execute the command given below to extract the ocstub tar file content.tar -xvf ocstub-pkg-1.0.0.0.0.tgzThe output of this command is:
ocstub-1.0.0.tgzocstub-go-images-1.0.0.tar - Execute the command given
below to load the STUB image in your cluster and then, push it to your
registry.
 docker
				  load --input ocstub-go-image-1.0.0.tar
docker tag registry-bastion-1:5000/ocstub-go:1.0.0 <CUSTOMER_REPO>/ocstub-go:1.0.0docker push <CUSTOMER_REPO>/ocstub-go:1.0.0 - Execute the command given
below to untar the helm charts,
ocstub-go-1.0.0.tgz.tar -xvf ocstub-go-1.0.0.tgz - Execute the command given
below to update the image name and tag in the
ocstub/values.yamlfile as required.Open the values.yaml file and update the
image.repositoryandimage.tag - Execute the command given
below to deploy Stub.
 helm
				  install <chart_directory> --set service.name=<service_name> --name
				  <release_name> --namespace <namespace_name> -f
				  <custom_values_filename>
For example:
helm install ocstub-go --set service.name=udr1svc --name udr1svc --namespace ocats -f ocstub-go/values.yaml - Similarly, execute the
commands given below to install all the stubs.
helm
				  install ocstub-go --set service.name =udr2svc --name udr2svc --namespace ocats
				  -f ocstub-go/values.yaml
helm install ocstub-go --set service.name= udr3svc --name udr3svc --namespace ocats -f ocstub-go/values.yamlhelm install ocstub-go --set service.name=nrf1svc --name nrf1svc --namespace ocats -f ocstub-go/values.yamlhelm install ocstub-go --set service.name=chf1svc --name chf1svc --namespace ocats -f ocstub-go/values.yamlhelm install ocstub-go --set service.name=smf1svc --name smf1svc --namespace ocats -f ocstub-go/values.yaml - Execute the command given
below to check the Stub deployment.
helm status
				  <release_name>
A sample screen showing stubs deployment is given below: