Prerequisites
This topic explains the prerequisites to backup and restore your databases in Oracle Database@AWS.
Oracle Database Autonomous Recovery Service
This topic explains how to enable Autonomous Recovery Service for Exadata Database(s).
- You must complete the following steps before proceeding to Backup Exadata Database for Automatic Database Backups using Autonomous Recovery Service.
Ensure Tenancy Resource Limits Are Sufficient for Recovery Service
- From the OCI console, navigate to Governance & Administration.
- From the Tenancy Management section, select the Limits, Quotas and Usage link.
- Use the Service, Scope, Resource, Subscription and Compartment fields to filter the limits.
- From the Service dropdown list, select the Autonomous Recovery Service option.
- From the Subscription dropdown list, select XXXXX-ORACLEDBATAWS.
- From the Scope dropdown list, select your region.
- Check the service limits of the following:
- Protected Database Count
- Space Used for Recovery Window (GB)
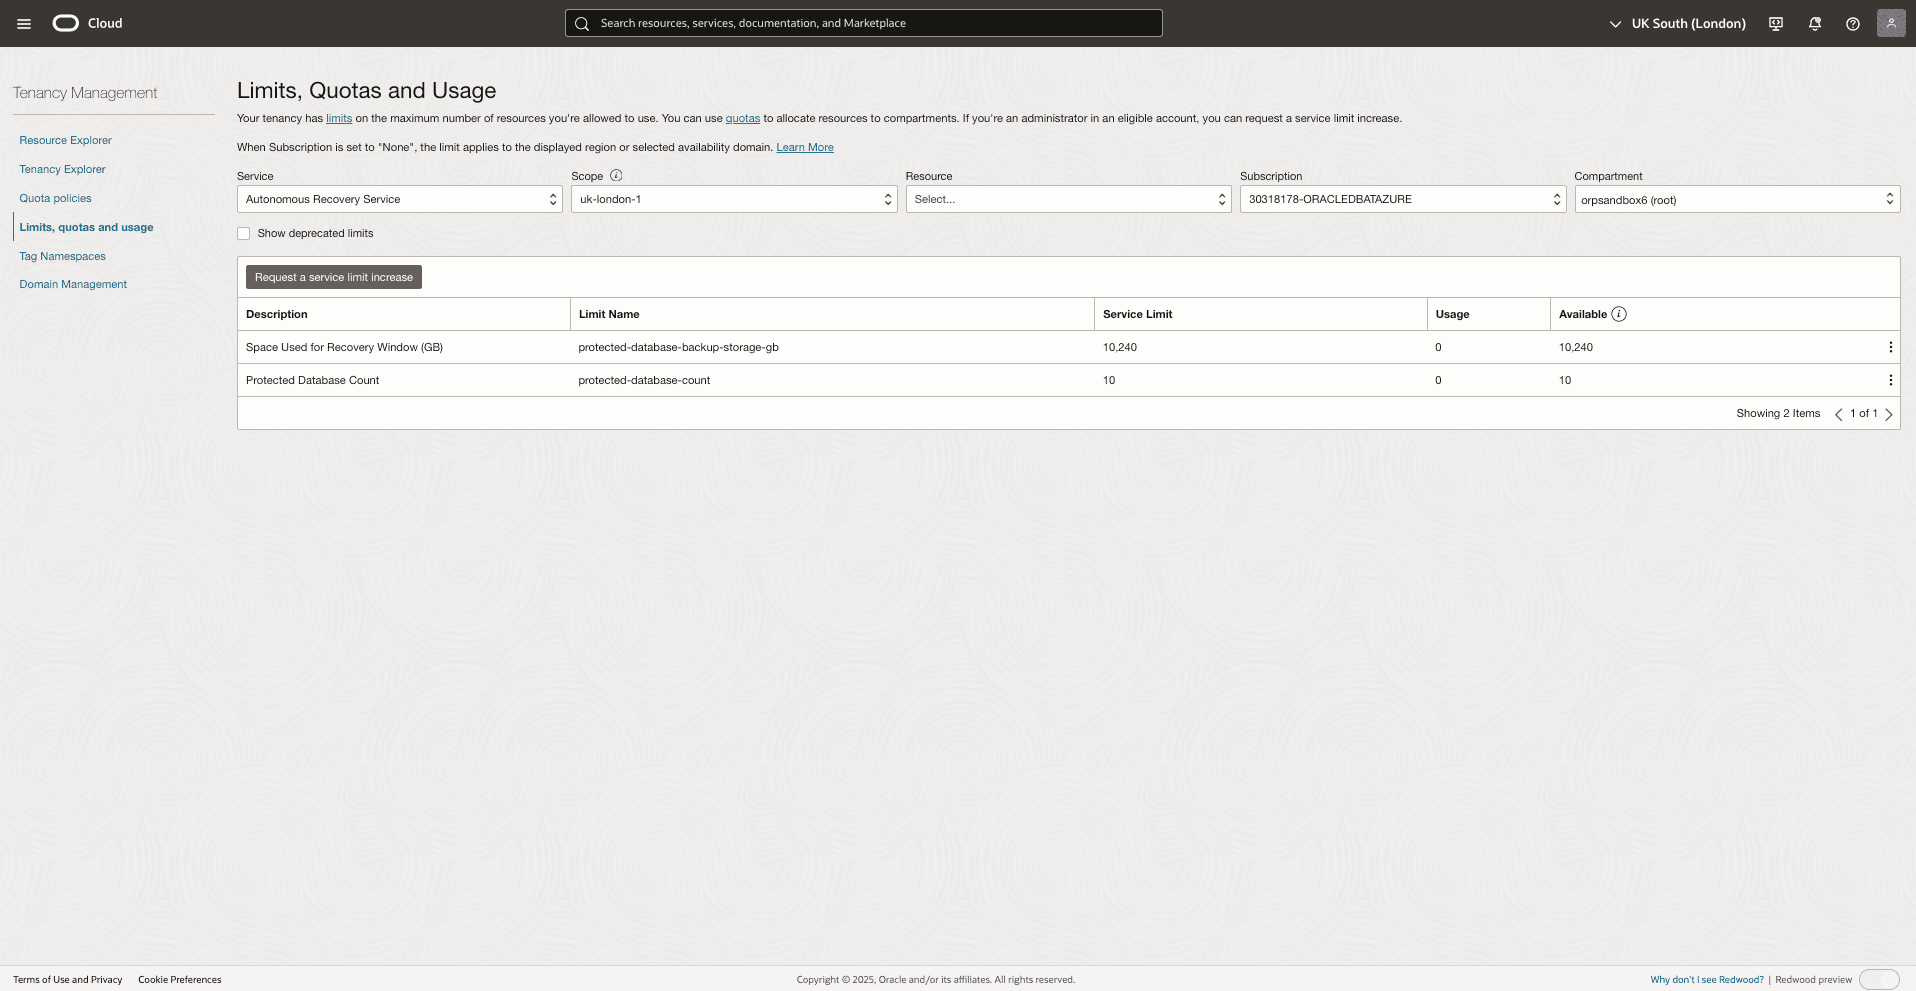
- If you want to increase your service limit, you can create a Service Limit Request.
Oracle Database Autonomous Recovery Service at AWS is generally available (GA) as of October 16, 2025.
Verify Required Group and Set OCI Policies
- If Oracle Database@AWS subscription is activated in your buyer account before Autonomous Recovery Service GA date, then you must edit the IAM policies as described below.
- Use the existing Oracle Database@AWS groups which are created as a part of onboarding or create new group(s) to administer Autonomous Recovery Service.
- Create the required IAM policies for the recovery services at root compartment.
- From the OCI console, navigate to Identity & Security, and then select the Identity.
- From the left menu, select the Policies section.
- To create an IAM policy for Oracle Database@AWS for Autonomous Recovery Service usage, complete the following substeps.
- To allow Oracle Database@AWS to use the Autonomous Recovery Service for backup:
Allow service database to use organizations-assigned-subscription in tenancy where ALL { target.subscription.serviceName = 'ORACLEDBATAWS' ANY { request.operation='CreateProtectedDatabase', request.operation='ChangeProtectedDatabaseSubscription' } } - Apply the following policies to grant users in the following groups permission to manage or use Autonomous Recovery Service:
allow group aws-db-family-administrators to manage recovery-service-family in tenancy
allow group aws-db-family-administrators to use recovery-service-family in tenancy
- To allow Oracle Database@AWS to use the Autonomous Recovery Service for backup:
Note
The manage permission allows editing Autonomous Recovery Service policies in addition to configuring database backups with Autonomous Recovery Service, whereas the use permission only allows configuring database backups. - If Oracle Database@AWS subscription is activated in your buyer account after Autonomous Recovery Service GA date, then IAM policies are configured automatically and do not require manual setup.
- Apply the following policies to grant users in the following groups permission to manage or use Autonomous Recovery Service:
allow group aws-db-family-administrators to manage recovery-service-family in tenancy
allow group aws-db-family-administrators to use recovery-service-family in tenancy
Note
The manage permission allows editing Autonomous Recovery Service policies in addition to configuring database backups with Autonomous Recovery Service, whereas the user permission only allows configuring database backups. - Apply the following policies to grant users in the following groups permission to manage or use Autonomous Recovery Service:
Configure Network Resources for Recovery Service
If your ODB network is created before Autonomous Recovery Service GA date, then configure network resources for recovery service .
- From the OCI console, navigate to Exadata VM Clusters, and then select your Exadata VM Cluster.
- Select the VM Cluster information tab, and then ensure the VM Cluster name on the OCI console matches the intended name.
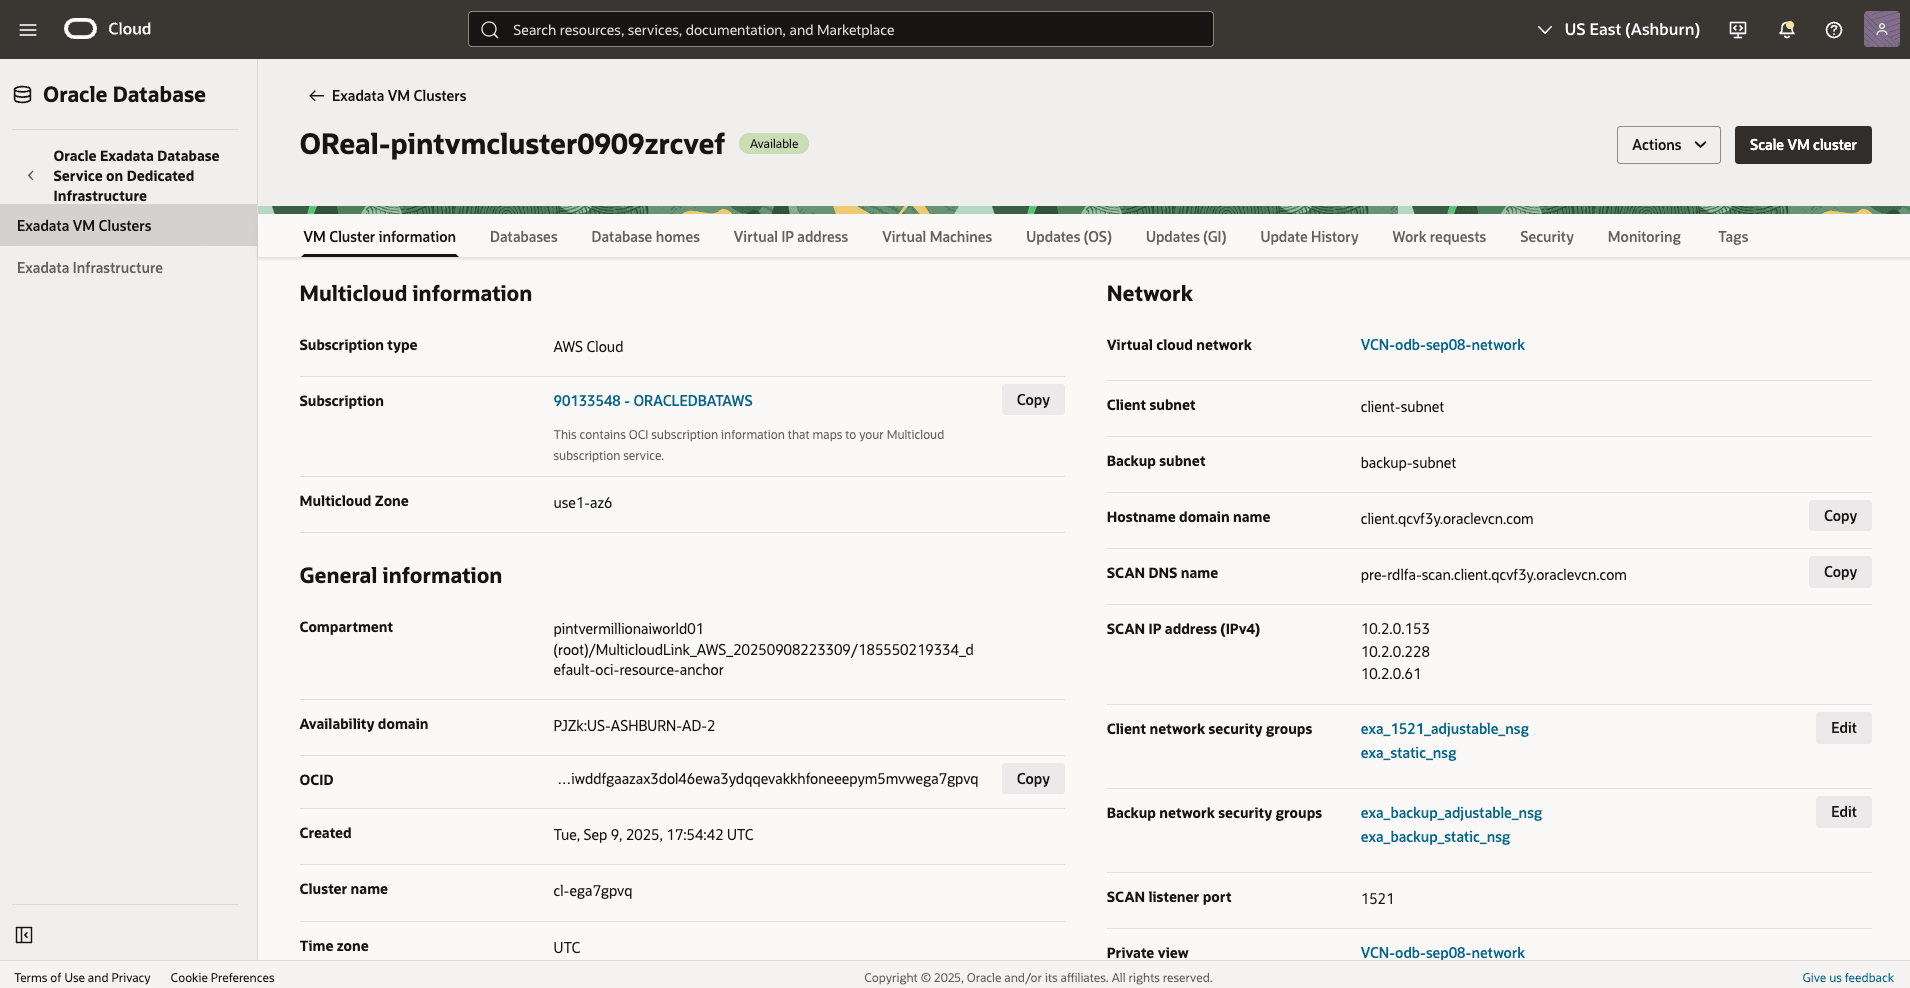
- From the VM Cluster information page, make a note of the names of the Virtual cloud network, Backup subnet, and Backup network security groups.
- In the VM Cluster Information tab, right-click the link next to Virtual Cloud Network and open it in a new browser tab.
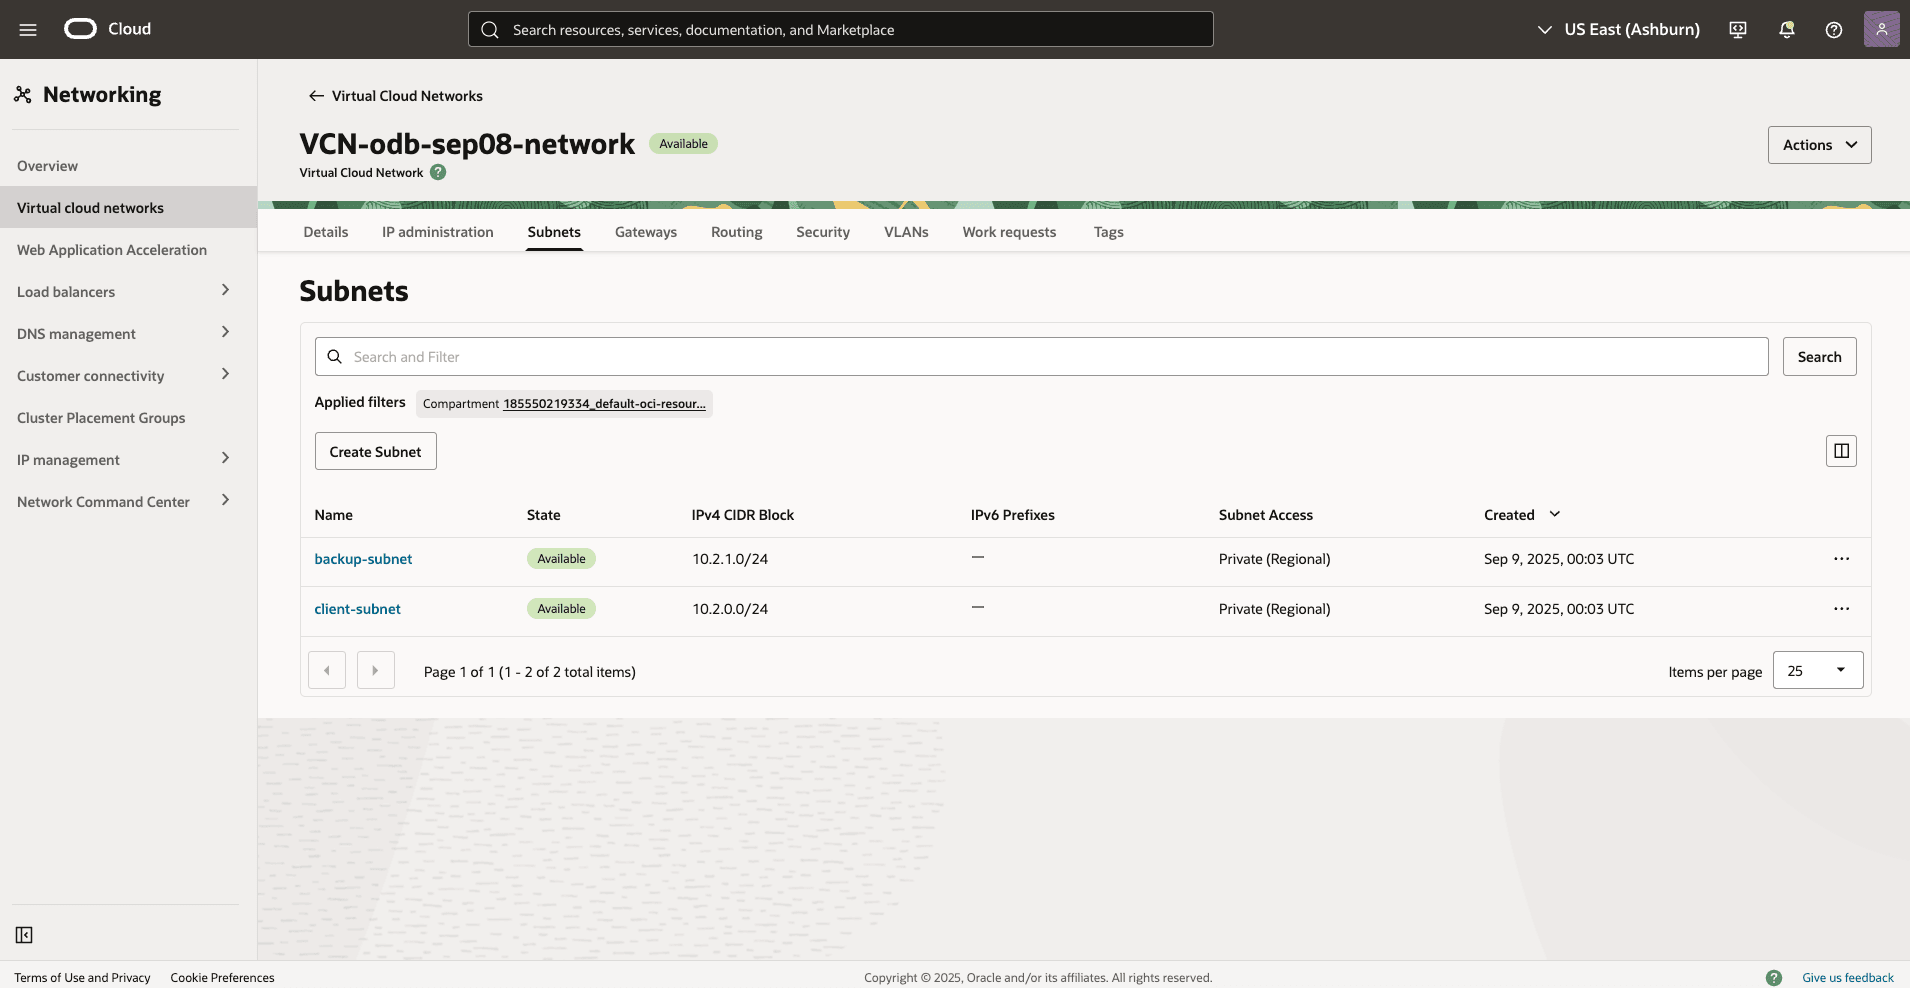
- Navigate to the Subnets tab.
- Make sure the IPv4 CIDR block of the backup subnet is at least /24 (256 IP addresses). If it is not, you must create a new subnet with a CIDR block of at least /24.
- Navigate to Oracle Database, and then select Database Backups.
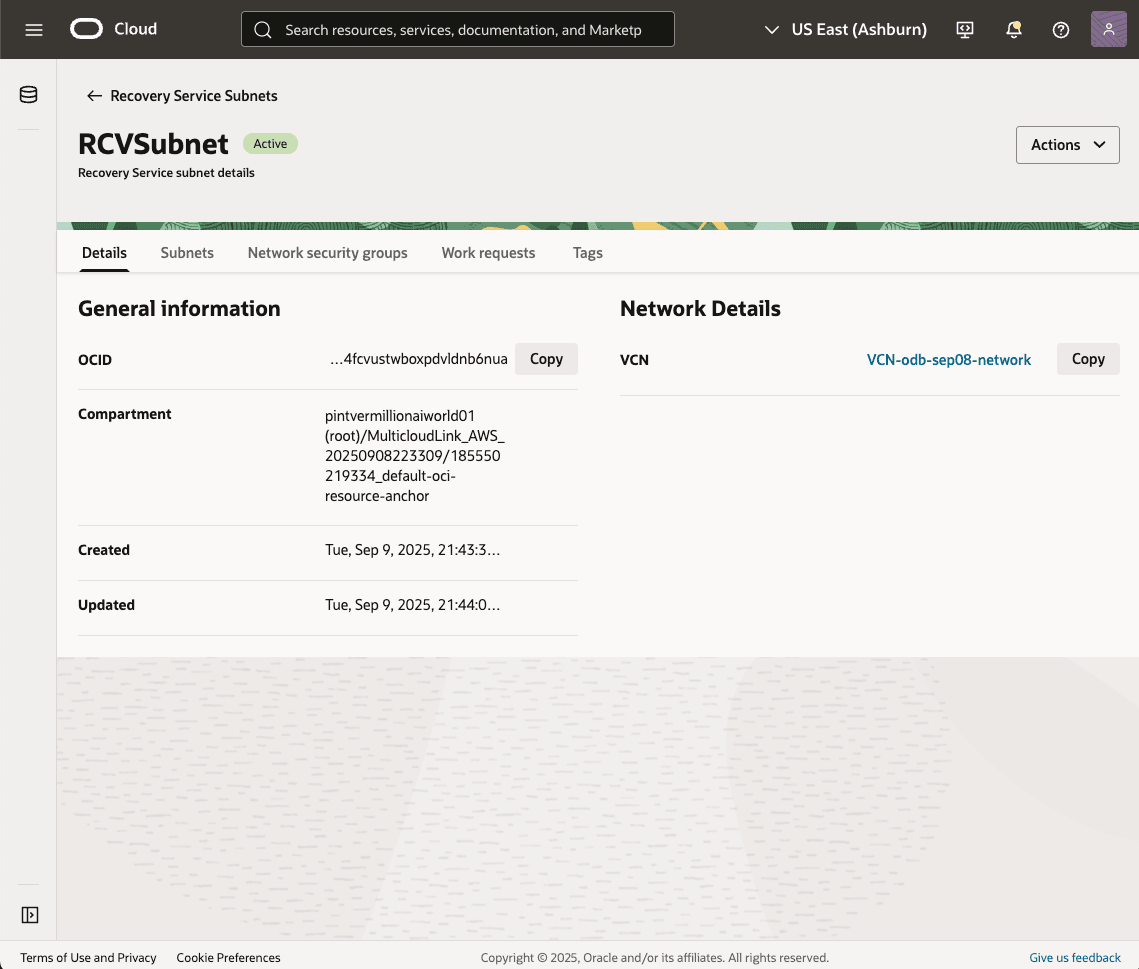
- From the Recovery Service Subnets section, and then select the Register Recovery Service subnet button.
- Enter a descriptive Name for your recovery service subnet.
- From the dropdown list, select the Compartment where the recovery service subnet will be created.
- Select the Virtual cloud network in compartment from the list.
- Select Virtual cloud network used by the VM Cluster and the Backup Subnet.
- Expand the Advanced options section, and then enable the Use network security groups to control traffic option.
- Select the Backup network security group of the VM cluster that you are using.
- Once you complete, select the Register button.
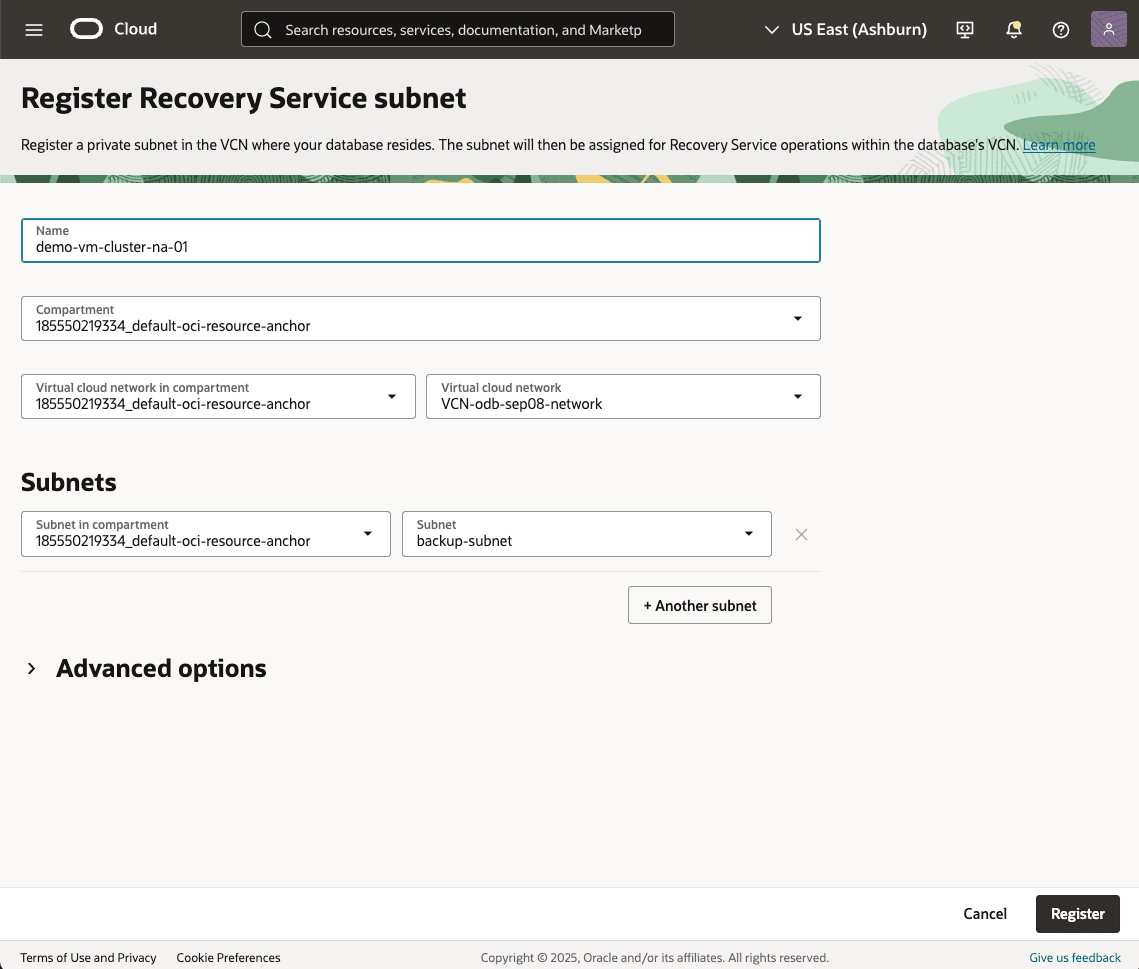
- If it is successful, the State of Recovery Service subnet will change to Active.
- In the VM Cluster Information tab, right-click the link next to Backup network security groups, and open it in a new browser tab.
- Navigate to the Security rules tab.
- Add stateful ingress rules to allow access from the entire CIDR range of the VCN where the database resides, permitting all source ports to destination ports 2484 and 8005.
- Add egress rules to allow access to destination ports 2484 and 8005 from the full CIDR range of the VCN where the database resides.

For more information, see Configuring Network Resources for Recovery Service.
- If your ODB network is created after Autonomous Recovery Service GA date, then the automation generates the Autonomous Recovery Service network configuration requirements.Note
In existing tenancies, newly created ODB Networks are automated
Create Autonomous Recovery Service Protection Policy(s) with locality enforcement
- Navigate to Oracle Database, select Database Backups, and then select the Protection policies.
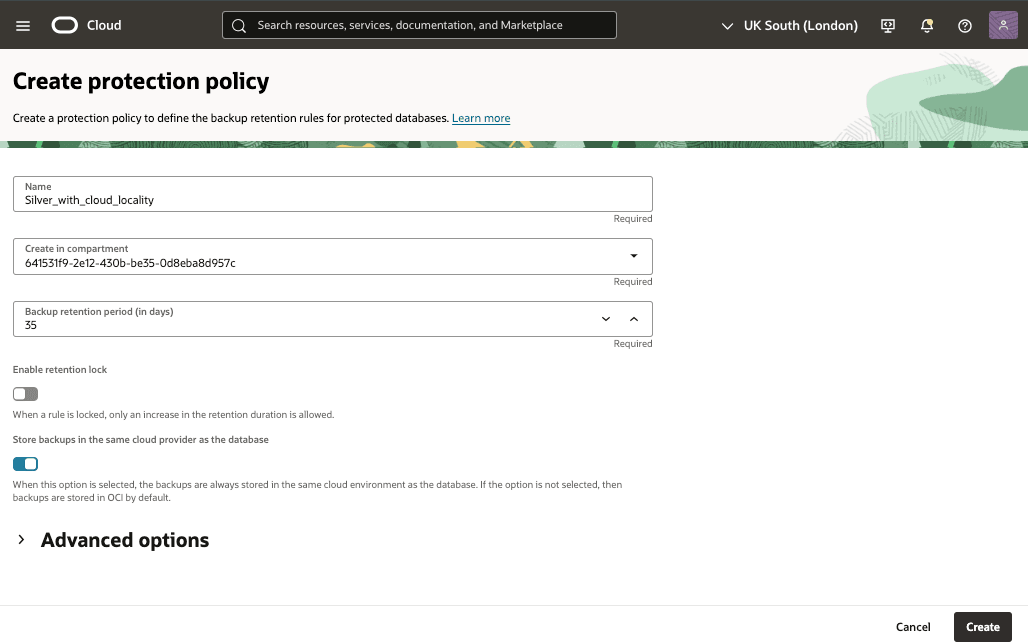
- To create protection policies, select the Create protection policy, and then complete the following substeps.
- Enter a descriptive Name for your protection policy.
- Select the Create in compartment from the list.
- Select your desired backup retention period from the Backup retention period ( in days) list.
- Enable the retention lock option if it is required.
- Enable the Store backups in the same cloud provider as the database option if you want to store the backups in AWS.
For more information, see Protection Policy(s) with locality enforcement.