Exascale Database
Creating an Exascale VM Cluster is a prerequisite for creating an Exascale Database.
Exascale Database creation is only available through the OCI Console and OCI CLI. To navigate to the OCI Console, complete the following steps:
-
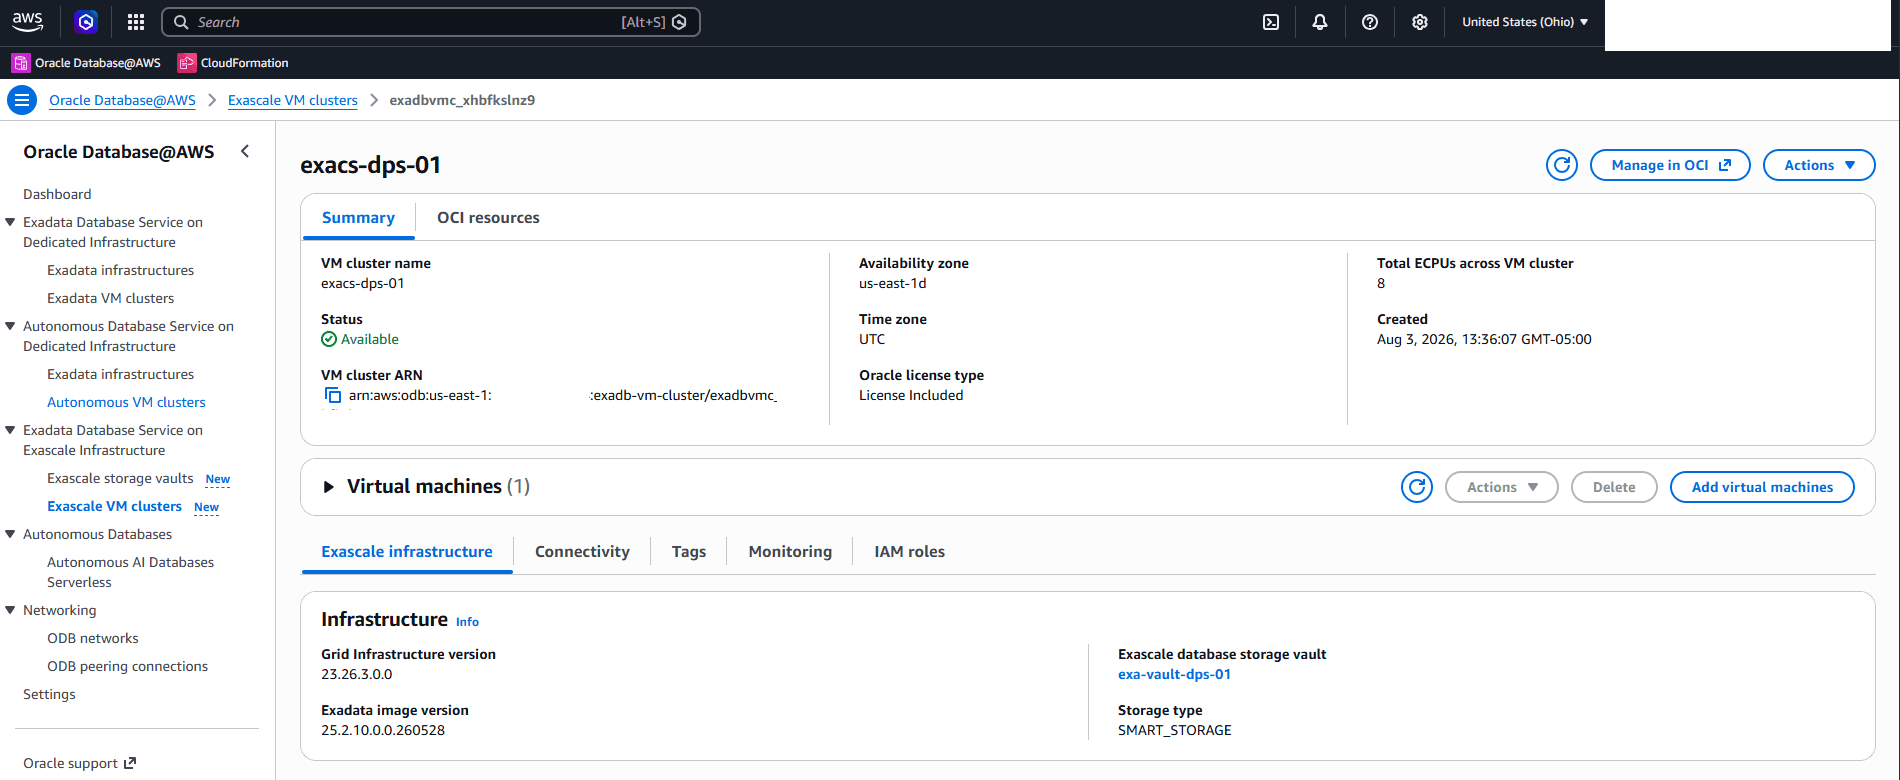
From the Oracle AI Database@AWS dashboard, select Exadata Database Service on Exascale Infrastructure and then select Exascale VM clusters.
-
Select your Exascale VM Cluster that you are using.
-
From the Summary page, select the Manage in OCI button which allows you to manage your Exascale VM Cluster in OCI.
-
Subsequent steps for creation of Exascale Database are performed through the OCI Console.
-
Complete the following steps to create a Container Database.
-
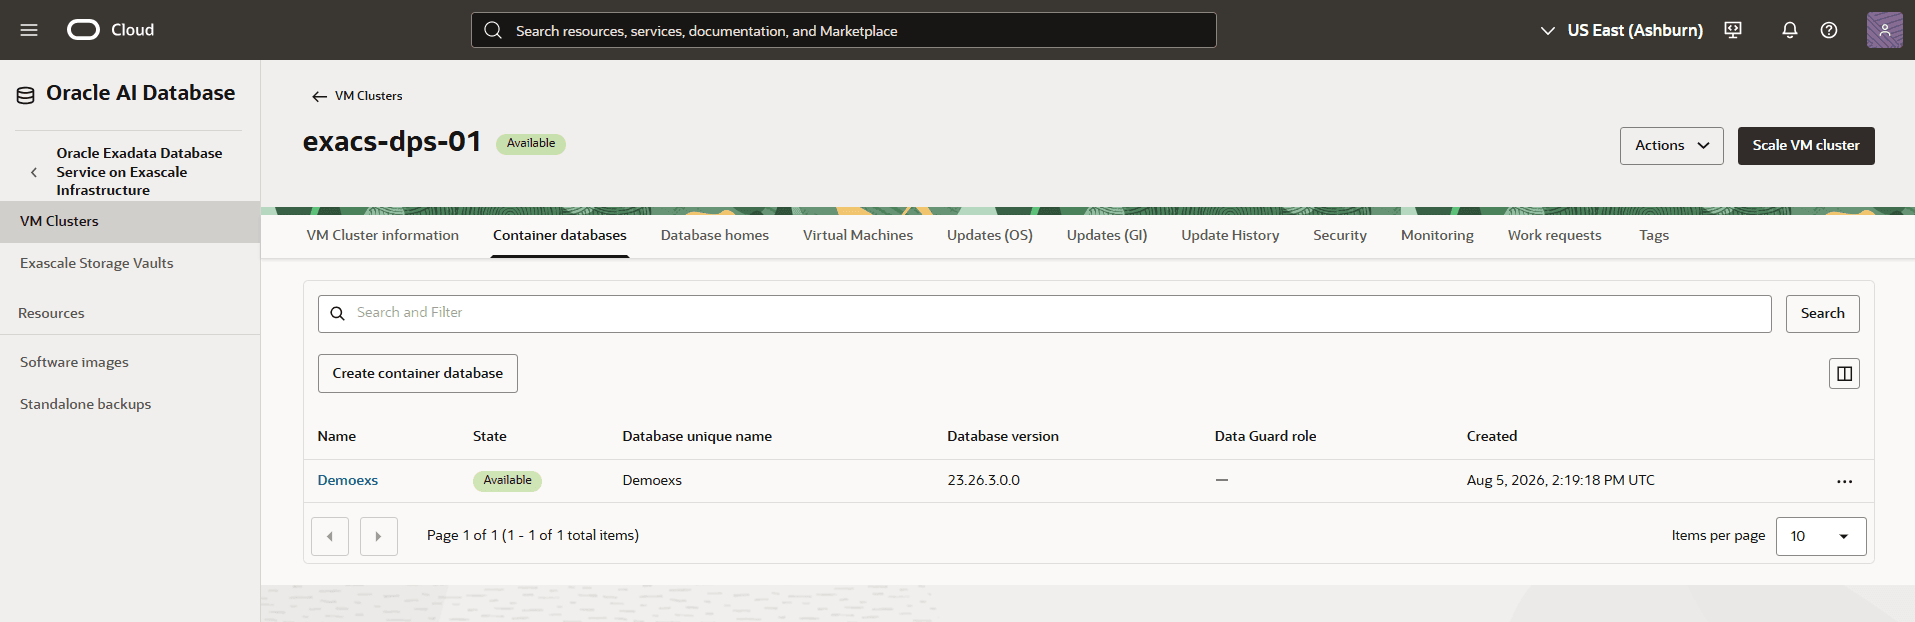
From the OCI console, select the Container databases tab and then select the Create container database button.
-
From the Create container database page, complete the following steps:
-
Enter a Database name. The database name can contain alphanumeric characters and cannot exceed 8 characters.
-
Enter an unique name for your Container Database in the Database unique name. The value must be unique within the VM Cluster. The value can contain up to 30 characters. If you don not specify a value, the system automatically generates a database unique name.
-
Enter a PDB name. The PDB name must be unique within the VM Cluster.
-
From the dropdown list, select your Database release.
-
For your Database Home source, there are two available options. These options are Create a new Database Home and Select an existing Database Home. Based on your requirements, make a selection.
-
Select an existing Database Home:If you choose this option, select your existing Database Home from the dropdown list.
-
Create a new Database Home: If you choose this option, enter a value in the Database Home display name field.
-
Enable Unified Auditing if you need to combine all database components audit trails into a single unified audit trail.
-
The Database image option allows you to change pre-configured Oracle AI Database software version makes software installation quicker and easier. Select the Change database image button to choose either Oracle Database Software Images or Custom Database Software Image.
-
-
-
Enter your Password and Confirm password. The Username is fixed as sys. You can add additional users later. The password must be 9 to 30 characters and contain at least 2 uppercase characters, 2 lowercase characters, 2 numeric characters, and 2 special characters. The special characters must be an underscore (_), a number sign (#), or a hyphen (-).
-
Note
Select the Use the administrator password for the TDE wallet toggle to use the administrator password for the TDE wallet. Note: If you are going to use customer-managed keys (CMEKs) stored in a vault, the TDE wallet does not apply.
-
-
the Enable automatic backups toggle is enabled by default. This option enables you to have automatic incremental backups for your database.
Note
Note: Automatic backup is the preferred method for backing up Oracle Cloud databases. -
From the Database backups section, you can configure the database backup(s). You can also configure this option after creating database. The backup options include:
1. **Autonomous Recovery Service (Recommended)**: You must complete the [Prerequisites](/iaas/Content/database-at-azure/azubr-backup-and-restore-prerequisites.html) steps before creating an Exascale Database. Choose **compartment** for policies and **protection policy** configured for backup retention and protection levels. The protection policy specifies the location for storing backups in OCI or AWS. You must ensure that the backup storage location is set to your desired choice. 2. **Object Storage**: This option allows you to store database backup at OCI Object Storage. For more information, see [configuration](/iaas/exadatacloud/doc/ecs-managing-db-backup-and-recovery.html#ECSCM-GUID-41586B8E-FF2F-44B7-827B-D9122289C8AE). - Select the **Backup retention period** from the dropdown list. You can change the backup retention period after provisioning. - From the **Scheduled day for full backup** section, choose a day of the week for the initial and future backups to start. - From the **Scheduled time for full backup** dropdown list, select the time window when the full backups start. - From the **Scheduled time for incremental backup** dropdown list, select the time window when the incremental backups start. 10. If you want to take your first backup immediately, select the **Take the first backup immediately** button.-
The Encryption section provides three options. These options include Oracle Wallet and OCI Vault.
-
The TDE wallet password field is optional to configure with Oracle Wallet encryption key management. If you want to use the administrator password for TDE wallet, enable the TDE wallet password toggle button.
-
Expand the Advanced options section, and complete the following substeps:
- Enter your Oracle SID prefix.
Note
Note: The Oracle Database instance number is automatically added to the SID prefix to create theINSTANCE_NAMEdatabase parameter.-
The Character set field is selected as
AL32UTF8. -
The National character set field is selected as
AL16UTF16. -
The Encryption section provides two options. These options include Use Oracle-managed keys and Use customer-managed keys.
-
The Tags section allow you to organize resources. If you want to add a tag, select Add tag button. Select your Namespace from the dropdown list, enter your Key and Value.
-
Select the Create button to complete the process.
-
-
Once your database is created, the Status changes from Provisioning to Available.
Complete the following steps to create a Pluggable Database.
-
From the OCI console, select the Container databases tab and then select the database that you are using.
-
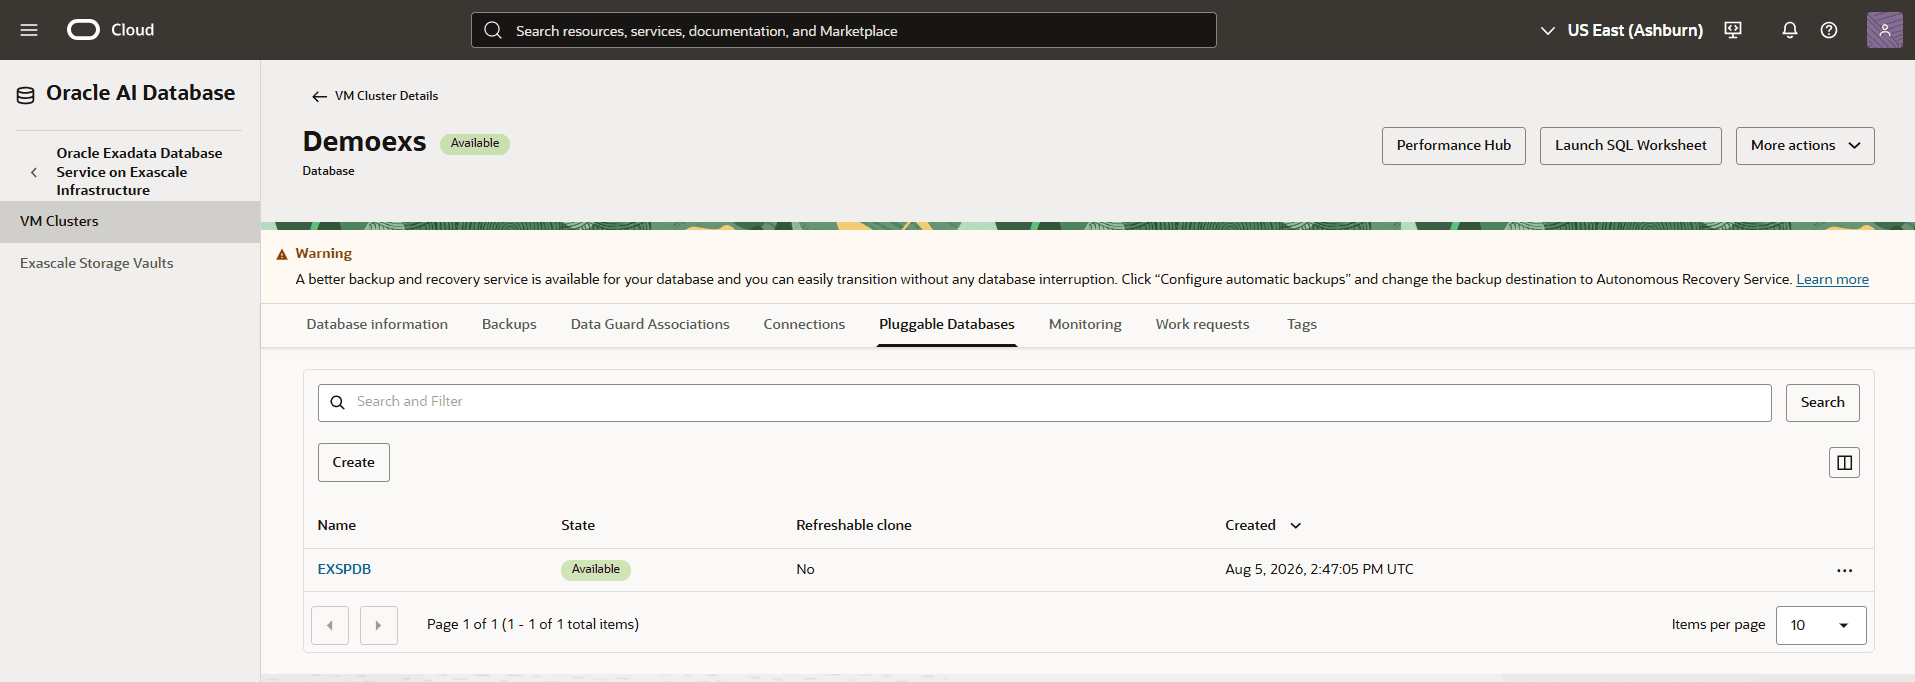
Select the Pluggable Databases tab, and then select the Create button.
-
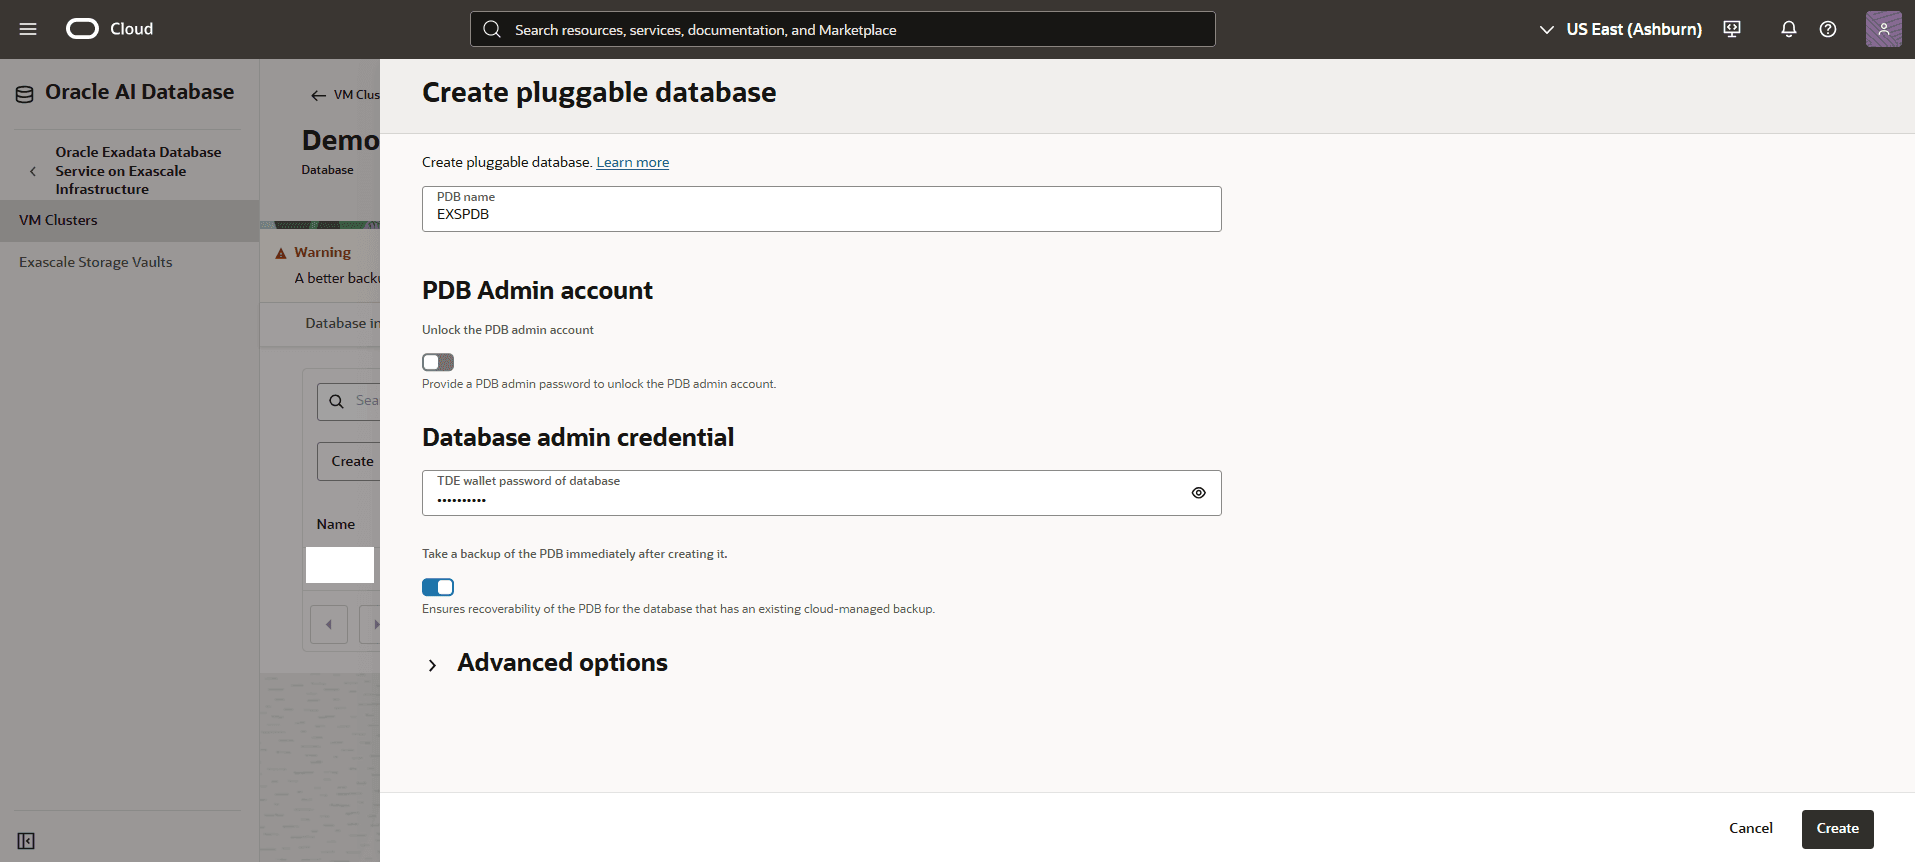
From the Create pluggable database page. complete the following steps:
-
Enter a name for the Pluggable Database. The PDB name must begin with an alphabetic character.
-
The PDB Admin account section is optional. Select this option to specify a PDB Admin password and configure the PDB to be unlocked at creation.
-
Enter a password for PDB Admin password. The PDB Admin password must contain the following:
-
A minimum of 9 and a maximum of 30 characters
-
At least two uppercase characters
-
At least two lowercase characters
-
At least two special characters. The valid special characters are: underscore ( _ ), a hash sign (#), and a dash (-).
-
At least two numeric characters (0 - 9)
-
-
Enable the Take a backup of the PDB immediately after creating it toggle to auto-backup on the CDB to back up a PDB immediately after creating it. This check box is checked by default if auto-backup was enabled on the CDB.
-
The Advanced Options section is optional.
-
Review your information, and then select the Create button.
-
-
Once the Pluggable Database is created, the State field changes to Available.
-
Exascale Database creation is only available through the OCI Console and OCI CLI.
There is currently no content for this page. Oracle AI Database@AWS team intends to add content here, and this placeholder text is provided until that text is added. The Oracle AI Database@AWS team is excited about future new features, enhancements, and fixes to this product and this accompanying documentation. We strongly recommend you watch this page for those updates.
There is currently no content for this page. Oracle AI Database@AWS team intends to add content here, and this placeholder text is provided until that text is added. The Oracle AI Database@AWS team is excited about future new features, enhancements, and fixes to this product and this accompanying documentation. We strongly recommend you watch this page for those updates.