Autonomous Database
To modify an existing Autonomous Database, follow these steps.
Manage an Autonomous Database
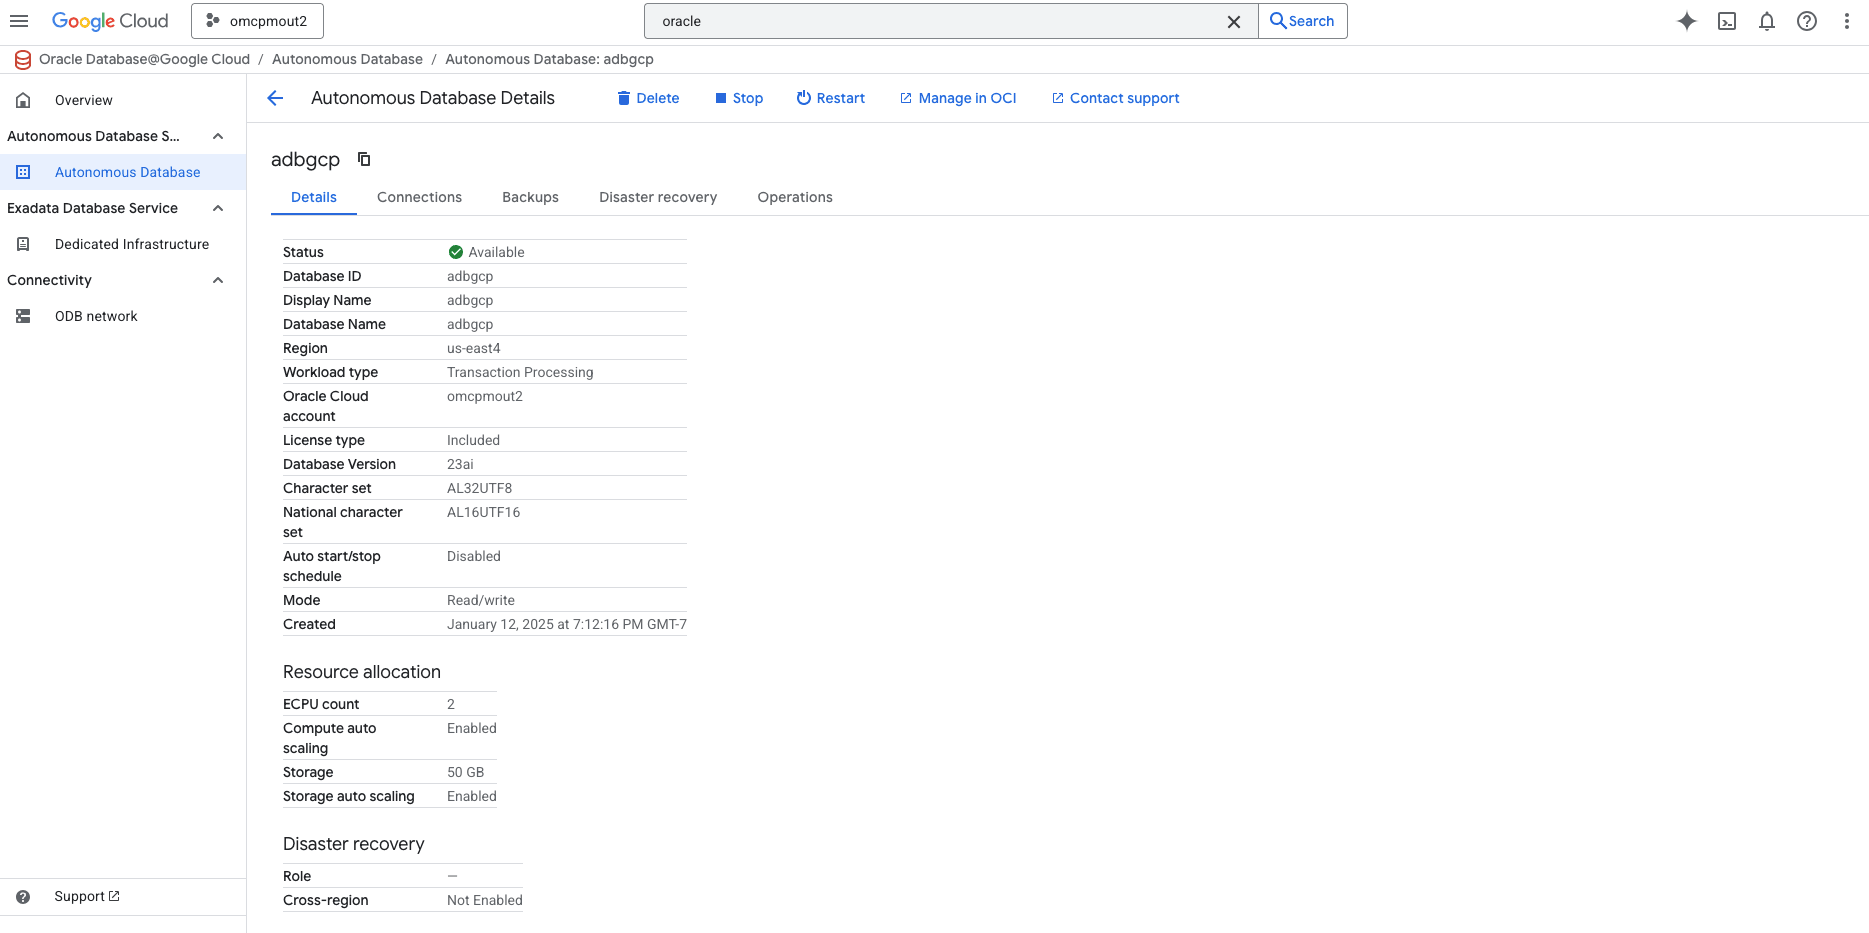
- From the Oracle Database@Google Cloud dashboard , select Autonomous Database Service > Autonomous Database from the left-menu.
- Select the Autonomous Database from the list.
- Select the Manage in OCI link.
Switchover
Switchover is a planned transition from the primary database to standby database with no data loss. This operation is typically used for maintenance, testing, or proactively shifting the workloads.
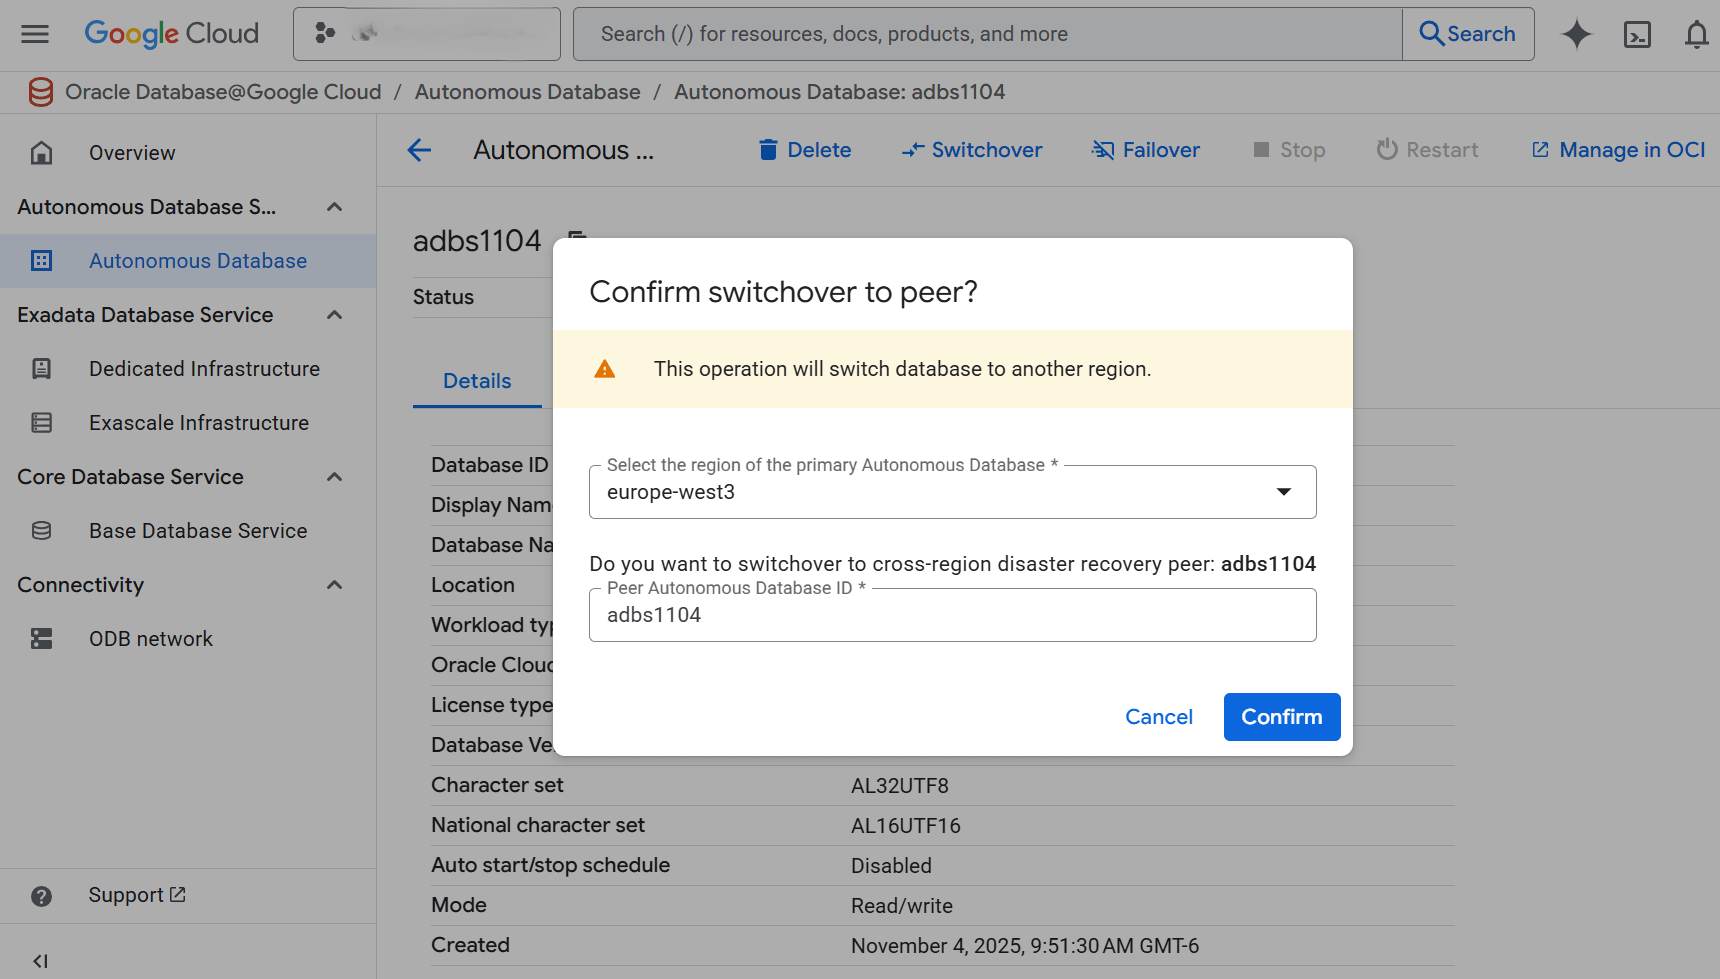
These are the steps to perform a switchover of your Autonomous Database from the Oracle Database@Google Cloud dashboard.- Select Autonomous Database Service > Autonomous Database from the left-menu.
- Select your Standby Autonomous Database.
- Select the Switchover button.
- From the Select the region of the primary Autonomous Database drop-down list, select the region of the primary Autonomous Database.
- Enter your Autonomous Database ID in the confirmation field.
- Select the Confirm button to save your changes.
- Navigate back to the Autonomous Databases list to check the Status of your Autonomous Database.
Failover
A failover is an unplanned operation that promotes the standby database to primary when the original primary becomes unavailable, which may result in data loss depending on the outage and data replication status. You should perform a switchover first and perform a failover when a switchover can not be completed such as in the event of a system failure or unplanned outage.
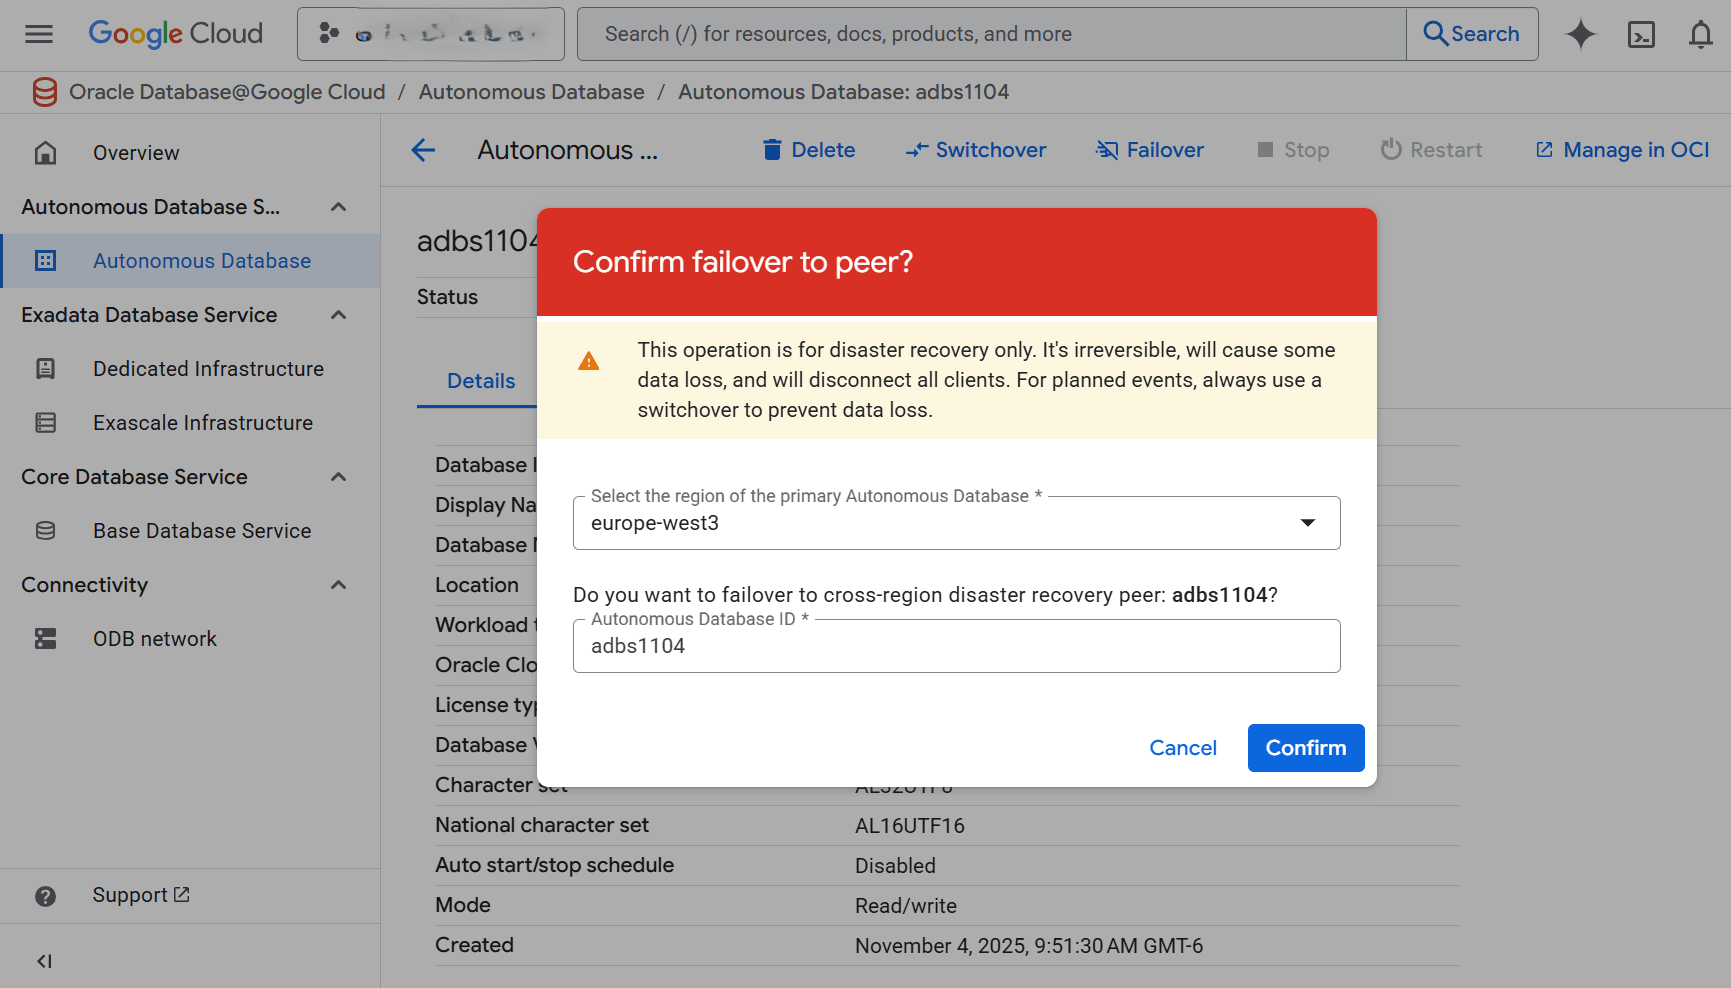
These are the steps to perform a failover of your Autonomous Database from the Oracle Database@Google Cloud dashboard.- Select Autonomous Database Service > Autonomous Database from the left-menu.
- Select your Standby Autonomous Database.
- Select the Failover button.
- From the Select the region of the primary Autonomous Database drop-down list, select the region of the primary Autonomous Database.
- Enter your Autonomous Database ID in the confirmation field.
- Select the Confirm button to save your changes.
Note
This operation is for disaster recovery only. It's irreversible, will cause some data loss, and will disconnect all clients. For planned events, always use a switchover to prevent data loss.
- Navigate back to the Autonomous Databases list to check the Status of your Autonomous Database.
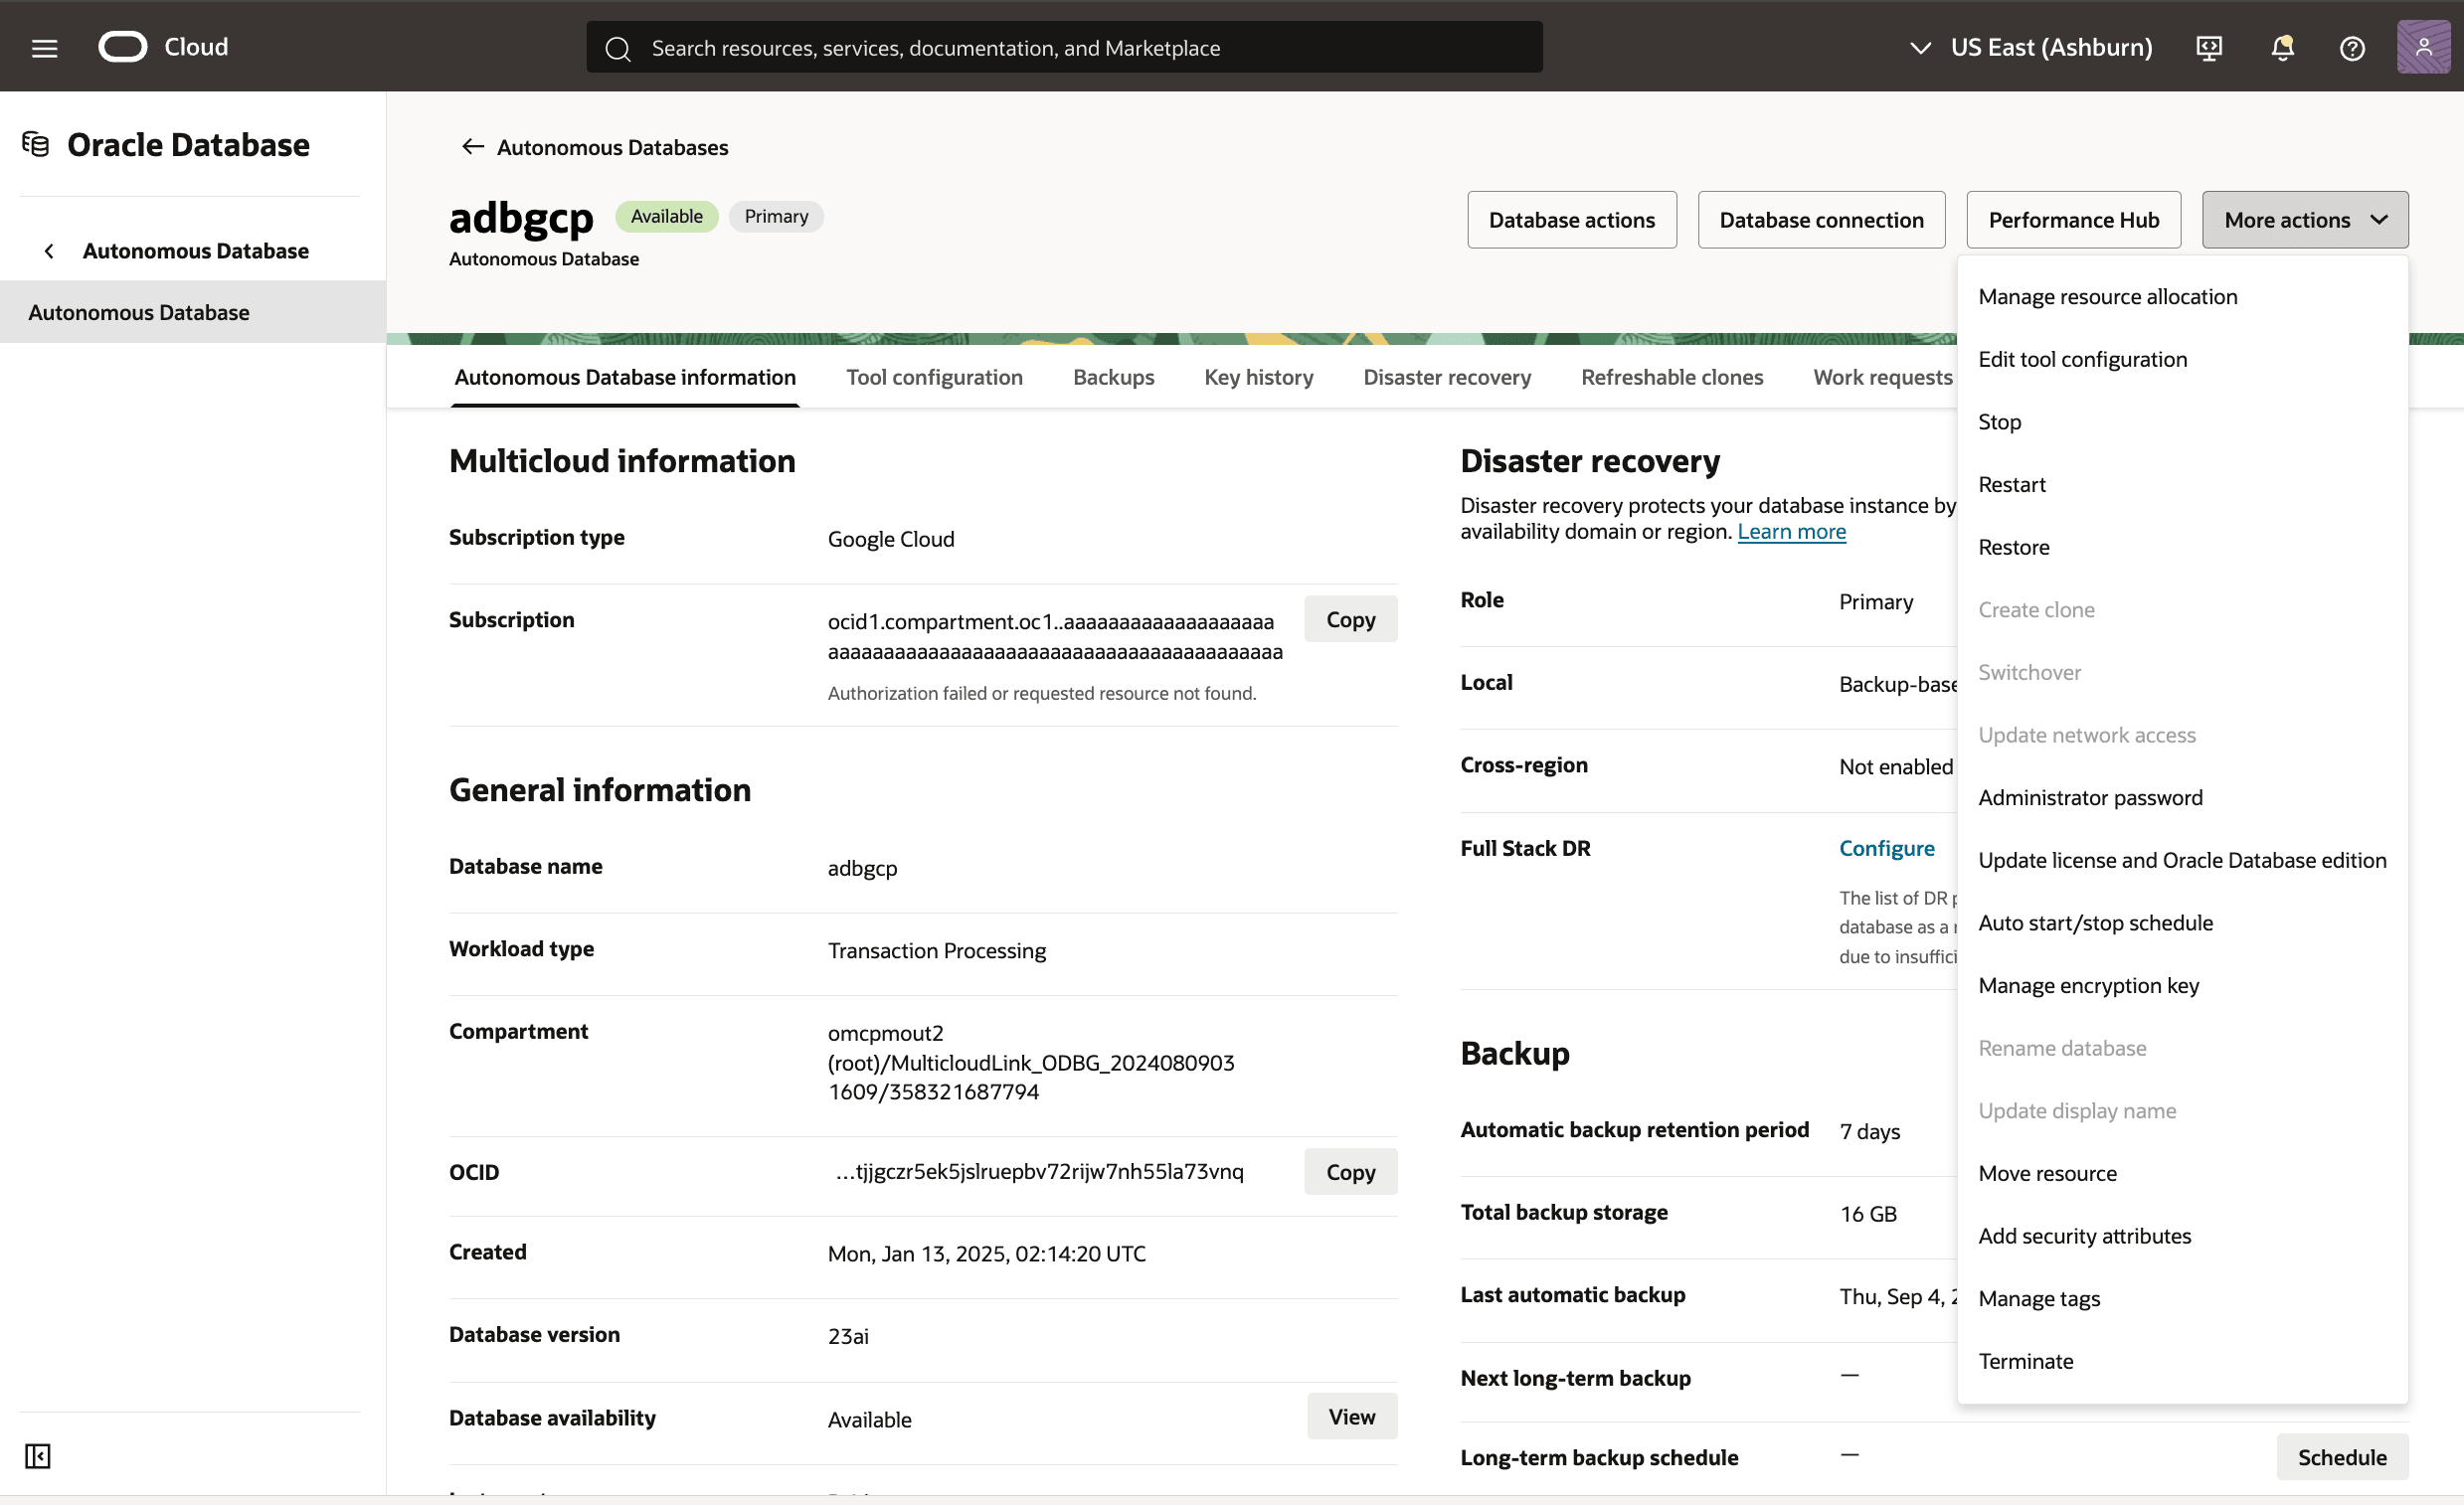
- To manage resource allocation, in the OCI console for the selected Autonomous Database, select the More actions button and the Manage resource allocation item from the menu. From the Manage resource allocation page, you can change the following options.
- In the Resources section, you can change the following.
- In the ECPU count field, you can enter a value.
- The Compute auto scaling checkbox enables or disables compute auto scaling as needed.
- In the Storage section, you can enter the following.
- In the Storage field, you can enter a value.
- In the Storage unit size drop-down, you can select GB or TB as needed.
- The Storage auto scaling checkbox enables or disables storage auto scaling as needed.
- The Allocated and Available fields are read-only calculated values.
- The Shrink button allows you to reduce the current Allocated storage of your database after you have deleted a significant amount of data. For more information, see Shrink Storage
- The Elastic pool checkbox enables or disables elastic storage if you have enabled it on your Autonomous Database. If it has not been enabled, this checkbox is unavailable.
- Select the Apply button to continue.
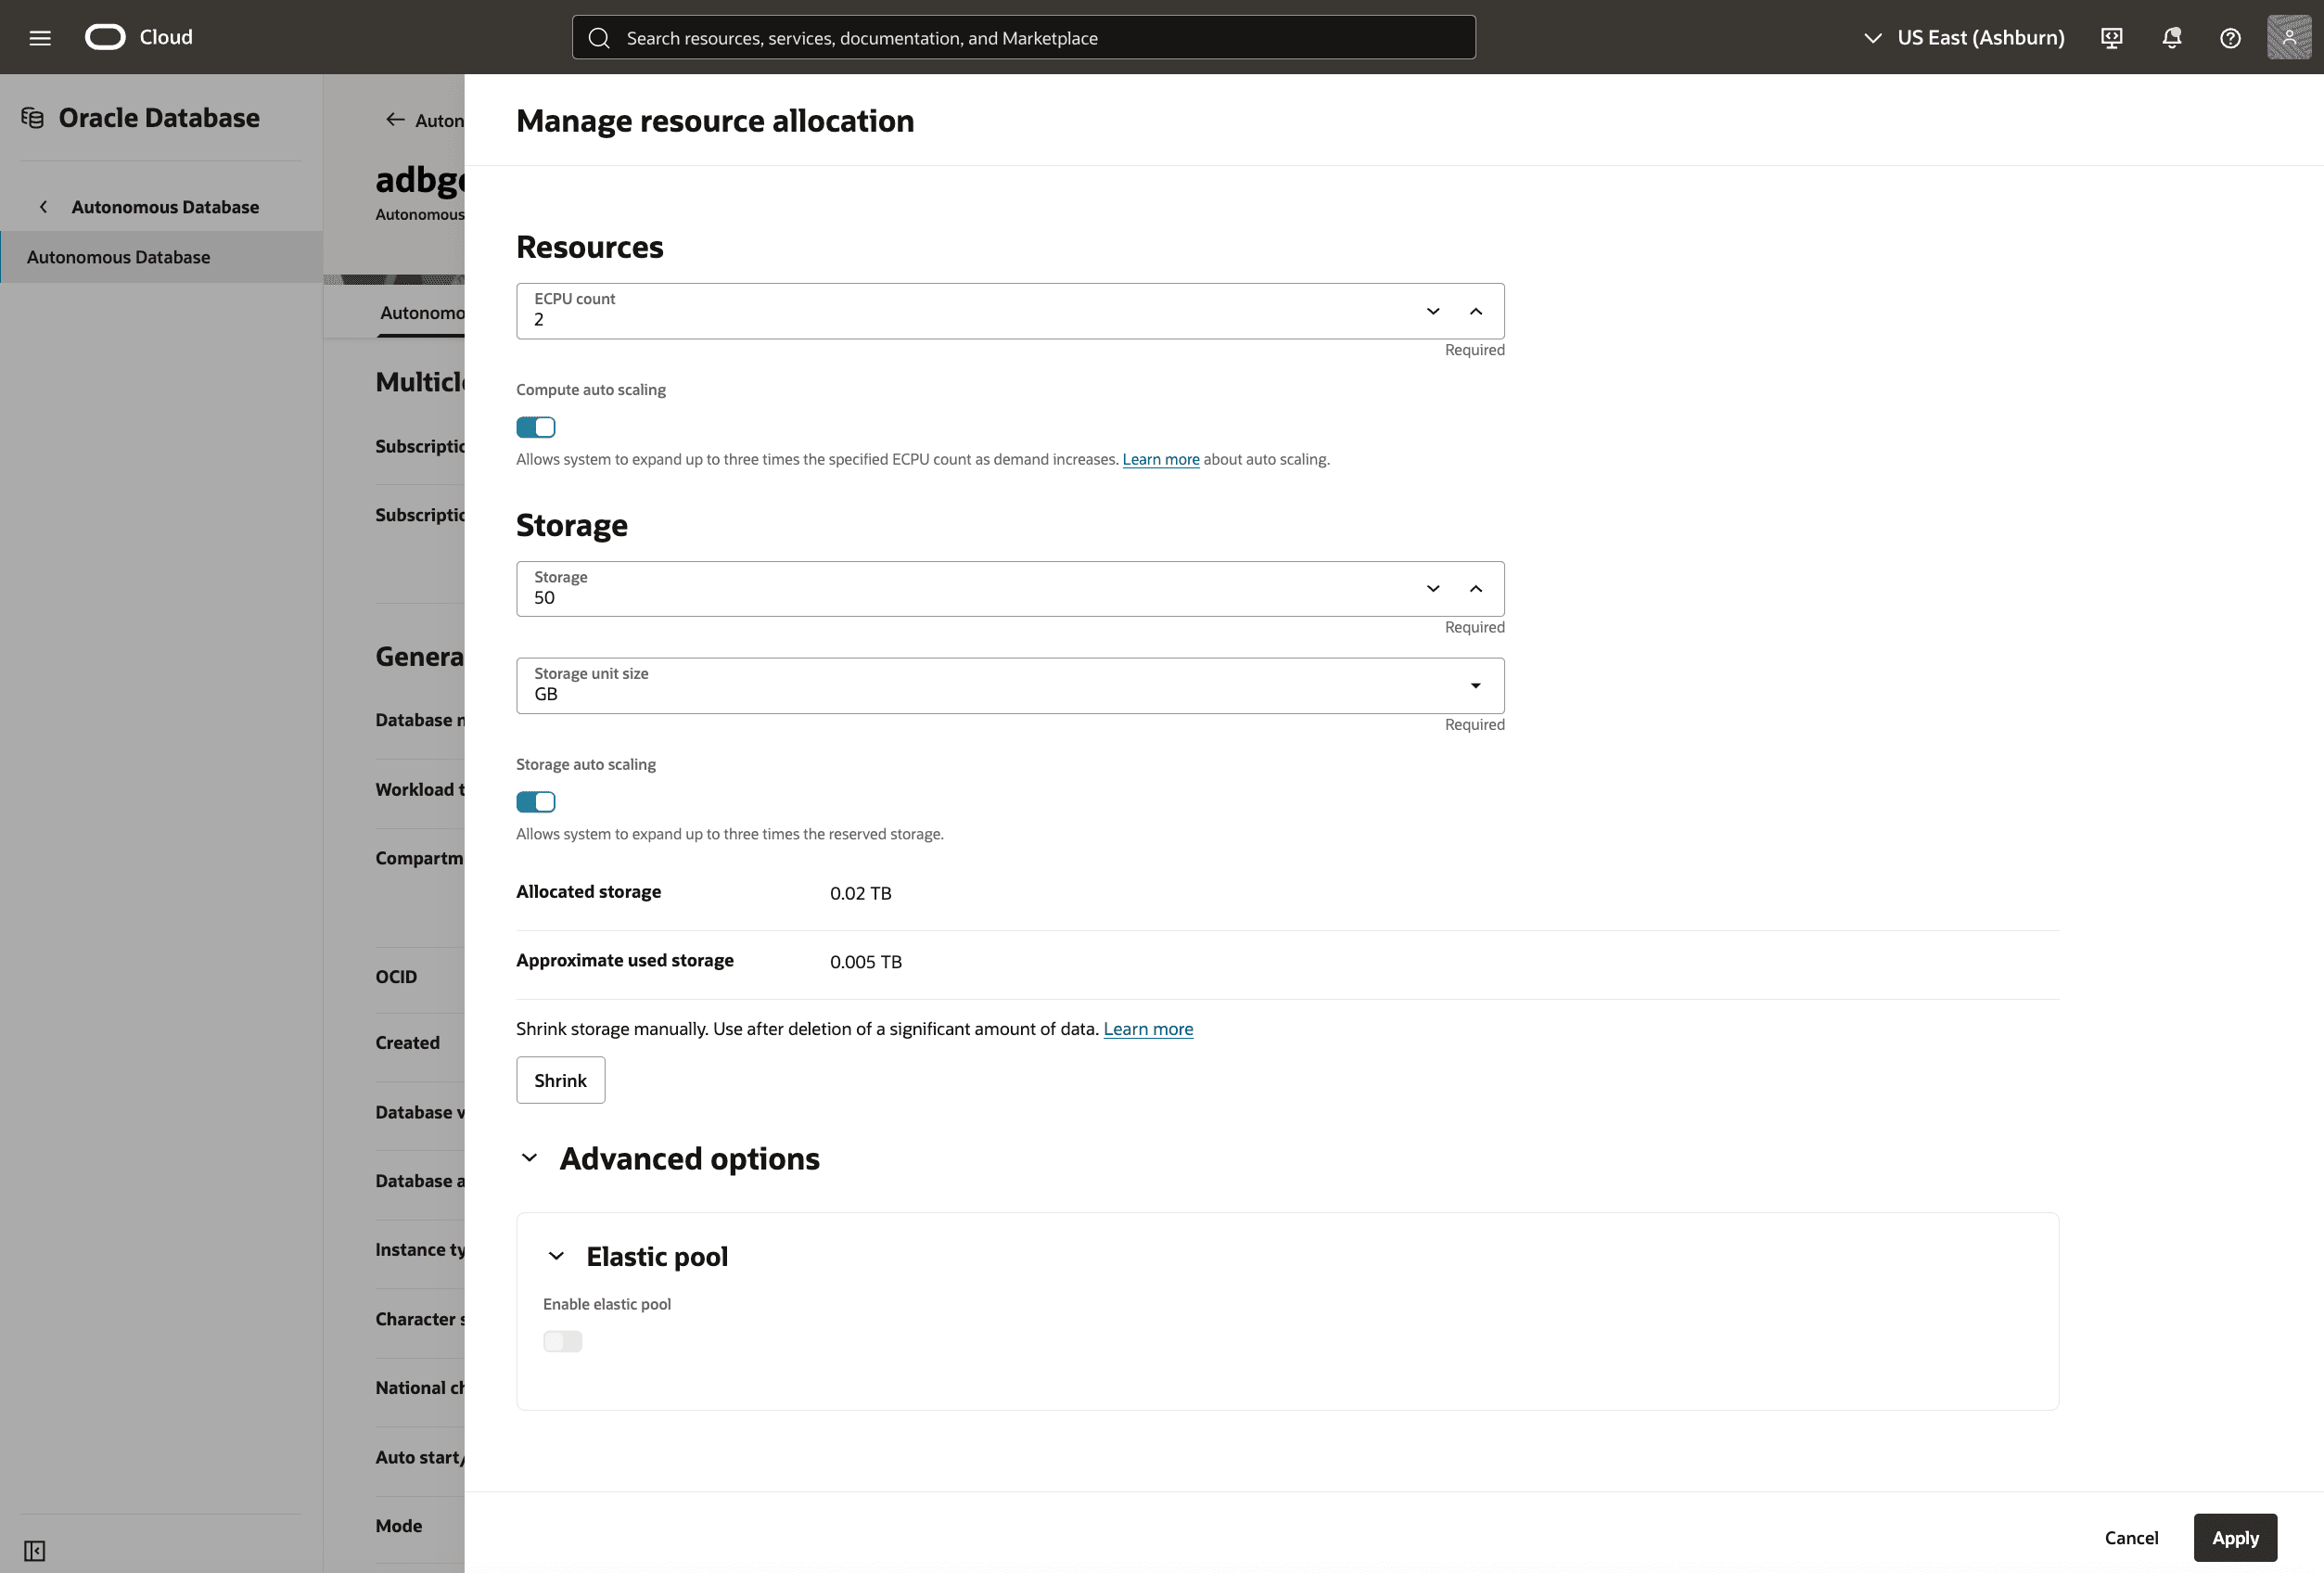
- In the Resources section, you can change the following.
- To configure the available tools, in the OCI console for the selected Autonomous Database, select the Actions button and the Edit tool configuration item from the menu. From the Configure tools page, you can change the following options.
- All of the Autonomous Database tools have checkboxes allowing you to enable or disable the tool, including Graph studio, Oracle Machine Learning user interface, Data Transforms, and Data Lake Accelerator.
- Some of the Autonomous Database tools have an ECPU count field that allows you to control the number of ECPUs assigned to that tool, including Oracle APEX, Database actions, Graph studio, Oracle Machine Learning user interface, Data Transforms, Web Access (ORDS), MongoDB API, and Data Lake Accelerator.
- Some of the Autonomous Database tools with ECPU count fields also have an Maximum idle time (Minutes) field that allows you to control the time, in minutes, after which an idle process for that tool will be terminated.
- Select the Apply button to continue.

- To change the adminstrator password, in the OCI console for the selected Autonomous Database, select the Actions button and the Administrator password item from the menu. From the Administrator password page, you can change the following options.
- The Password and Confirm password fields are used to change the password, and the same complexity and reuse rules apply as during Autonomous Database creation.
- Select the Change button to continue.

- To change the license type, in the OCI console for the selected Autonomous Database, select the Actions button and the Update license and Oracle Database edition item from the menu. From the Update license and Oracle Database Edition page, you can change the following options.
- The Bring Your Own License (BYOL) checkbox can enabled or disabled.
- If Bring Your Own License (BYOL) is enabled, you can select the Oracle Database edition. See the ECPU limits for each addition in the help text.
- If Bring Your Own License (BYOL) is enabled, you can enable or disable the Enable BYOL ECPU limit checkbox. BYOL ECPU limits allow you to control how many ECPUs will be covered by BYOL licenses.Use the limit when the number of BYOL licenses you bring may not be enough to cover all of the database ECPUs you have provisioned, including auto-scale, disaster recovery peers, and database tools.
- If Bring Your Own License (BYOL) and Enable BYOL ECPU limit are enabled, enter a value in the Number of ECPUs to be covered by BYOL
- Select the Save button to continue.

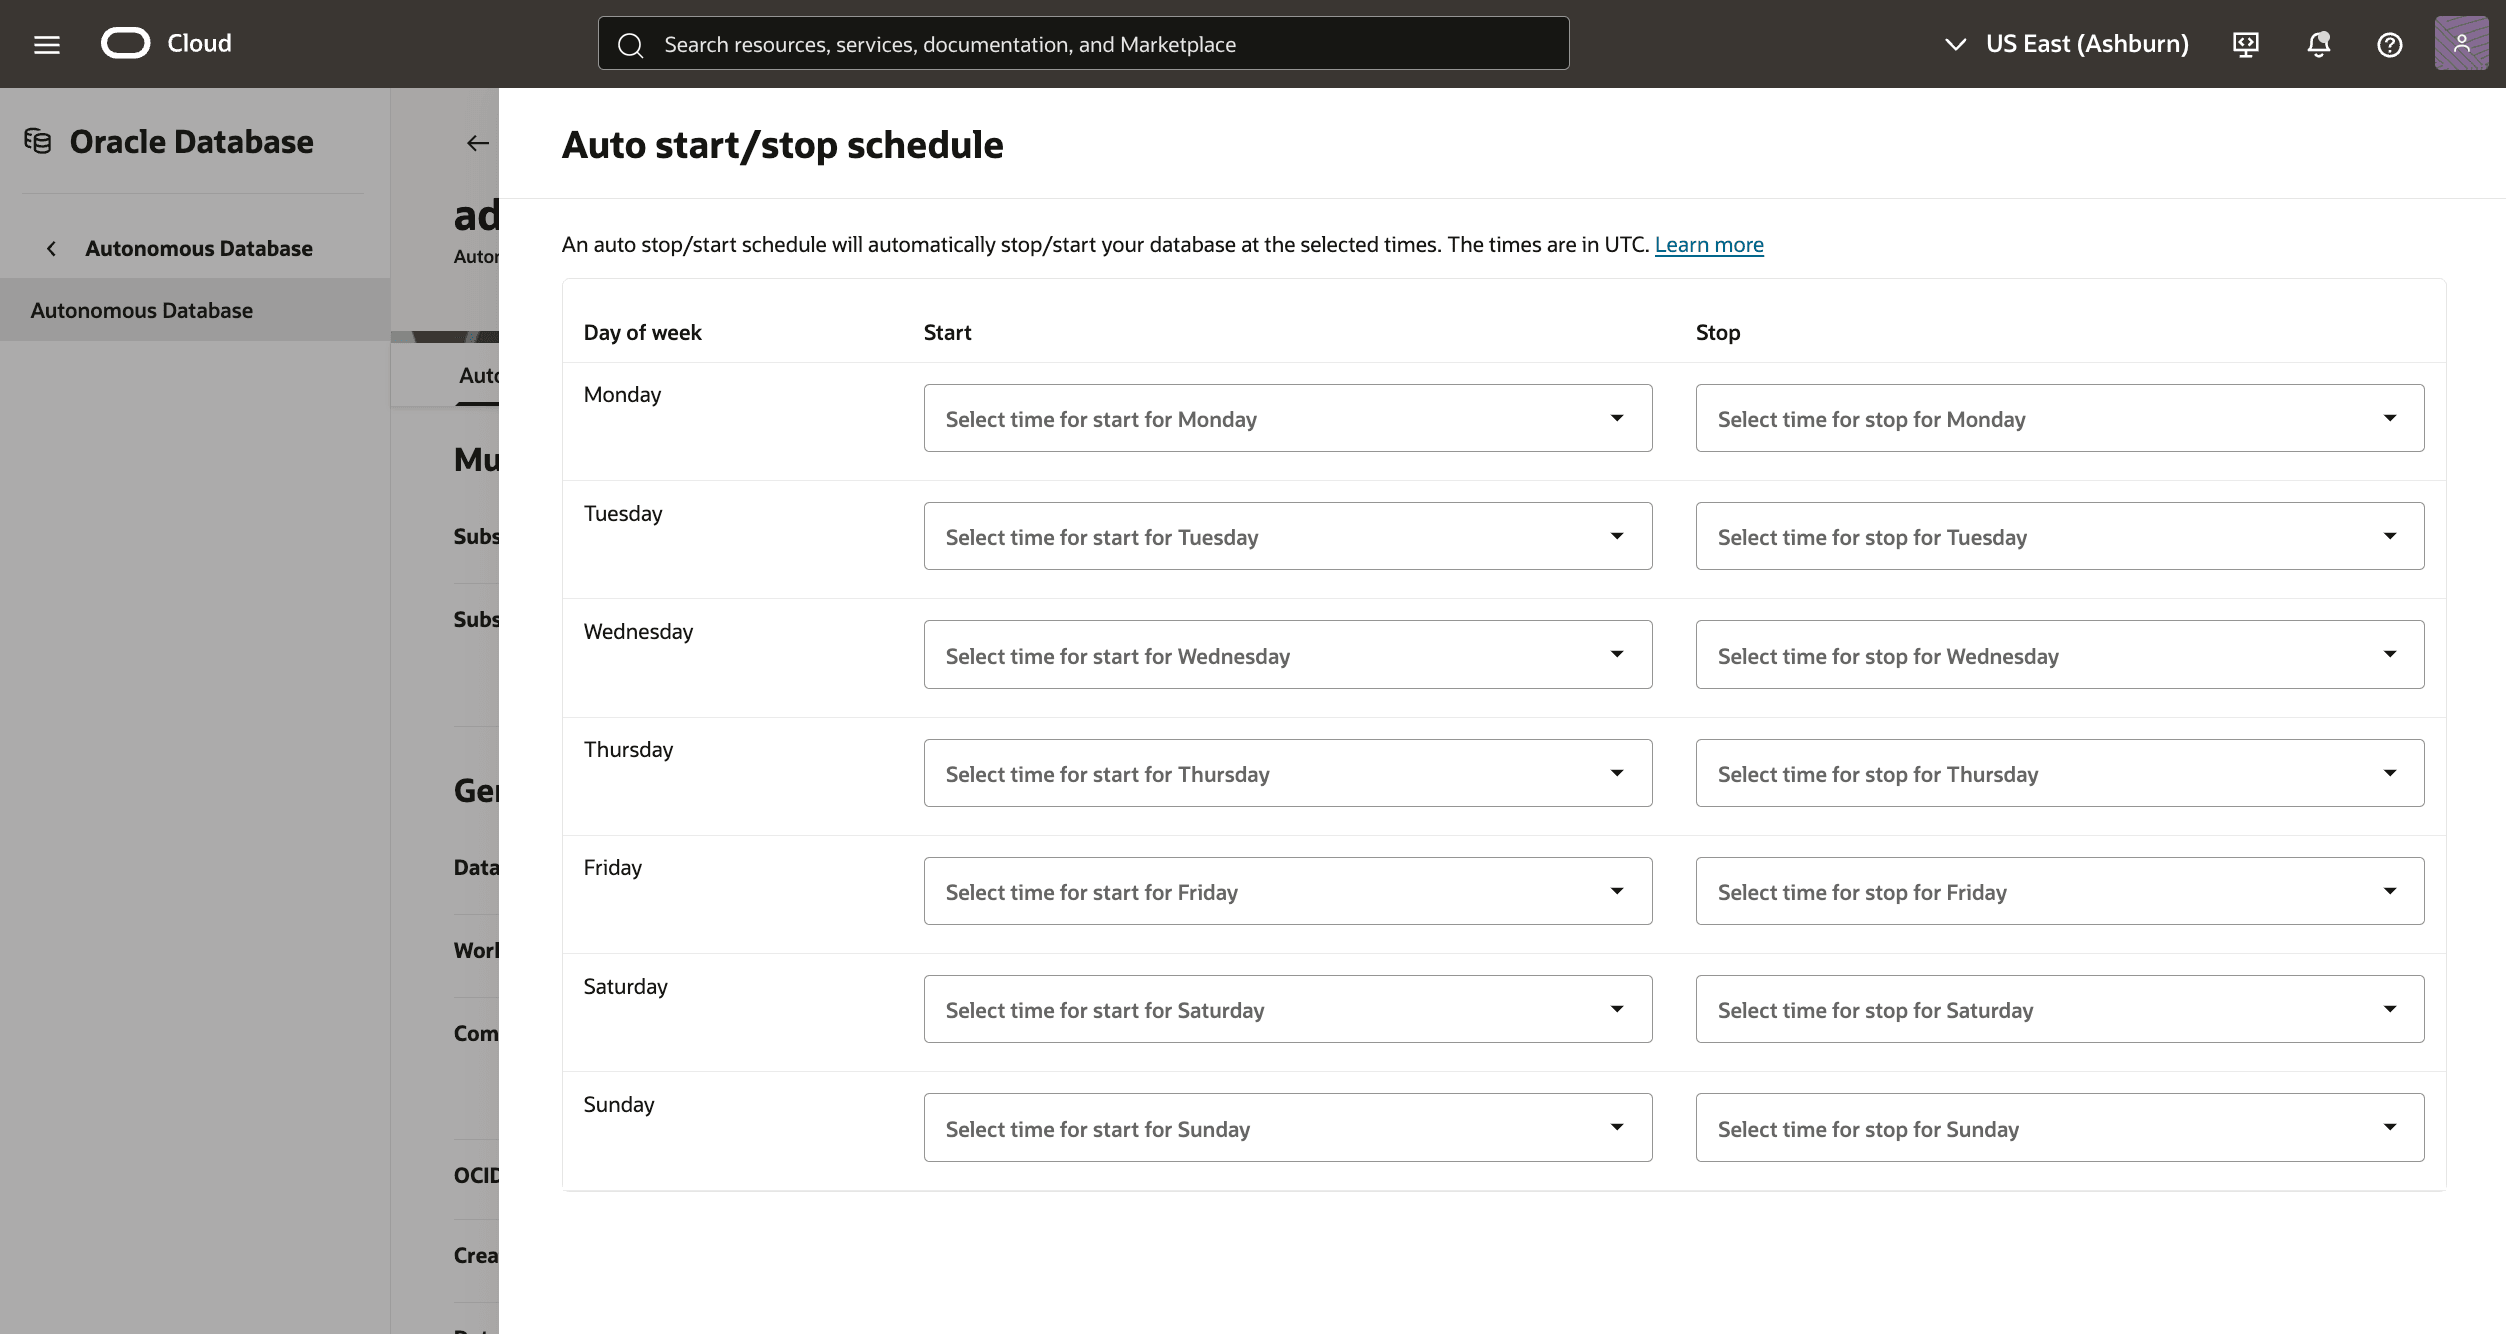
- To change the auto start/stop schedule, in the OCI console for the selected Autonomous Database, select the Actions button and the Auto start/stop schedule item from the menu. From the Auto start/stop schedule page, you can change the following options.
- There are fields for the Start and Stop time for each day of the week in one (1) hour increments.
- Select the Apply button to continue.
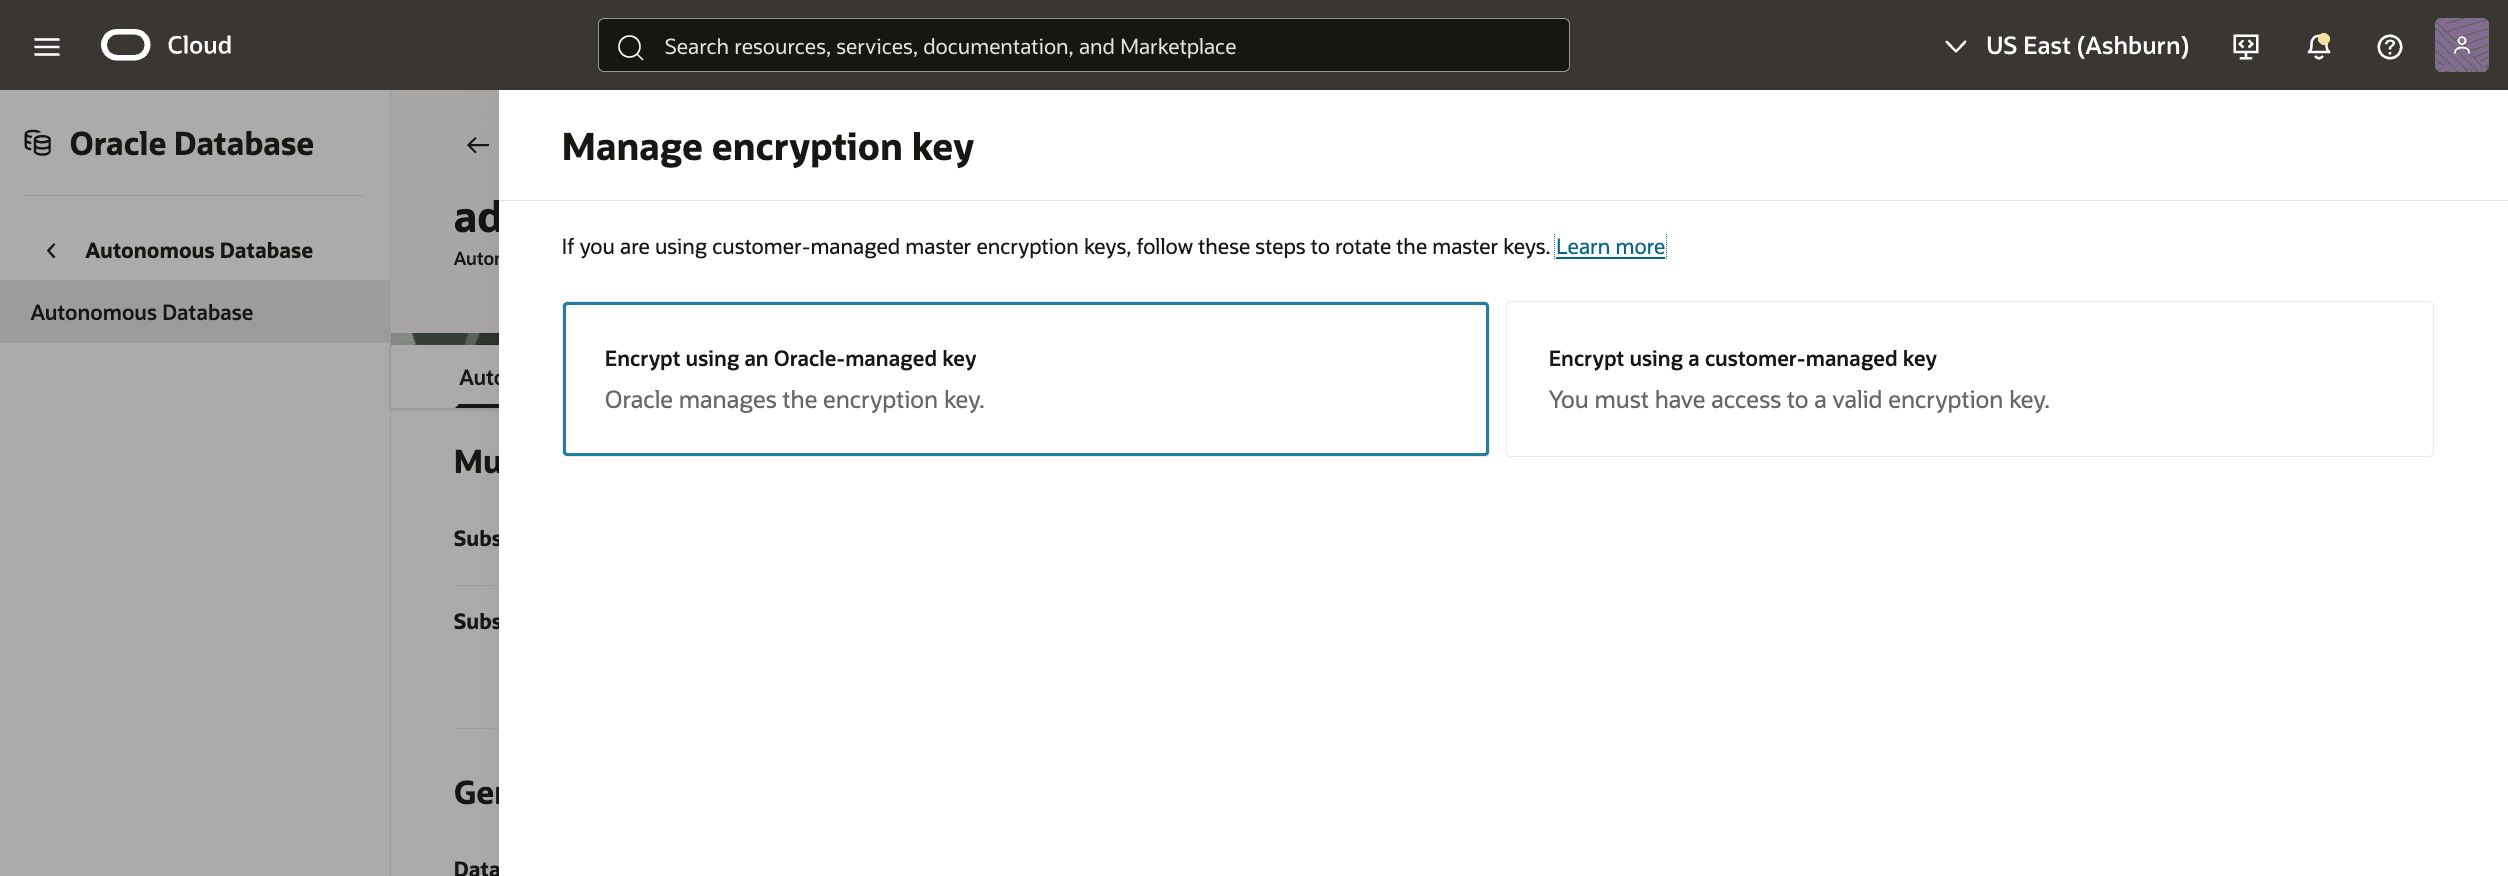
- To change encryption key, in the OCI console for the selected Autonomous Database, select the Actions button and the Manage encryption key item from the menu. By default, your Autonomous Database uses Oracle-managed encryption keys during creation. From the Manage encryption key page, you can change the following options.
- Select either Encrypt using an Oracle-managed key or Encrypt using an customer-managed key.
- If you select Encrypt using an customer-managed key, you see the Key type drop-down of available customer-managed options. Select the one you want to use.
- Depending on the option you select, there may be additional fields and values required by that encryption key management option. For more information, see Use Customer-Managed Encryption Keys with Vault Located in Local Tenancy, Use Customer-Managed Encryption Key Located in a Remote Tenancy, AWS Key Management Service, or About Azure Key Vault as required.
- Select the Save button to continue.
- To move a resource in your Autonomous Database, in the OCI console for the selected Autonomous Database, select the Actions button and the Move resource item from the menu. From the Move resource page, you can change following.
- The Move resource page shows the current compartment at the top. In the Destination compartment enter a new compartment. You cannot move resources to the same compartment.
- Select the Move resource button when finished.

- To add security attributes to your Autonomous Database, in the OCI console for the selected Autonomous Database, select the Actions button and the Manage security attributes item from the menu. From the Manage security attributes page, you can change following.
- Select the Add security attribute button to add an attribute.
- The Namespace drop-down, the value should be selected if available. If not, for more information, see Zero Trust Packet Routing (ZPR)
- The Key and Value fields can be used needed.
- For more information on what you can do with tags, see Overview of Tagging.
- If you want to enter another tag, select the Add tag button.
- When you have added the tag(s) you want, select the Add button.

- To add a tag to your Autonomous Database, in the OCI console for the selected Autonomous Database, select the Actions button and the Add Tags item from the menu. From the Add Tags page, you can change following.
- The Namespace drop-down is a single value
None (free-form tag). - The Key and Value fields can be used needed.
- For more information on what you can do with tags, see Overview of Tagging.
- If you want to enter another tag, select the Add tag button.
- When you have added the tag(s) you want, select the Add button.

- The Namespace drop-down is a single value
- To manage resource allocation, in the OCI console for the selected Autonomous Database, select the More actions button and the Manage resource allocation item from the menu. From the Manage resource allocation page, you can change the following options.
There is currently no content for this page. Oracle Database@Google Cloud team intends to add content here, and this placeholder text is provided until that text is added. The Oracle Database@Google Cloud team is excited about future new features, enhancements, and fixes to this product and this accompanying documentation. We strongly recommend you watch this page for those updates.
There is currently no content for this page. Oracle Database@Google Cloud team intends to add content here, and this placeholder text is provided until that text is added. The Oracle Database@Google Cloud team is excited about future new features, enhancements, and fixes to this product and this accompanying documentation. We strongly recommend you watch this page for those updates.
There is currently no content for this page. Oracle Database@Google Cloud team intends to add content here, and this placeholder text is provided until that text is added. The Oracle Database@Google Cloud team is excited about future new features, enhancements, and fixes to this product and this accompanying documentation. We strongly recommend you watch this page for those updates.