Connect to Data Integration

Before you use Data Integration, a user with administrator privileges configures security and networking, and then creates workspaces for different data integration solutions, for example, staging, testing, and production scenarios.

In this tutorial, you:

  1. Create access policies for users who don't have administrative privileges.
  2. Create a workspace for the Data Integration resources that you create and use.
  3. Get the workspace OCID to create the policies you need to restrict access to that workspace.

Before You Begin

To create a Data Integration workspace, you must have the following:

  • An Oracle Cloud Infrastructure account with administrator privileges. Sign up for Oracle Cloud Infrastructure.
  • A compartment
  • A virtual cloud network (VCN) with at least one regional subnet
  • A group for users in charge of a workspace
  • Access to the Data Integration service.

1. Creating Access Policies

  1. Open the Oracle Cloud Infrastructure Console navigation menu and select Identity & Security. Then under Identity, select Policies.
  2. Under List scope, select the compartment you want to use for Data Integration.
  3. Click Create Policy.
  4. In the Create Policy panel, complete the following fields:
    1. For Name, enter a name without any spaces. You can use alphanumeric characters, hyphens, periods, and underscores only.
    2. For Description, enter a description to help other users know the purpose of this set of policies.
    3. In Policy Builder, use the manual editor to add the following statements, then click Create.
      allow group <group-name> to manage dis-workspaces in compartment <compartment-name>
      allow group <group-name> to manage dis-work-requests in compartment <compartment-name>
      allow group <group-name> to use virtual-network-family in compartment <compartment-name>
      allow group <group-name> to manage tag-namespaces in compartment <compartment-name>
  5. If you're enabling a private network for the workspace, repeat steps 1 through 4c to create the following policy at the compartment level:
    allow service dataintegration to use virtual-network-family in compartment <your_compartment>
  6. In the Console navigation menu, navigate to Networking, then Virtual Cloud Networks.
  7. In the Virtual Cloud Networks list, select <the VCN>.
  8. On <the selected VCN> page, in the Subnets list, select <the Subnet>.
  9. On <the selected Subnet> page, in the Subnet Information section, select the link next to Route Table.
  10. Click Add Route Rules.
  11. In the Add Route Rules panel, add a route rule to include the Service Gateway as its Target Type. The route rule ensures connectivity to other services such as Oracle Cloud Infrastructure Object Storage.

    For more information about recommended service gateways, see Network Configurations.

    Note

    Ensure that the Service Gateway Destination is set to All IAD Services in Oracle Services Network.

2. Creating a Workspace

  1. In the Oracle Cloud Infrastructure Console navigation menu, navigate to Analytics & AI. Under Data Lake, select Data Integration.
  2. Click Workspaces.
  3. Under List Scope, from the Compartment menu, select the compartment in which you created policies in the previous section.
  4. Click Create workspace.
  5. In the Create workspace panel, complete the fields as follows, and then click Create:
    1. For Name, enter a name without any spaces.

      You can only use alphanumeric characters, hyphens, periods, and underscores in the name.

    2. Under Network selection, leave Enable private network selected.
    3. Select the VCN and subnet where the data sources reside.
      Note

      These are the networks where the source and target data sources that you're using are located. If the source and target data sources are in a different network or region, you must separately configure appropriate gateways to establish routing between the networks. If you don't see the subnets that you want, it could be because they weren't created as regional subnets.
The workspace takes a few minutes to create and become active. After the creation process is completed, you can access the workspace from this list.

3. Getting Workspace OCID to Create Policies

To create the policies that you need and restrict the policies at the workspace level, you need the workspace OCID.

To get the workspace OCID, perform either of the following procedures:

  • From the Workspaces page, select the Actions menu (Actions menu) corresponding to the workspace, and then select Copy OCID.

    copy-ocid-from-workspace-page

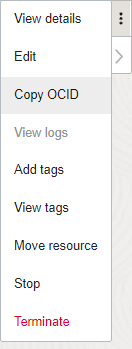
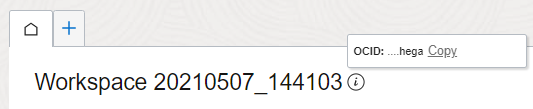
  • From the Home tab in a workspace, click the Copy link in the tip that's next to the workspace name.

    copy-ocid-from-workspace-details-page