Scaling Out Foundation Services
Complete this procedure on each host machine, for example, FNDHOST2, onto which Oracle Hyperion Foundation Services is to be scaled out.
To scale out Foundation Services:
- Log on to the Foundation Services scale-out machine (
FNDHOST2) as the deployment user, and define a network drive (for example,Z:/) that maps to the shared disk directory into which you extracted Oracle Enterprise Performance Management System software (for example,//sharedhost/sharedlocation/downloads/epm_unzipped). - From the mapped network drive, launch
installTool.cmd. - Follow the EPM System Installer wizard:
-
In Destination, specify the MIDDLEWARE_HOME directory location exactly as set while deploying Foundation Services on FNDHOST1.
-
In Installation Type, select New Installation.
-
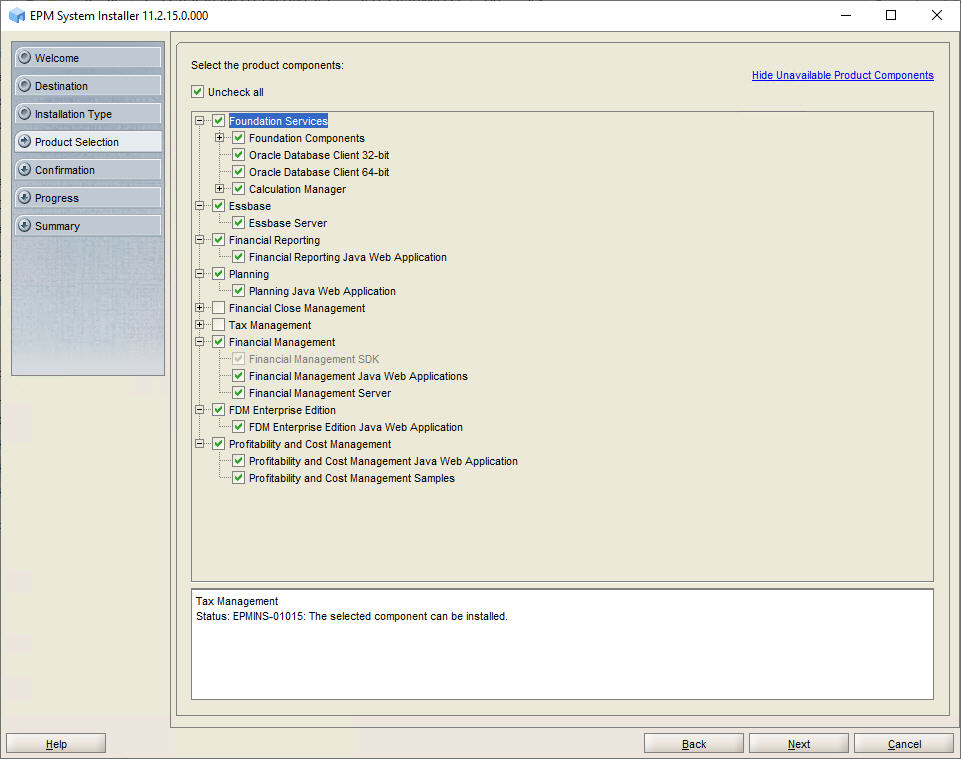
In Product Selection, clear the selection (uncheck) from Uncheck All, and then select the following components:
Although you may not use all these components, installing them prepares the WebLogic domain to host the Java web applications of these components in the future.
-
Foundation Services and all components listed under Foundation Services
-
Essbase—Essbase Server
-
Financial Reporting—Financial Reporting Java Web Application
-
Planning—Planning Java Web Application
-
Financial Management—Financial Management SDK (automatically selected)
-
Financial Management—Financial Management Java Web Applications
-
FDM Enterprise Edition—FDM Enterprise Edition Java Web Application
-
Profitability and Cost Management Java Web Application
-
Profitability and Cost Management Samples

-
-
- In Summary, click Finish after verifying that all components installed successfully.
- Follow the steps in Creating Infrastructure Schemas Using Repository Creation Utility on FNDHOST1 to run the Repository Creation Utility and update RCU schema properties on
FNDHOST2. Note these steps:- On the Select Components page, enter a unique prefix, for example FNDHOST2.
- When modifying
RCUSchema.propertiesin a text editor, for schemaPrefix, make sure to enter the unique prefix used on this machine, for example FNDHOST2.
- Launch EPM System Configurator: Launch EPM System Configurator: From the Start menu, select Oracle EPM System, and then EPM System Configurator (all instances).
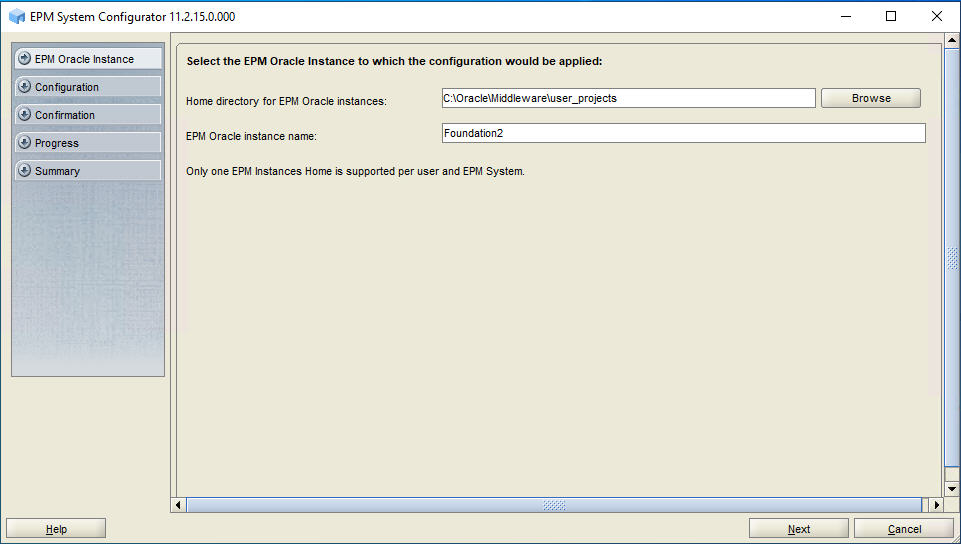
- In EPM Oracle Instance, complete these steps, and then click Next.
- In Home directory for EPM Oracle instance, verify that the location of EPM Oracle Home directory is identical to that specified while configuring Foundation Services on FNDHOST1.
- In EPM Oracle instance name, enter
Foundation2.

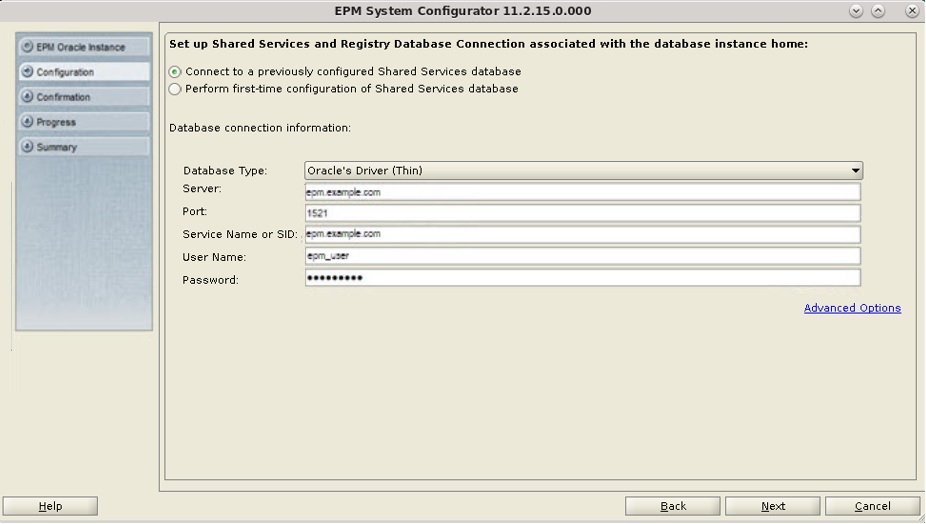
- On the Set Up Shared Services and Registry Database Connection screen, complete these steps:
- Select Connect to a previously configured Shared Services database.
- Enter database connection information for Oracle Hyperion Shared Services Registry and the user name and password of the database account to use for accessing the database (recorded in Table 3-1). This information must be identical to the information you entered while deploying Foundation Services on FNDHOST1.
- Click Next.
If you are scaling out on the same machine as
FND1HOST, you do not see the Set up Shared Services and Registry Database Connection screen.The Shared Services Registry stores the configuration information for all the servers in the deployment so that components can find one another.

- On the Configuration screen, complete these steps:
- Remove the selection (uncheck) from Uncheck All.
- Select these components From Hyperion Foundation:
-
Scale out single managed server on this machine
-
Configure Web Server
-
- Click Next.
- In Configure Web Server, complete these steps, and then click Next.
- In Web Server Type, select Oracle HTTP Server.
- In Web Server Port, change the web server port number if you changed it on
FndHost1. - Click Advanced Options and specify the location of the shared drive on which to install Oracle HTTP Server, click OK, and then click Next. The shared drive location is the same location that you specified on the first Foundation Services host machine (FNDHOST1).
- In Confirmation, review the summary of the configuration tasks that will be executed, and then click Next.
- When the deployment process is complete, the Summary screen is displayed. Verify that all the tasks completed successfully, and then click Finish.
- Start EPM System: From the Start menu, select Oracle EPM System, and then Start EPM System.
- Reconfigure the load balancer so that it routes requests addressed to
epm.mycompany.comandepminternal.mycompany.comto the Oracle HTTP Server on this Foundation Services host also.