Creating a New Model Data Registration
You must specify the external table that you want to use as the data source for the Detailed Profitability application, apply a new table name, and select the table type that you want to use.
External tables may be horizontally or vertically oriented. For Source Stage tables, you can specify the type or orientation you want for the table that you are registering. Destination and Lookup tables cannot be changed, and are presented horizontally only.
To create a new Model Data Registration table:
- From Oracle Hyperion Enterprise Performance Management Workspace, select Navigate, then Applications, then Profitability, and then select the application that you want to view.
- From Task Areas, select Manage Model, and then Model Data Registration.
The Model Data Registration screen is displayed.
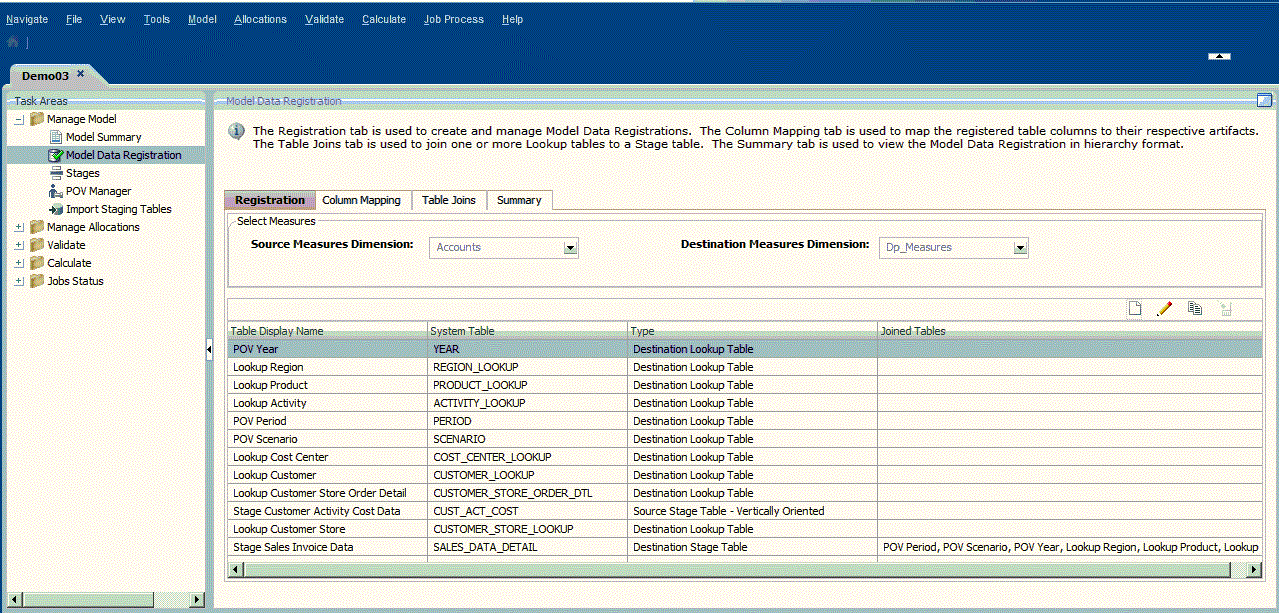
- On the Registration tab, under Select Measures, select a measures dimension from the drop-down list for the Source Measures Dimension and the Destination Measures Dimension.
You may select the same measures dimension for each stage, or select different measures dimensions for each stage.
-
All registered source stage tables and their joined lookup tables use the Source measures dimension.
-
All registered destination stage tables and their joined lookup tables use the Destination measures dimension.
Only Business dimensions can be used as the Source or Destination Measures dimension. You cannot use an Alias, Attribute or unmamaged dimension.
Caution:
After measures have been selected for both the Source and Destination stages, the measures cannot be changed as long as the Model Data Registrations or drivers exist.
-
- On the Registration tab, click Add new table.

Step 1: Select Table wizard is displayed.
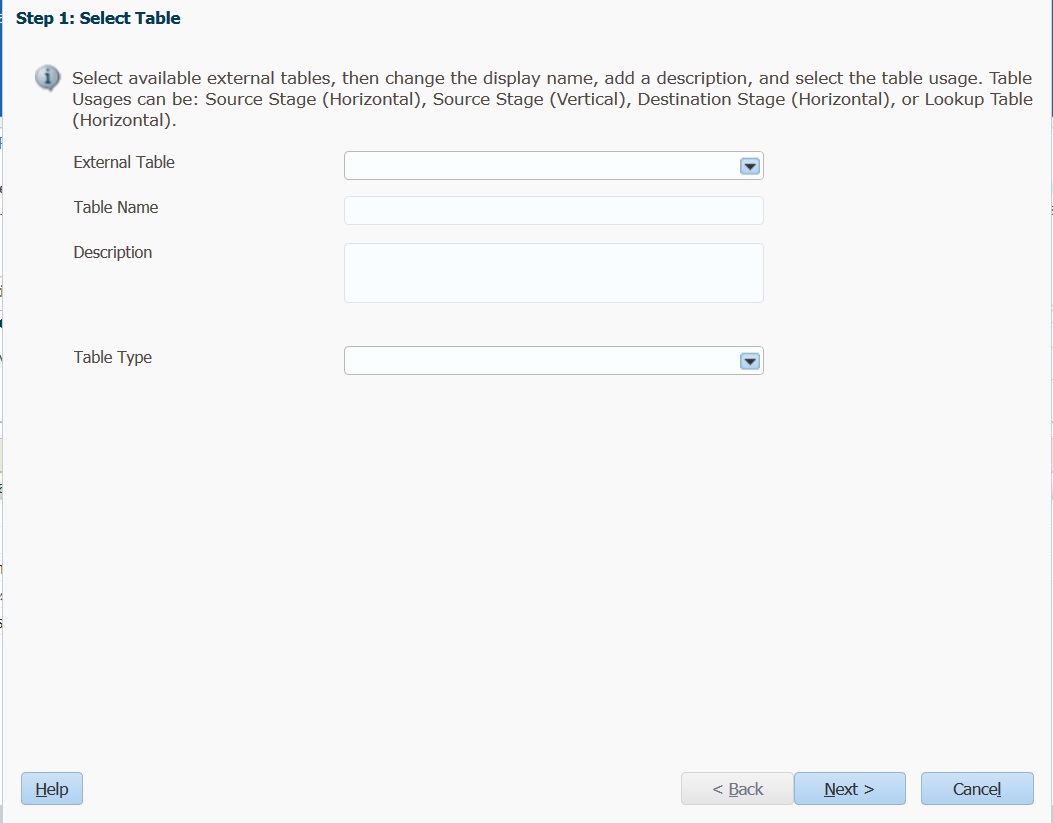
- From External Table, select the name of the existing table or view that you want to use as the data source. This list displays all external tables to which the user has Read or Write access.
Register tables and columns that only use uppercase characters, numbers, and "_"or "$" in their names. Any tables or columns having invalid names will not appear for selection.
- In Table Name, enter a user-friendly name for the registered table.
- Optional: Enter a brief description of the purpose or contents of the table.
- From Table Type, select the table type and orientation for the table to be registered:
-
Source Stage Table - Horizontally Oriented: Measures are stored in separate columns on the table, with one column for each distinct measure.
-
Source Stage Table - Vertically Oriented: Measures values are stored in separate rows in the table, with the measure value in one column, and the measure identification in the measures dimension column.
-
Destination Stage Table
-
Source Lookup Table
-
Destination Lookup Table
Note:
The available Lookup table types depend on the Measures selected on the Registration tab. If two separate measure dimensions are registered, then two Table Type choices are available (Source Lookup Table and Destination Lookup Table).
If the same measures dimensions are selected, then only one Table Type choice is available (Lookup Table).
-
- Click Next.
Step 2: Select Columns screen is displayed.
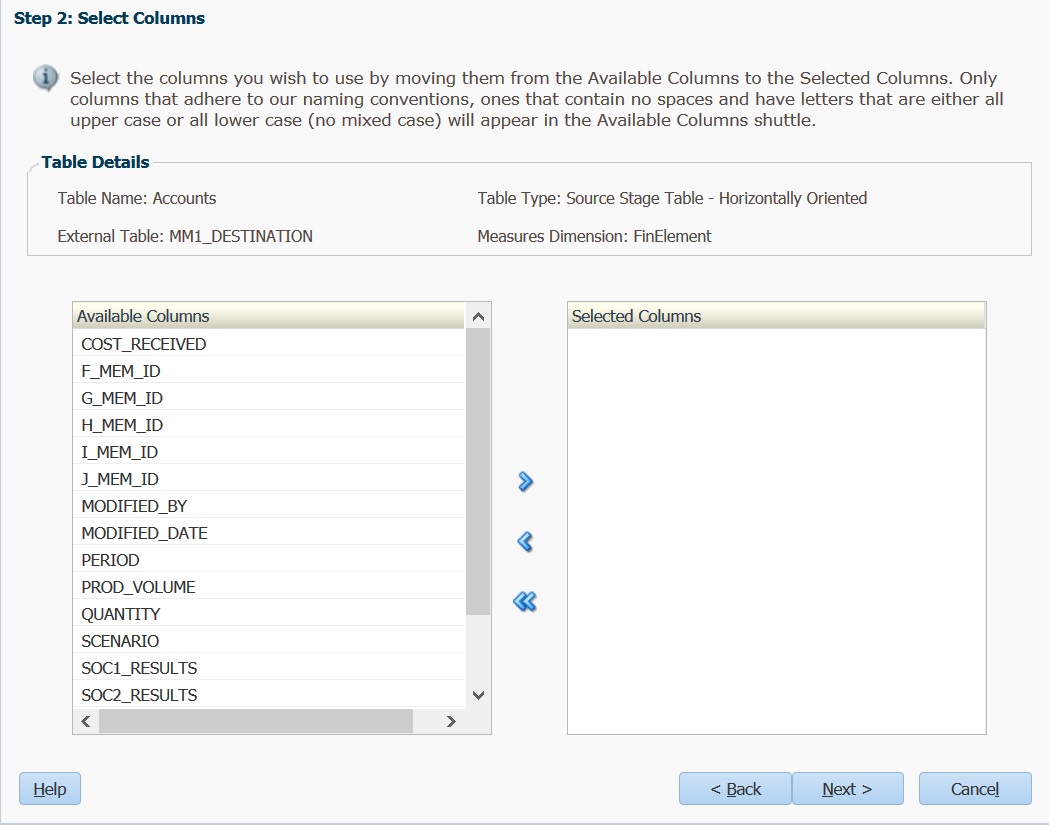
- Under Available Columns, select the columns from the table that you are registering to use in the final table, and then click the Add arrows
 to move the selections to Selected Columns.
You can select multiple columns at one time from the list:
-
To select a range of columns, press Shift and select the first and last columns in the range.
-
To select multiple random columns, press Ctrl and select individual columns from the list.
Note:
Register tables and columns that only use uppercase characters, numbers, and "_"or "$" in their names. Any tables or columns having invalid names will not appear for selection.
-
- Click Next.
Step 3: Map Columns screen is displayed, listing details of the selected table.
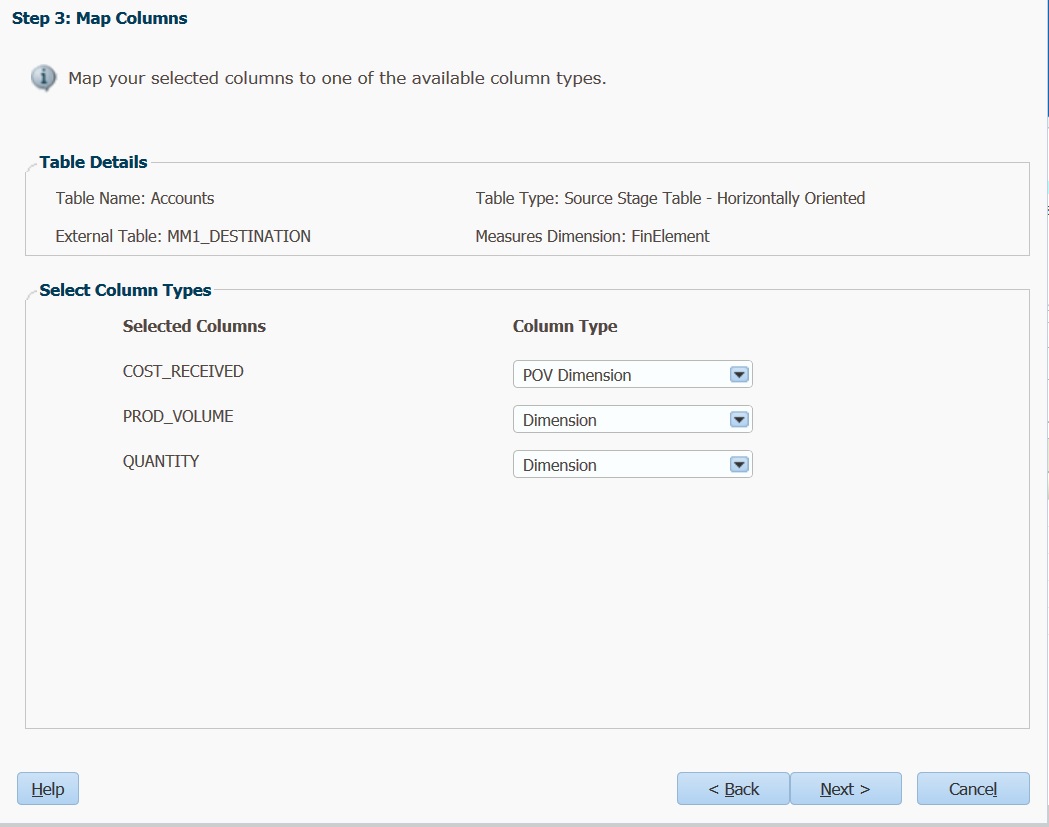
- Under Select Column Types, map the Selected Columns to the available column types:
-
POV Dimension
-
Dimension
-
Unmanaged Dimension
-
Measure
-
Audit: Last Modified By
-
Audit: Last Modified Date
-
- Click Next.
Step 4: Rename Special Columns screen is displayed, showing any unmanaged and Audit dimensions, such as IDs, dates, audit, and so on. If you do not have any unmanaged or Audit dimensions, the list is blank.
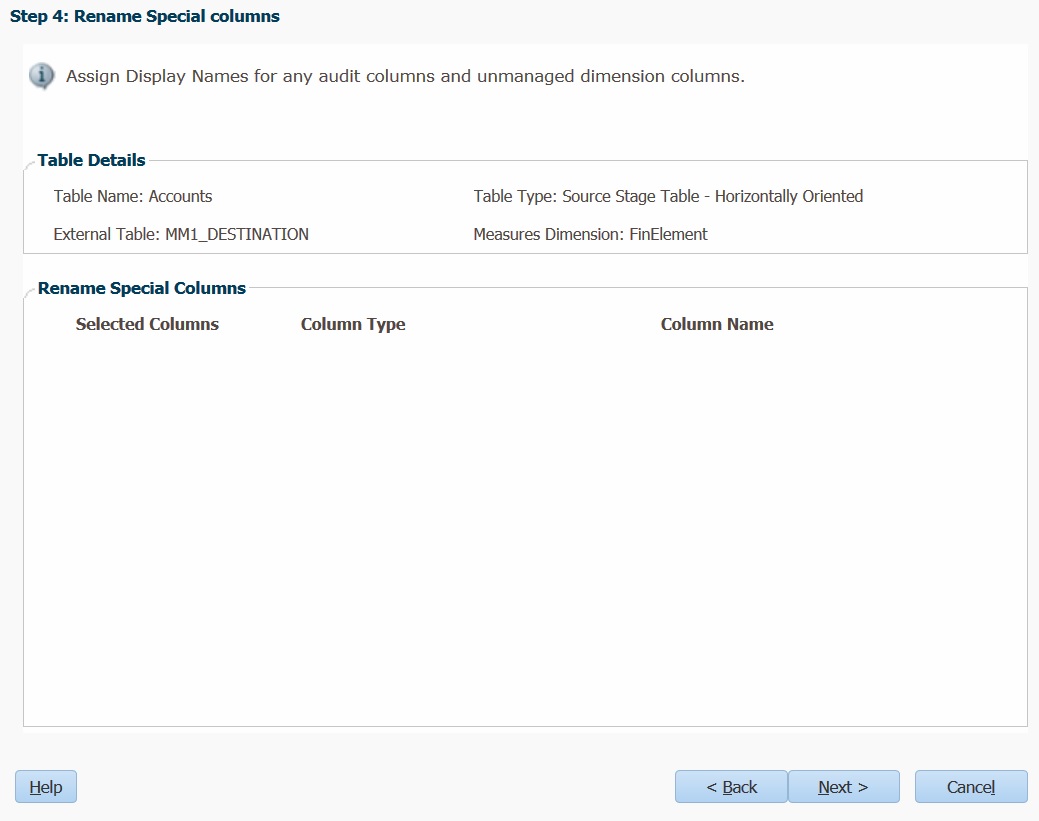
- Optional: Enter the new user-friendly name to be associated with the previously selected unmanaged and Audit dimensions under Column Name. These names make the dimensions easier to use.
- Click Next.
Step 5: Map and Rename Dimensions Columns screen is displayed.
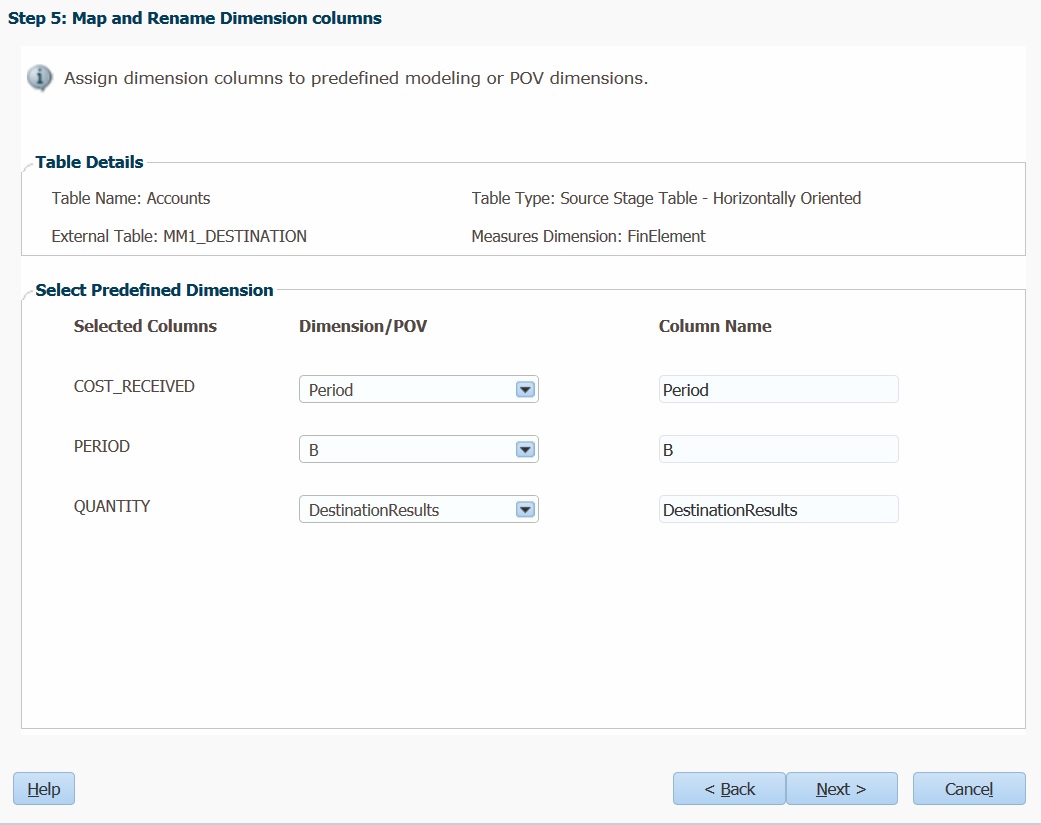
- Under Dimension/POV, map all columns set as a managed POV or managed dimension to existing dimensions. The selected Dimension/POV is automatically displayed under Column Name. You can change this value, if required.
- Click Next.
Step 6: Map and Rename Measure Columns screen is displayed.
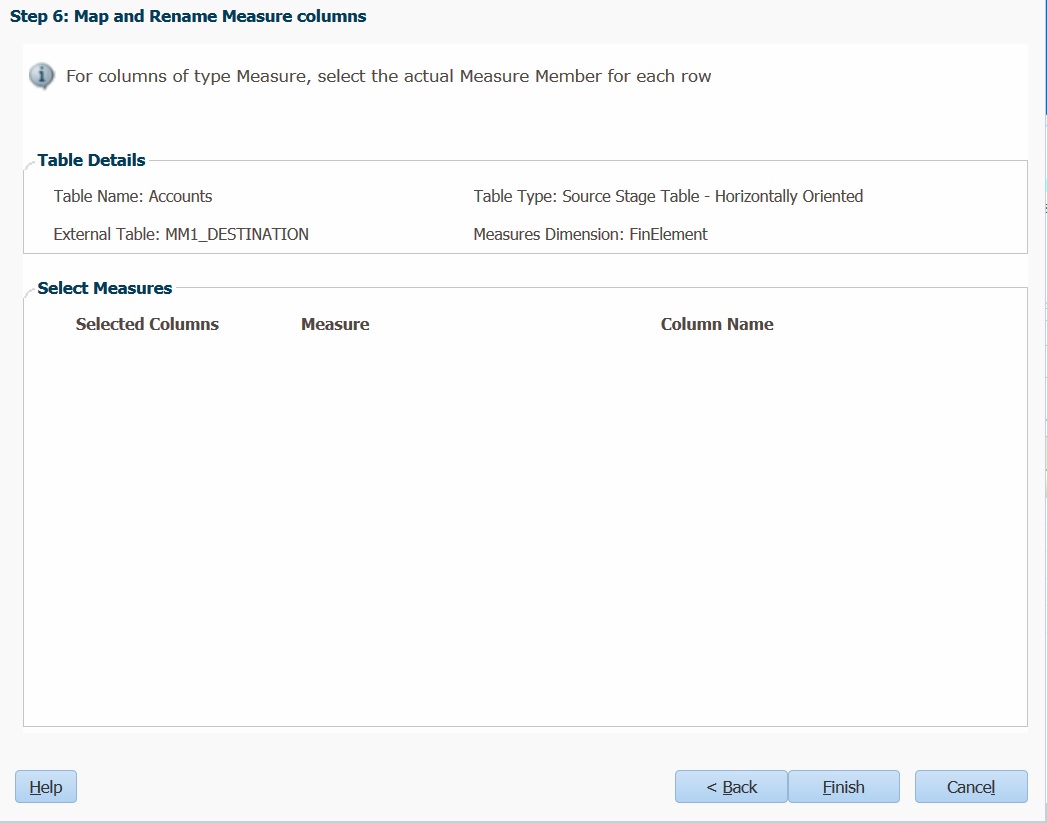
- Under Measure, for Measure type columns, select the actual Measure member for each row. The selected Measure is automatically displayed under Column Name. You can change this value, if required.
- Click Finish.
The table is registered, and displayed on the list of registered tables on the Registration tab.