Copying POVs

You can copy a POV to provide a starting point for a new model or scenario, or to play what-if scenarios with an existing model.

For example, you can begin a period by copying driver selections and assignments from the previous period, or you can create seed data for a forecast scenario by copying data from an actual scenario.

To copy the POV, you must have a Source POV, which contains the information to be copied, and a Target POV, which is destination to which the data will be copied. You can copy information only to POVs with the status of "Draft" that are listed on the Status tab of the Manage POVs screen.

To copy POVs:
  1. Optional: If required, create a POV on the Status tab of POV Management to provide the target POV for the copy operation. See Adding POVs.
  2. In an open model, from Task Areas, select Manage Model, then POV Manager.

    The Status tab of the POV Manager window is displayed. All existing POVs are listed.

  3. From POV Manager, select the Copy tab.

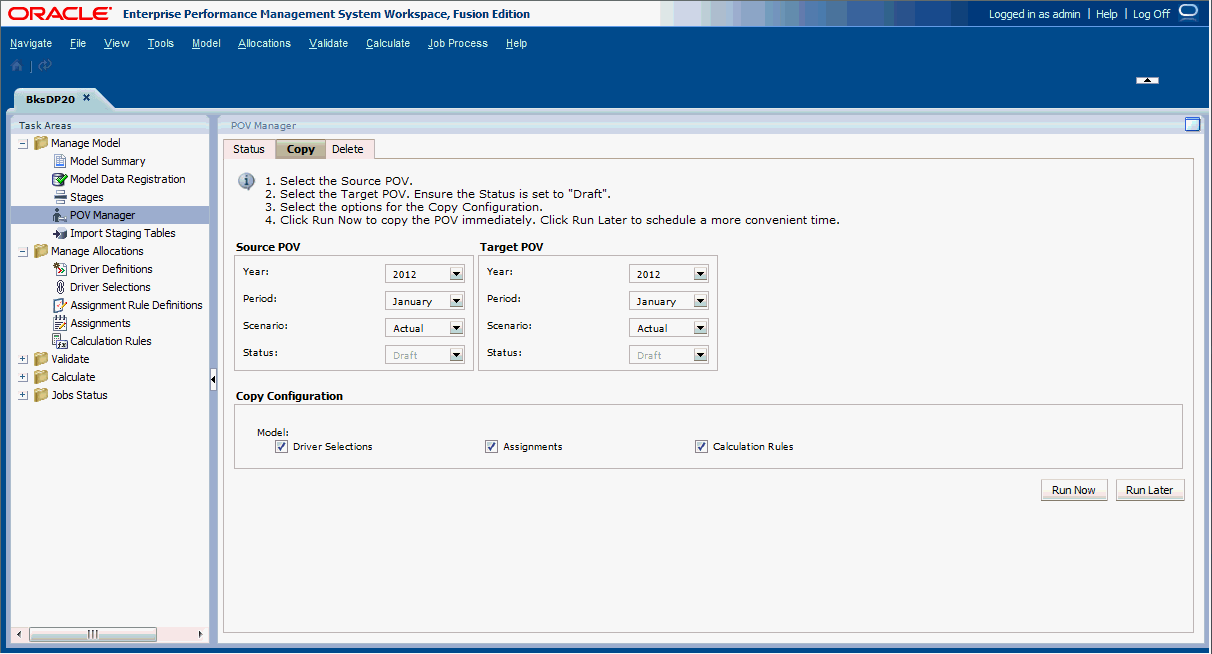
    Use the POV Copy Screen to select a source and target for the POV copy, and to select the data to be copied.
  4. Under Source POV, select the POV that is to be copied.

    Note:

    The Status for the Source is automatically set to the status assigned to this POV, and cannot be modified on this screen.

  5. Under Target POV, select the POV that is to be the destination for the copied POV.

    Caution:

    The Target POV must exist as a valid POV with the Status of "Draft" on the Status tab of the POV Manager screen, or the copy operation will not start.

  6. Under Copy Configuration, select the elements of the POV that are to be copied:

    Under Model, select Driver Selections, Assignments, Calculation Rules, or all. These options enable you to control the information that is required for the new POV.

  7. Perform one of the following tasks:
    • Click Run Later to schedule a date and time to copy the POV.

      Note:

      If this option is not selected when the task is created, you will not be able to schedule the task.

    • Click Run Now to copy the POV immediately.

      A confirmation message indicates that the job has started and identifies the assigned taskflow ID. Select Jobs Status, and then Search Task to monitor the status. See Job Library.

      Caution:

      Depending on the size and complexity of the model, this operation may take a significant amount of time.

  8. When the copy is complete, review the copied information under the target POV.