Resolving Data Validation Errors
Your administrator can set up data validation rules to ensure that data meets company guidelines.
Cloud data provider types: , Planning, Financial Consolidation and Close, Tax Reporting
On-premises data provider types: Oracle Hyperion Planning,
For example, your administrator can set:
-
Criteria for the data you enter, called data validation rules
-
Background colors to call your attention to data validation errors
-
Messages that tell you what the criteria is
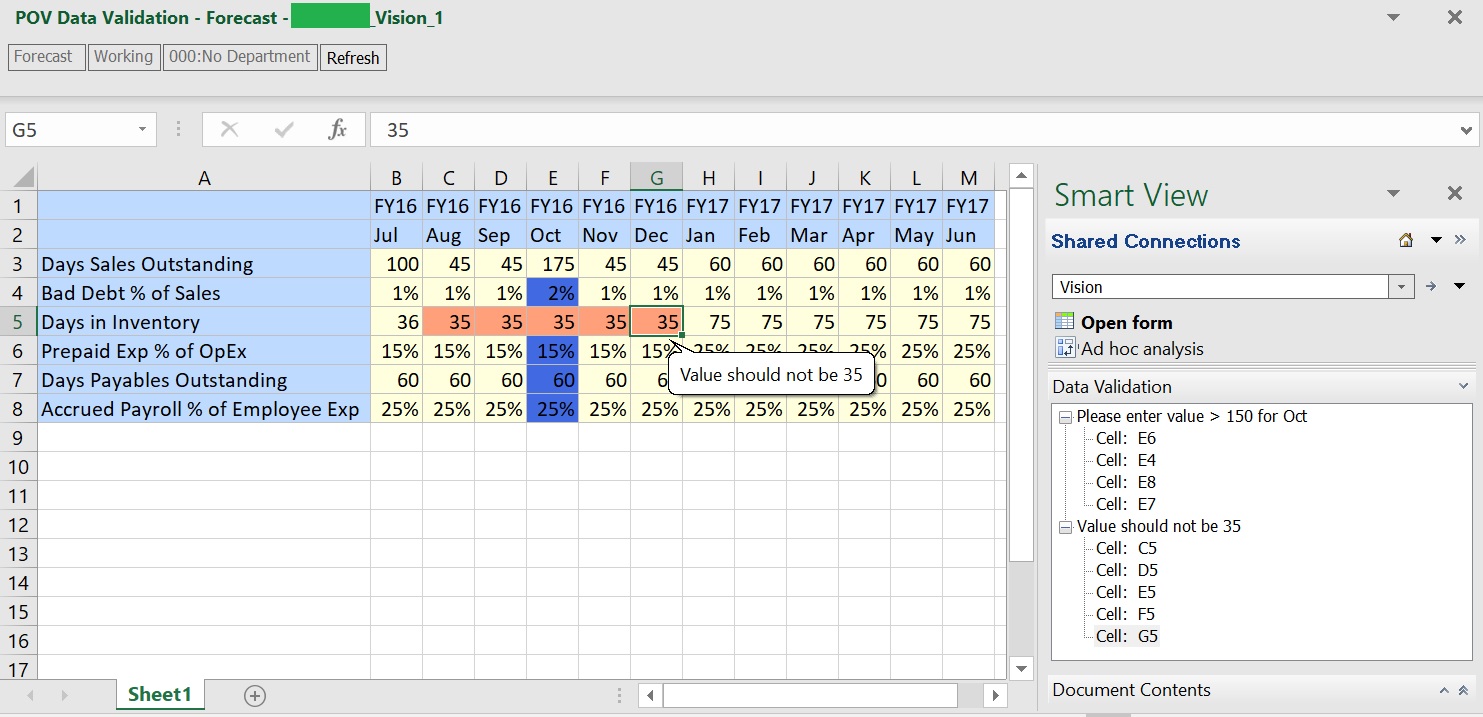
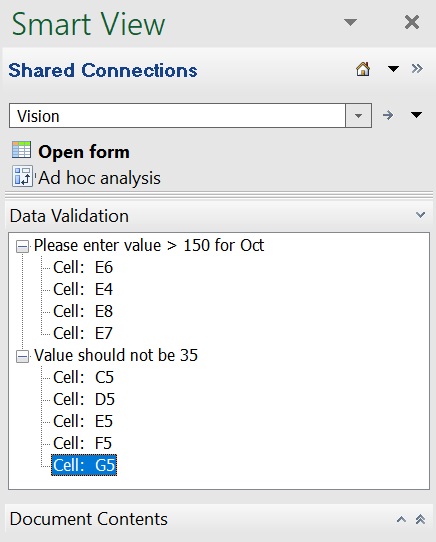
The Data Validation pane displays in the Smart View Panel, listing the cells containing validation errors, grouped by validation rule.
Figure 5-23 is an example of these elements.
Figure 5-23 Form Showing Invalid Data Cells, a Data Validation Message, and the Data Validation Pane in the Smart View Panel

If the data in a form doesn’t meet the criteria in the data validation rules, follow the steps in this topic to fix the errors.
To resolve data validation errors in simple forms and composite forms:
-
In a form with errors, hover your cursor over the cell having a non-default colored background to view the validation message.
Your administrator typically calls your attention to cells having data validation rule errors by displaying them with a colored background. Pop-up text displays the validation rule.

-
Click in each data cell that has validation errors and resolve each error based on the instructions in the data validation message.
You can also locate cells to resolve by reviewing the cells listed in the Data Validation pane of the Smart View Panel.

As you resolve errors, those cells are removed the list.
-
In composite forms, repeat this for each form having data validation errors.
-
If there’s more than one message in a cell, view the pop-up messages and resolve the errors.
-
When you’ve resolved all errors, submit the data.
The cells’ colored backgrounds and the data validation messages no longer display in the grid and the Data Validation pane no longer displays in the Smart View Panel.
Tip:
If your POV doesn't include valid members, you can clear the current members by clicking on the editable dimensions in the POV, and then selecting <Clear Selection>. You can then select members from the dimensions that are included in the valid intersection definition.