Reviewing Warehouse Inventory Information for a Non-License Plate Warehouse
To inquire on warehouse inventory information for a non-license plate warehouse:
Open the application by tapping the WMS AVAIL icon on your device, and then log in.
Enter a value in the Item Description field, and tap the Search button.
To filter records, tap the filter icon.
To filter records for a non-license plate warehouse, enter a non-license plate warehouse in the Branch/Plant field. Then, enter data in the Item Number field using one of these options:
Use the keyboard on your mobile device to manually enter the data.
Use the camera application on your mobile device to scan the data.
To use this option, tap the QR Code button next to the Item Number field. The system launches the device camera and you can scan the barcode of the item number.
Use a Bluetooth-enabled scanning device to scan the data.
To use this option, tap the Item Number field to activate the scanning device. Then, scan the barcode of the item using the scanning device.
See Setting Up the Bluetooth Option in the Mobile Device to Scan Barcodes (Release 9.2 Update)
Note: You can filter records either for a license plate warehouse or a non-license plate warehouse at a time. You use the Item Number field to filter records for a non-license plate warehouse. You use the License Plate Search option and License Plate Number field to filter records for a license plate warehouse. The system hides the Item Number field if you have selected the License Plate Search option.On the Filter screen, enter a non-license plate warehouse in the Branch/Plant field and complete the Item Number field.
Note: To filter records by license plate number, select the License Plate Search option. Enter a value in the License Plate Number field and tap the Apply button to filter records based on license plate number.In the Filters pane, to continue the search using the specified filter values, tap the Apply button. When you tap the Apply button, the system:
Takes you to the list of items that are displayed based on your filter values.
Saves the filter values that you entered. The system displays the saved filter values the next time you open the filter screen.
To discontinue the use of filter values in your search, tap the Cancel button. When you tap the Cancel button, the system takes you to the list of items associated with the last saved filter values, if applicable.
To delete all of the filter values that you specified, and to enter new filter values, tap the Clear button.
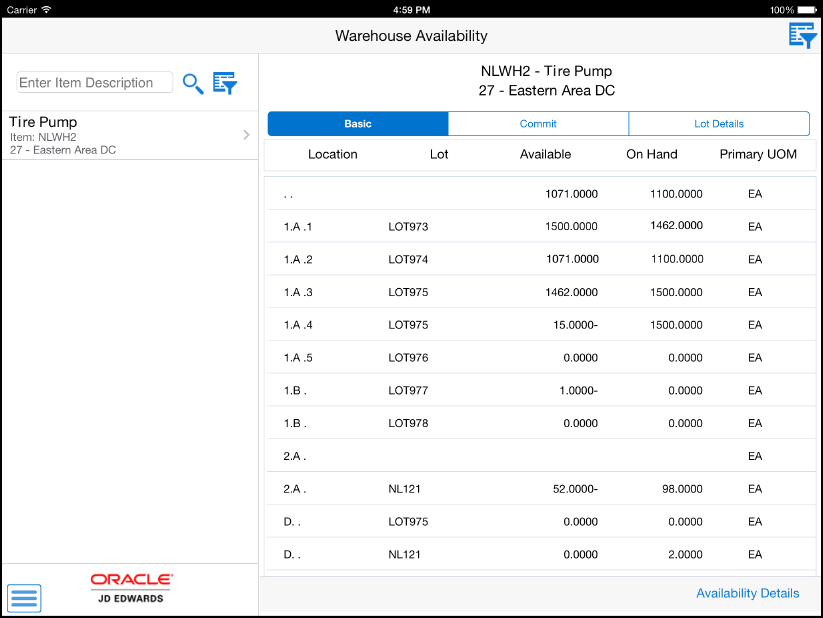
The system displays warehouse inventory information in three tabs: Basic, Commit, and Lot Details.
 Note: To filter records based on location and lot/serial number, tap the filter icon on the top right of the screen. On the filters screen, complete the Location and Lot/Serial number fields using one if these options:
Use the keyboard on your mobile device to manually enter the data.
Use the camera application on your mobile device to scan the data.
To use this option, tap the QR Code button next to the Location and the Lot/Serial number field. The system launches the device camera and you can scan the barcode of the location and the lot/serial number.
Use a Bluetooth-enabled scanning device to scan the data.
To use this option, tap the Location and the Lot/Serial number field to activate the scanning device. Then, scan the barcode of the location and lot/serial number using the scanning device.
The system displays location, lot, available quantity, on hand quantity and primary unit of measure values on the Basic tab.
The system displays location, lot, backordered quantity, committed quantity and soft committed quantity on the Commit tab.
You review lot information including lot status, lot grade and lot potency on the Lot Details tab.
Tap the Availability Details button in the bottom right of the screen.
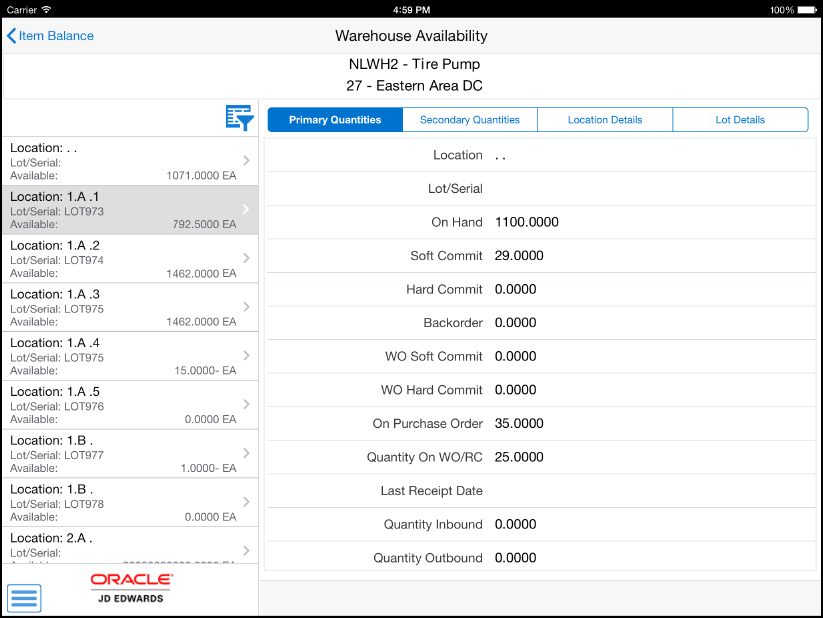
The system displays item availability information on the Availability Details screen. The column on the left displays the list of location and lot combinations.
Tap a record in the left column to view availability information for the respective location. The system displays availability information in four tabs: Primary Quantities, Secondary Quantities, Location Details and Lot Details.

You review warehouse availability information including location, lot/serial number, and on hand quantity under the Primary Quantities tab.
To view warehouse location details, tap the Location Details tab.
Tap the Warehouse Location Details button. The system displays a list of locations in the left column.
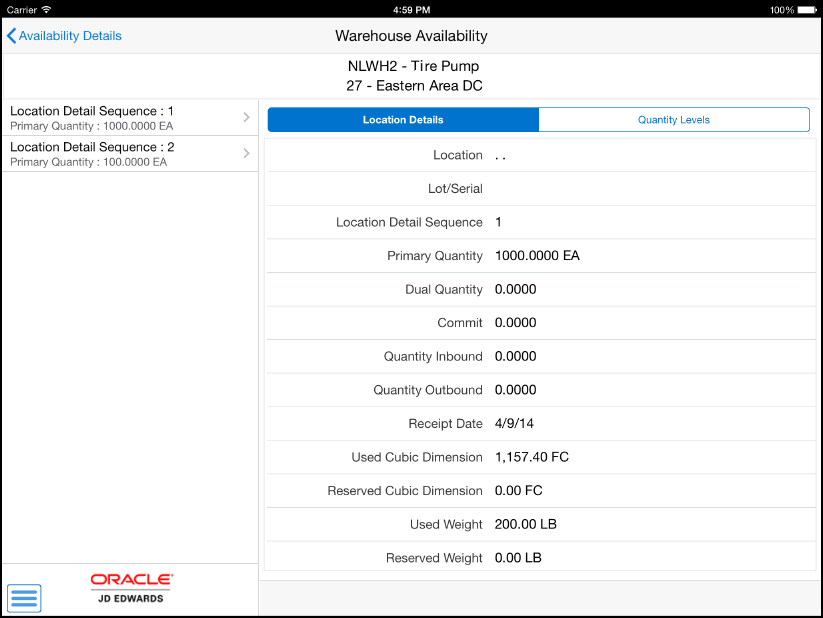
Tap a Location Detail Sequence to review location details.
The system displays warehouse location details in two tabs: Location Details and Quantity Levels.

The system displays location information including location, lot/serial number, location detail sequence, primary quantity, secondary quantity, committed, inbound and outbound quantity on the Location Details tab.
The system displays quantity details for different level containers on the Quantity Details tab.
To go back to view warehouse availability details, tap the Availability Details button in the top left on the screen.
To log out of the application, tap the Menu button at the bottom left of the screen, and then tap Logout.