Create a Collaborative Portal Server as a New Managed Instance
You must use Server Manager to install a new Collaborative Server instance.
The WebSphere 7.0 or 8.5 installation must also include an HTTP Server.
Refer to the JD Edwards EnterpriseOne Collaborative Portal Server Reference Guide for details on additional tasks and topics related to Server Manager.
To install a Collaborative Portal Server instance:
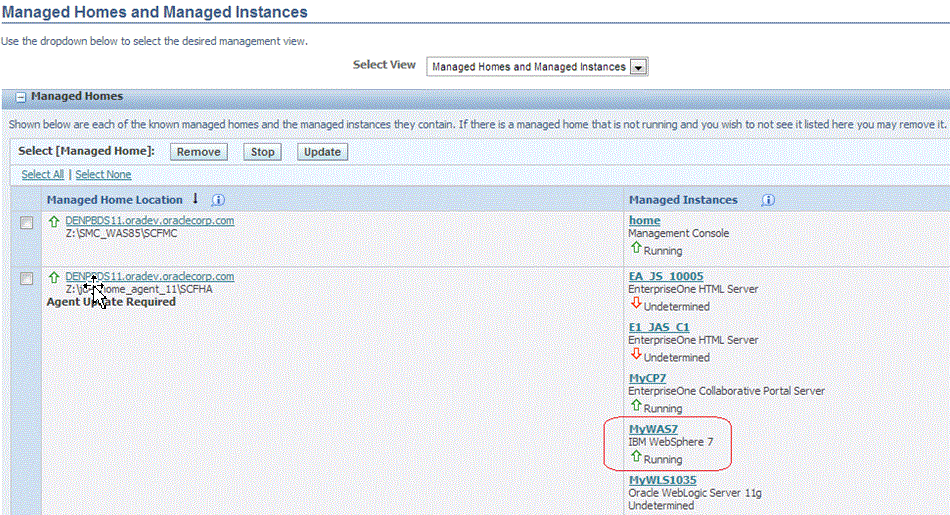
Select the Managed Home in which you wish to install the Collaborative Portal Server.

Click the Create a New Managed Instance button to create the Managed Instance in the Managed Home.

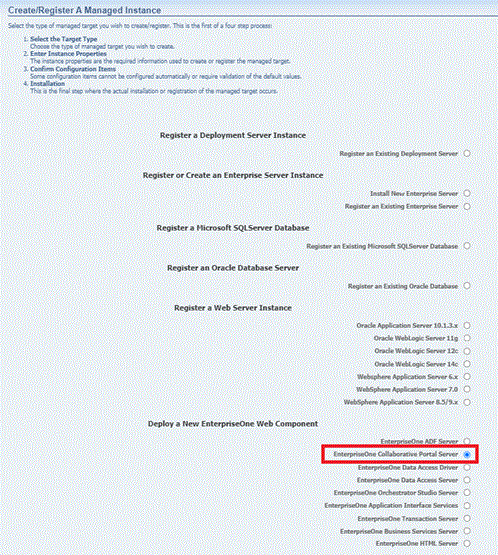
On Create/Register a Managed Instance, Instance Type, select this radio button:
EnterpriseOne Collaborative Portal Server
Click Continue.

On Create/Register a Managed Instance, Instance Properties, complete these fields:
Server Group
Use the dropdown to select the Server Group to which you want this instance to belong.
Also refer to Administer Server Groups.
Instance Name
Enter a name for the instance.
Tip:A good business practice is to name your instances so that they are easily and consistently identifiable. For example:
PRODUCT_SERVER_PORTwhere
PRODUCTis the JD Edwards EnterpriseOne server type, such asEnterprise_Server, HTML_Web_Server, RTE_Transaction_Server, Collaborative_Portal, orBusiness_Services, andwhere
SERVERis the machine on which the instance is installed, andwhere
PORTis the HTTP port which is defined for use by this server.J2EE Server
Use the dropdown to select a valid J2EE server.
Software Component
Use the dropdown to select the version of this Software Component that you wish to install.
Click Continue.

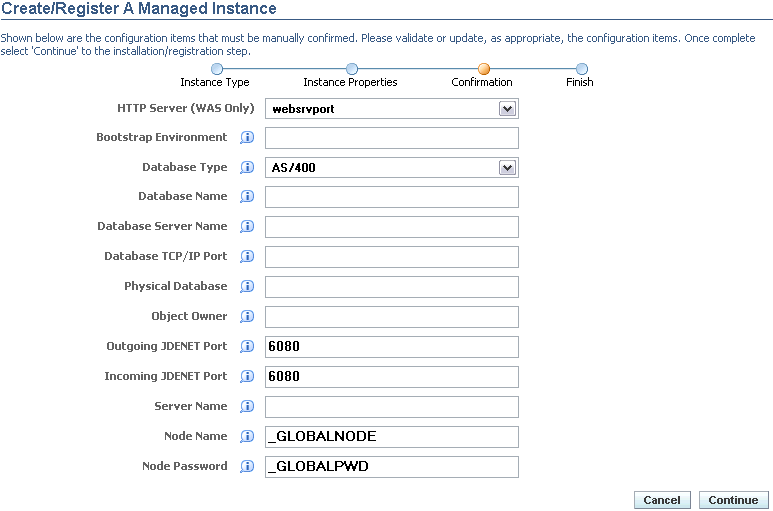
On Create/Register a Managed Instance, Confirmation, review the key configuration items. The values on this form must be confirmed manually. You must validate or update, as appropriate, all configuration items.
Tip:For help, click the Information icon next to the title of a field.
After you have validated and updated all configuration items, click Continue to proceed to the next installation step.

On Create/Register a Managed Instance, Finish, click the Create Instance button to complete the installation of the Collaborative Portal Server.

After you have completed the installation, the browser is redirected to the Management Console page for the newly registered Collaborative Portal. This server also appears as a Managed Instance in the corresponding Managed Home.
For each registered Managed Instance, the Management Console displays appropriate information at the top of the page:
General
Status
Valid values are:
Running
When the status is Running, the Stop button is available.
Stopped
When the status is Stopped, the Start button is available.
Software Component Version
Displays the version of this Software Component.
Instance Properties
Instance Name
The name assigned to the Managed Instance at the time it was created or registered.
Application Server Instance
Displays the application server into which this EnterpriseOne server is installed and also provides a link to the application server instance and associated WebSphere Application Server profile.
For information on log files, refer to the chapter entitled: Available Log Files.