Create (Install) an Enterprise Server as a New Managed Instance
You can use Server Manager to install new Enterprise Servers. These Enterprise Servers only contain a system (foundation) and a path-code. There is no package delivered. These Enterprise Servers are not fully functional until the user adds a plan in EnterpriseOne. Refer to the Additional Task at the end of the screen prints. Additionally, at least one Enterprise Server in your installation must be installed outside of Server Manager using the Platform Pack installer which includes the platform and database dependent application data and path codes.
To create an Enterprise Server as a new Managed Instance using Server Manager, you must obtain the appropriate Enterprise Server software components either directly from the Management Console or from the Update Center. There are two software components needed. The foundation(system) par file and the application .par file from a Package Build. The Managed Software Components must be uploaded to the Management Console and distributed to the Management Agent to which you wish to install the new Enterprise Server. For additional information, refer to Managed Software Components.
For more information on the application .par file needed from a package build, see "How the System Builds a Full Server and Client Package" in theJD Edwards EnterpriseOne Tools Package Management Guide.
To create an Enterprise Server as a new Managed Instance:
-
Select the Managed Home with which you wish to create the Enterprise Server as a new Managed Instance.
-
Click the Create a New Managed Instance button to create the Managed Instance in the Managed Home.
-
On Create/Register a Managed Instance, Instance Type, select this radio button:
Install New Enterprise Server
-
Click Continue.
-
On Create/Register a Managed Instance, Instance Properties, complete these fields:
-
Server Group
Use the dropdown to select the Server Group to which you want this instance to belong.
-
Instance Name
Enter the name for the instance.
-
(Release 9.2.7.0) Install Location
Enter a valid install location for the existing Enterprise Server.
For both Windows and UNIX, you must specify the Install Location as the full path.
IBMi:
E920SYS
IBMi Enterprise Servers. These systems do not require a full path. Instead, you should only enter the library name that corresponds to the IFS directory in which JD Edwards EnterpriseOne is installed. Ensure that there are no slash characters in the Install Location.
For example, E920SYS , E920SYS_1 , E920SYS_2.
Based on this Install Path, the requested path code libraries and IFS directories are created accordingly by appending the addendum at the end of the pathcodes.
For example,
-
E920SYS will create the requested path codes in this format: DV920 , PY920, PS920, PD920.
-
Addendum ‘_1’ creates E920SYS_1 with the requested path codes in this format: DV920_1 , PY920_1, PS920_1, PD920_1.
-
Addendum ‘_A’ creates E920SYS_A with the requested path codes in this format: DV920_A , PY920_A, PS920_A, PD920_A.
-
-
Foundation Component
Select the required foundation component from the drop-down menu.
-
Application Component
Select the required application component from the drop down menu that was created by package build.
Use the drop-down menus to select the foundation and application components from the list of Enterprise Server components distributed to this Management Agent.
-
Path Code
Pathcode built in the component will be automatically selected unless this is a PS package then all pathcodes are available to be selected. This is used for One-Click provisioning.
-
-
Click Continue.
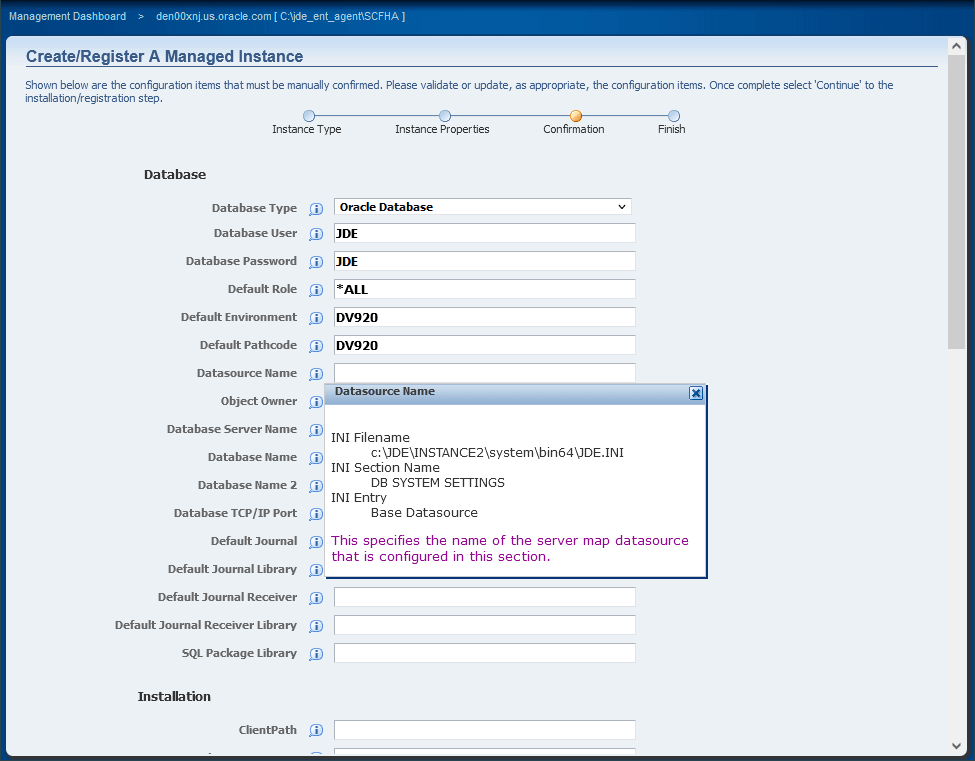
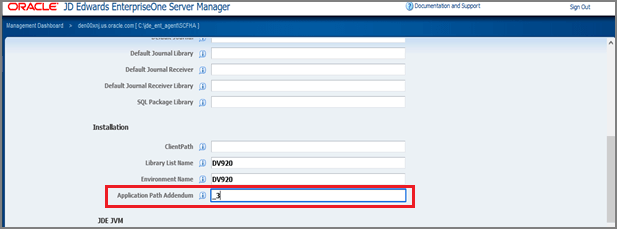
Validate or update the configuration items. Use the help which directs you to the setting in the ini file.
(Release 9.2.7.0) For IBMi, ensure that you fill out the Application Path Addendum under Installation section. This will identify the Tools Release (example: 'E920SYS<addendum>') with the pathcode (example: 'DV920<addendum>, PY920<addendum>').
-
On Create/Register a Managed Instance, Confirmation, review the key configuration items. The web page displays a variety of fields depending on the database and environments of your installation.
You can further configure any item as required.
-
Click Continue.

-
On Create/Register a Managed Instance, Finish, click the Create Instance button to complete the installation of the Enterprise Server.
After you have completed the installation, the browser is redirected to the Management Console page for the newly registered Enterprise Server. This server also appears as a Managed Instance in the corresponding Managed Home.
Beginning with Release 9.2.7.0, IBMi-based Enterprise servers do not need to re-link the business functions. This is automatically done once the installation is complete.
Prior to Release 9.2.7.0 to an IBMi -based Enterprise Server, as in previous JD Edwards EnterpriseOne Tools Releases, you must re-link the Business Functions.
For instructions, refer to the chapter entitled: Re-Linking Business Functions in the JD Edwards EnterpriseOne JD Edwards EnterpriseOne Deployment Server Reference Guide Reference Guide.
Quick tour:Click here to view a recording of this feature.
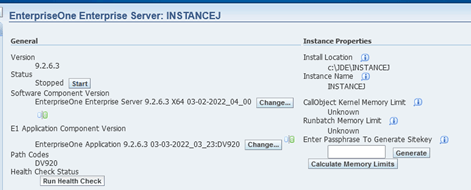
Additional Task (Release 9.2.7.0)
- If a site key is used, in Server manager on the Enterprise Server home page, enter the same passphrase and click the Generate button or copy from an existing jde.ini the site key.
- Add the Enterprise Server through Add a Server Plan.
On the Deployment Server, sign into EnterpriseOne JDEPLAN environment, and Add a Server Plan. For more information, refer to the Applications Upgrade Guides.
- If the server is a Microsoft Windows based Enterprise Server, ensure you set the Visual Studio compiler settings. Refer to Visual Studio Requirements for Microsoft Windows-based Enterprise Servers.
- If the server is UNIX based, then you should update these three settings on
the enterprise server under /e920/SharedScripts/enterpriseone.sh:
- ORACLE_USER_ACCT= <database user>
- ORACLE_HOME= < path to database>
- ORACLE_SID=< name of database >
-
If you are installing Multi-Foundation or Multi-Instance on the same machine, when creating the new instance on the Configuration page for the ‘Service Name Listen’, Service Name Connect’ and the ‘Start IPC Key Value’, ensure they are unique values.
If the values are set at the same value as another instance, it can cause unpredictable issues. The ‘Start IPC Key Value’ can be whatever you want as long as startIPCKeyValue + maxIPCResources does not collide with a range on another EnterpriseOne instance on the machine.
- Start the EnterpriseOne Enterprise Server Instance.
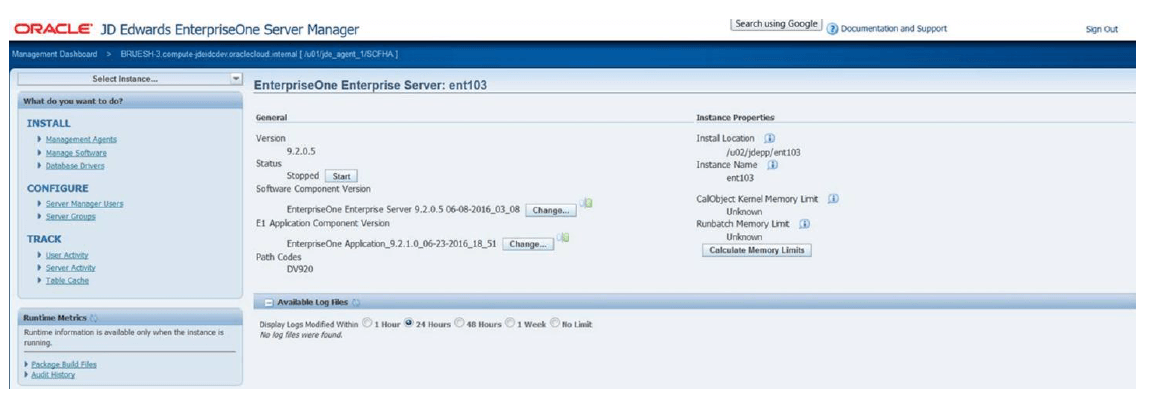
For each registered Managed Instance, the Management Console displays appropriate information at the top of the web page:
General
Software Component Version
Displays the version of this software component.
Status
Valid values are:
Running
When the status is Running, the Stop button is available.
Stopped
When the status is Stopped, the Start button is available.
E1 Application Component Version (Release 9.2.1)
Displays the EnterpriseOne application component version.
Path Codes (Release 9.2.1)
Displays the path codes.
Instance Properties
Install Location
Displays the full path for the install location of the selected Managed Instance.
Instance Name
Displays a clickable link for the name of the selected Managed Instance.
For information on log files, refer to the chapter entitled: Available Log Files.