Installing an ADF Server Instance Using Server Manager Console
In the Managed Software Components window, click Choose File, select the EnterpriseOne ADF Foundation component downloaded from the Update Center, and click Open.
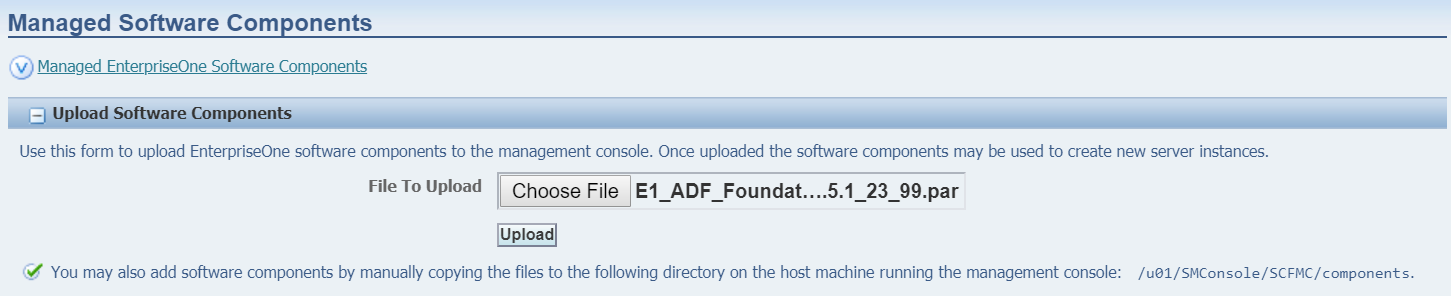
Click Upload.
Verify that the EnterpriseOne ADF server components are uploaded as shown in the following example.
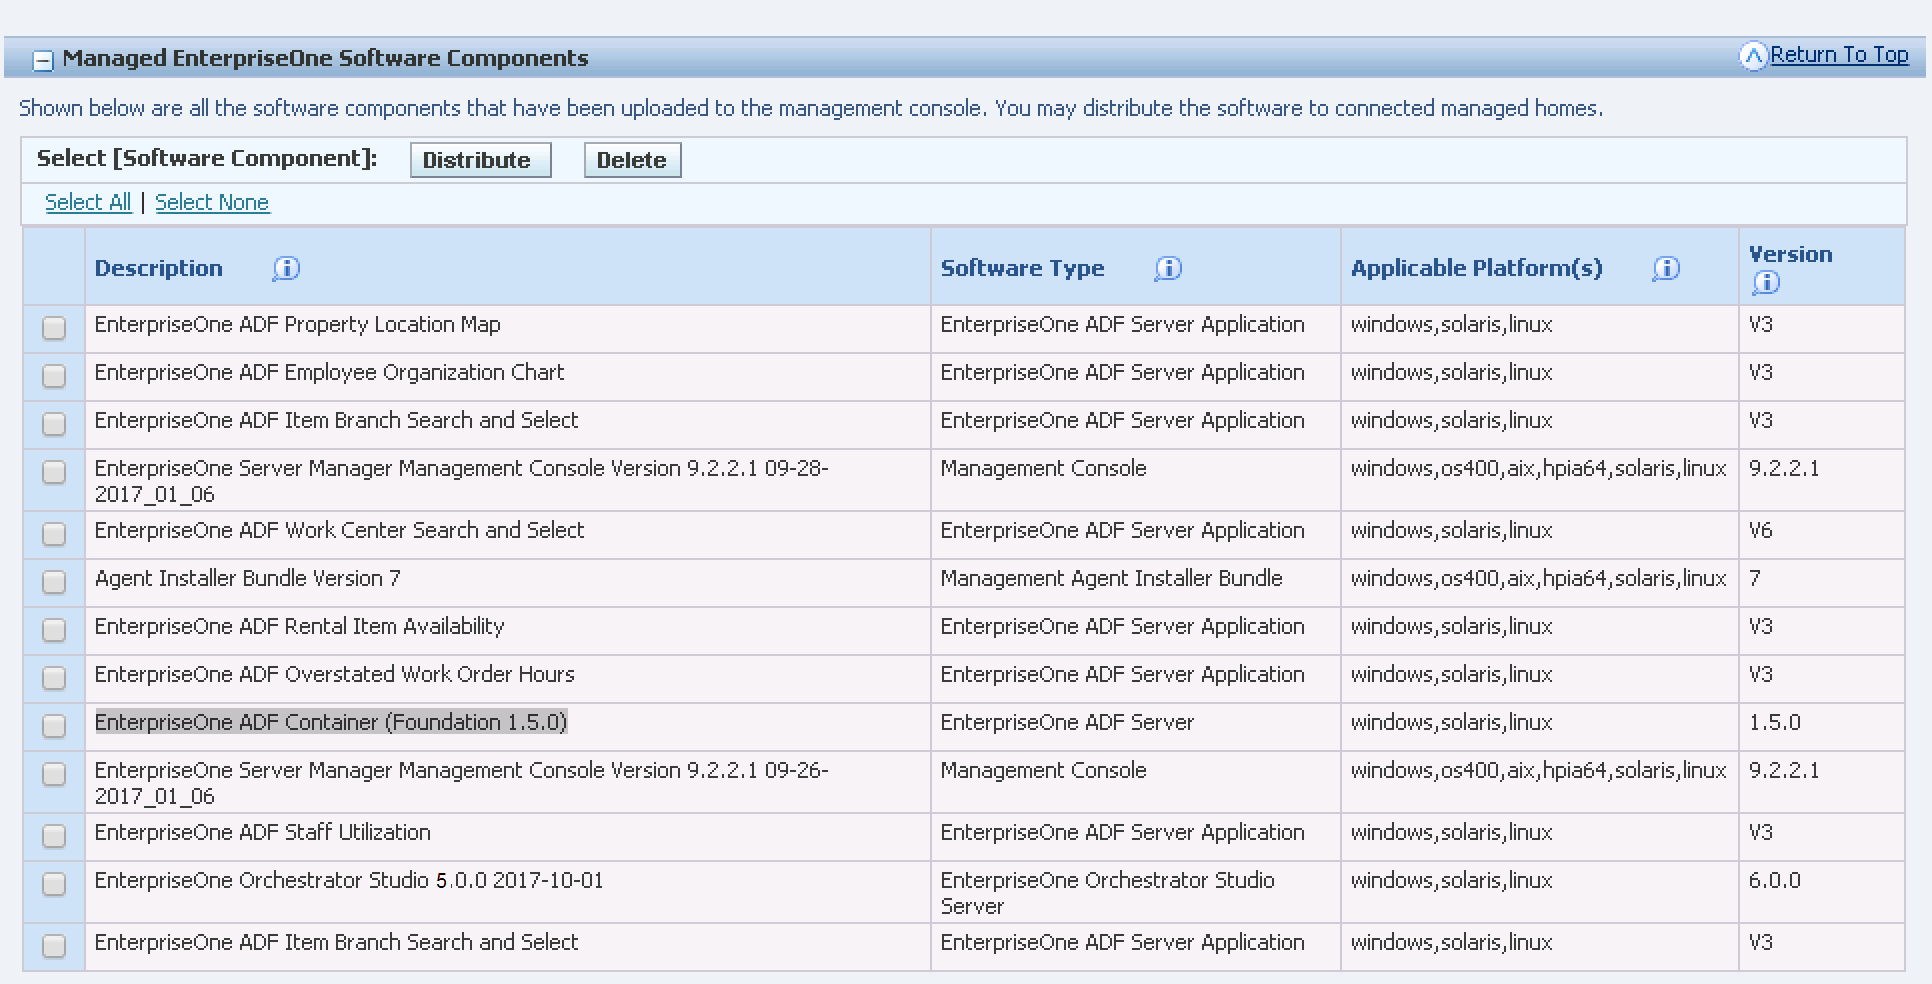
Select the EnterpriseOne ADF server components, and then click Distribute.
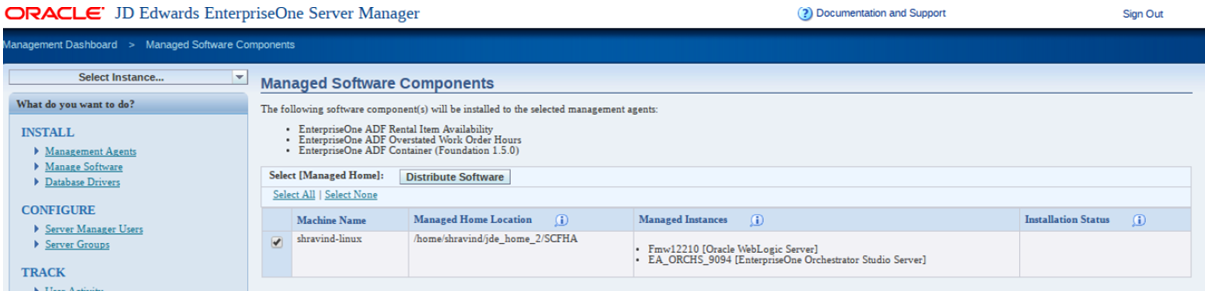
In the Managed Software Components window, select required Managed Instances, and then click Distribute Software.
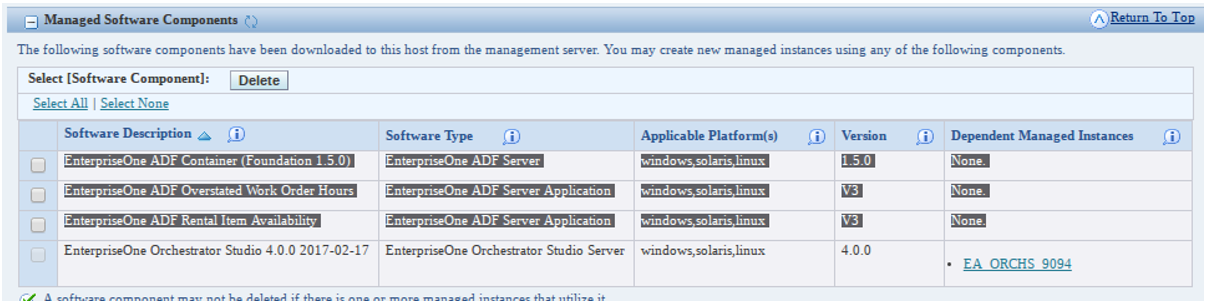
The Distributed ADF Server Components will be available in the selected Server Manager Agent as shown in the following example.
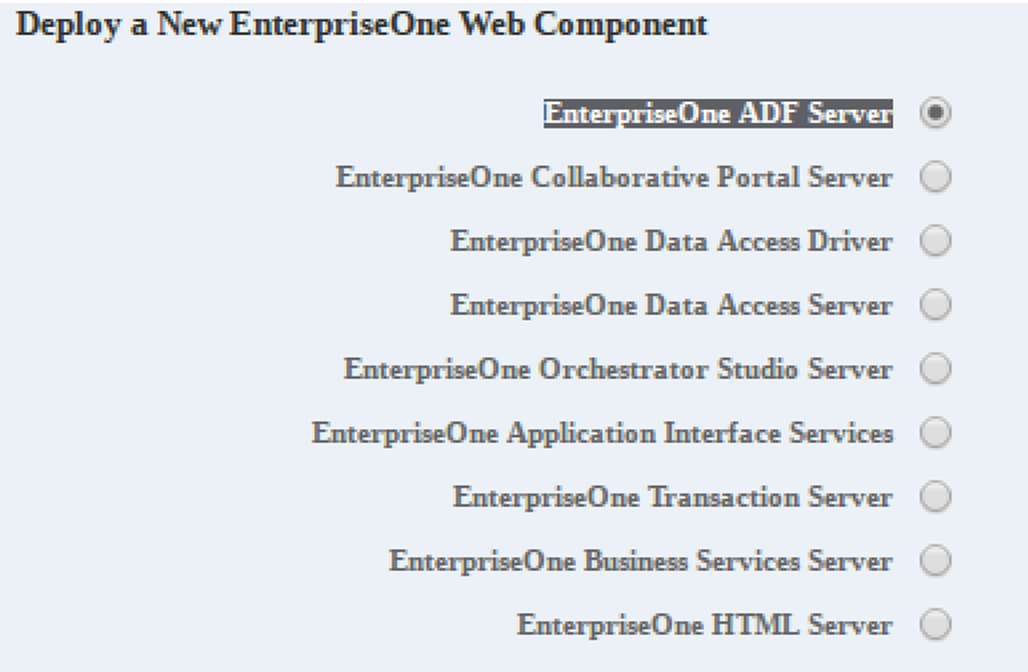
To create a new ADF Server instance, select EnterpriseOne ADF Server in the "Deploy a New EnterpriseOne Web Component" window.
On Create/Register a Managed Instance, Instance Properties, complete these fields:
Server Group
Use the pull-down to select the Server Group to which you want this instance to belong.
Also refer to Administer Management Console Users and User Groups
Name
Enter a name for the instance.
J2EE Server/Cluster
Select the already created J2EE Container for creating the ADF Server Instance.
Foundation Component
Select the Foundation Component. The distributed ADF Server Foundation component(s) will be available in the drop-down menu.
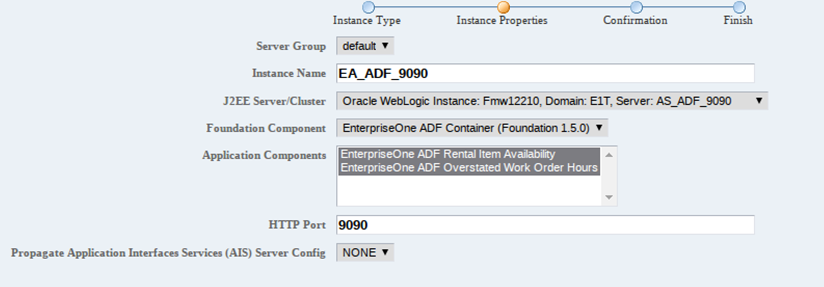
Application Components
The ADF Application components are auto selected. Select or deselect the ADF Application Components as required.
In the AIS Server URL field, enter the AIS Server to use with this ADF Server.

In the HTML Server Whitelist field, enter the URLs to the supported EnterpriseOne HTML Servers for this ADF Server. For each EnterpriseOne HTML Server, you must provide the long and short host name along with port number.

Click Continue, and then click Create Instance.
You can modify or update the configuration entries after the ADF Server instance is created successfully.
Important:After the ADF Server instance is created, you must update the HTML Server configuration setting in Server Manager to point to this ADF Server.
It is not necessary to install the JDBC Driver on the ADF Server instance since it does not connect to the EnterpriseOne database directly.
By default, the ADF Server timeout setting is 20 minutes and the AIS Server timeout setting is 30 minutes. If you adjust these settings, make sure that the timeout for the ADF Server is less than the timeout for the AIS Server.