Server Manager Agent on Windows
After you update the Server Manager Agent to Tools Release 9.2.3.4 or later, create a copy of the $SCHFA\bin\installAgentServiceV2.bat file and save the file as $SCHFA\bin\installAgentService.bat.
This step is necessary to persist the changes related to TLSv1.2 to the agent. If you do not perform this step, your changes will be overwritten when the agent is updated.
If the file $SCHFA\bin\installAgentService.bat is already present, use it to make the changes related to TLSv1.2. Do not use the $SCHFA\bin\installAgentServiceV2.bat file if the $SCHFA\bin\installAgentService.bat file is already is present.
Then perform the following tasks:
Stop the Server Manager Agent by using the $SCFHA\bin\stopAgent.bat file.
Uninstall the existing Server Manager Windows Service by using the $SCFHA\bin\uninstallAgentService.bat file.
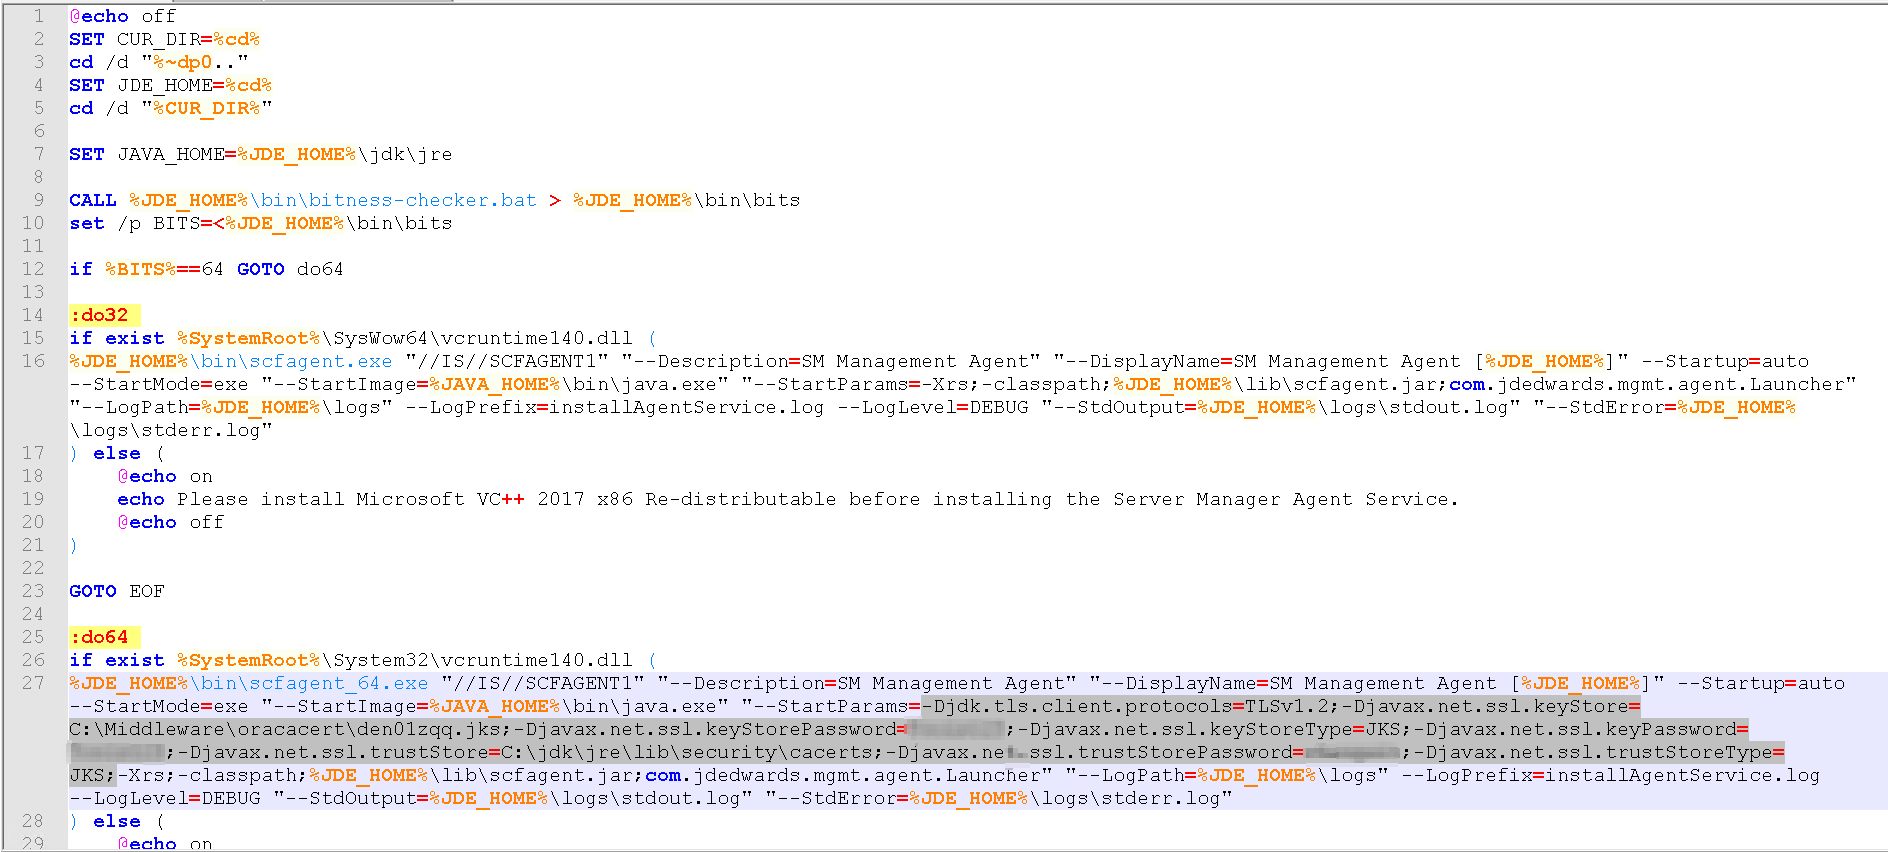
Changes the $SCHFA\bin\installAgentService.bat file as follows:
A sample start params entry is provided below. The changes are shown in bold in this entry sample, make the same set of changes in the do32 and do64 sections.
"--StartParams=-Djdk.tls.client.protocols=TLSv1.2;-Djavax.net.ssl.keyStore= C:\certs\keystore.jks;-Djavax.net.ssl.keyStorePassword=<password>;-Djavax.net.ssl.keyStoreType=JKS;-Djavax.net.ssl.keyPassword=<password>;-Djavax.net.ssl.trustStore= C:\Java64\jdk1.8.0_211\jre\lib\security\cacerts;-Djavax.net.ssl.trustStorePassword=<password>;-Djavax.net.ssl.trustStoreType=JKS;-Xrs;-classpath;%JDE_HOME%\lib\scfagent.jar;com.jdedwards.mgmt.agent.Launcher"Install the Server Manager Agent Windows Service by using the modified $SCFHA\bin\ installAgentService.bat file.
Start the Server Manager Agent by using the $SCFHA\bin\startAgent.bat file.