Creating a REST Connection with a Certificate
On the Orchestrator Studio Home page, click the Connections icon.
On the Connections side panel, click the New button and select REST from the drop-down list.
On the Connections design page, complete these fields:
Name. Enter a unique name for the Orchestrator connection.
Description. Enter a description to identify the connection. For example, if you are creating more than one soft coding record to connect to different locations, you should include the respective location in the description of each of the soft coding records.
The type of connection is displayed next to the Description field.
User/Role. Enter the user who is authorized to run the originating orchestration, which is the orchestration on the local system and calls the external orchestration. The user can be an EnterpriseOne user, role, or *PUBLIC.
Environment. Enter the environment where the local orchestrations reside.
On the Service Information tab, in the Endpoint field, enter the service URL.
Click the Security tab and enter the security settings that are required for the service.
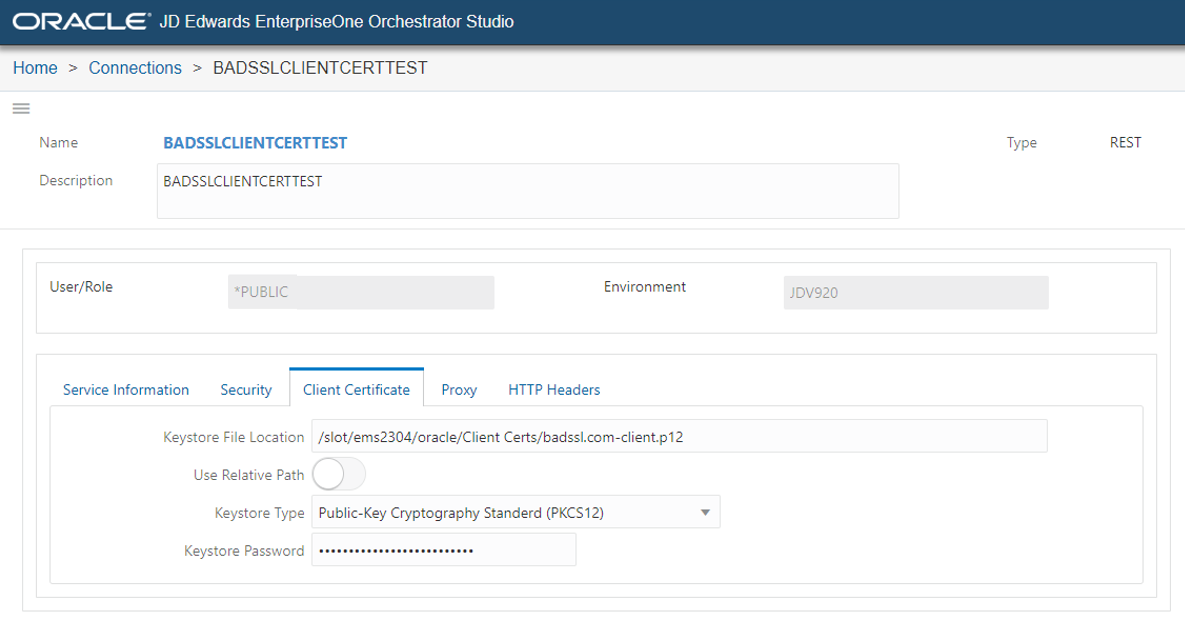
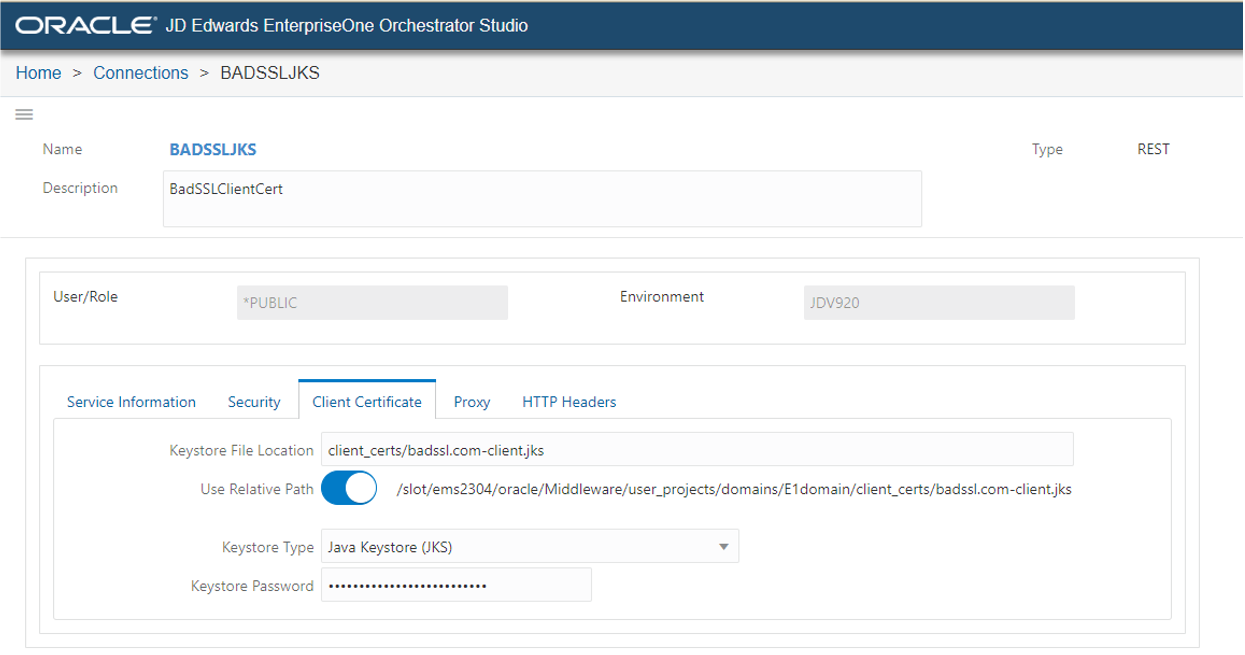
Click the Client Certificate tab and complete these fields:
Keystore File Location. Enter the fully qualified path to the keystore on the AIS server where the orchestration is running.
Or
Enter the relative path from the domain root of the AIS server. If you want to choose this option, you must slide the Use Relative Path toggle button to the right. The system displays an example of where the relative path is located on the AIS host server when you enable the Use Relative Path option.
Keystore Type. Enter the type of the keystore file. For example,
- PKCS12 (.p12, .pfx)
- JKS (.jks)
Keystore Password. Enter the password of the keystore.
Or
On the Proxy tab, specify a proxy server for accessing the external server if required.
On the HTTP Headers tab, enter the details to add a header record if required.
Click the Save button to save the record.