 Enabling
Centralized Configuration for EnterpriseOne Servers
Enabling
Centralized Configuration for EnterpriseOne Servers Before You Begin
Purpose
This OBE shows you how to enable Centralized Configuration for EnterpriseOne Servers in the Server Manager Console.
Time to Complete
50 minutes.
Background
EnterpriseOne Servers are a critical component of the JDE architecture with a wide range of settings and configurations. Any single change to a setting that has to be done on multiple servers requires complex navigation and multiple steps through the server manager interface of each enterprise server. This can be simplified and optimized with a centralized configuration mechanism. Starting with Tools Release 9.2.8, you can use Centralized Configuration in Server Manager Console to configure settings for all the EnterpriseOne Servers. Centralized Configurations allows to set up a default configuration that servers can inherit as well as eliminates the manual effort to populate common settings across multiple servers.
Note: If you have enabled Centralized Configuration in the previous Tools Releases 9.2.7 or 9.2.7.3, the Centralized Configuration will be automatically enabled for Enterprise, BSSV, and Transaction servers in Release 9.2.8. Alternatively, when you perform a Change Component operation on the Enterprise, BSSV, and Transaction server instances, Centralized Configuration is automatically enabled if it was enabled in the previous releases. Change component will make all the current configuration entries in database as instance level configuration. See “Using Centralized Configuration for EnterpriseOne HTML Servers (Release 9.2.7)” for details.
The Centralized Configuration settings are not applicable for Deployment and Database servers.
Scenario
For this OBE, consider a scenario in which you want to create a new server group with Centralized Configuration settings enabled and create new HTML, AIS, and Enterprise server instances that will inherit the same configuration settings from the server group. Additionally, you will update the default configuration settings in the server group to verify changes are applied across the HTML, AIS, and Enterprise servers.
Prerequisite
Before performing the tasks in this OBE, you must ensure that
- The Sever Manager Console and the HTML, AIS, and Enterprise servers are on Tools Release 9.2.8.
- All the required drivers and certificates must be installed on both Server Manager Console and JAS for Server Manager Console to communicate with the database.
- Latest Rollup ESU must be installed.
 Enabling
Centralized Configuration
Enabling
Centralized Configuration
In this task, you will enable the Centralized Configuration for EnterpriseOne servers in the Server Manager Console.
After you save the settings in the Centralized Configuration for the first time, it is applied to the server group’s server configuration settings and all the server instances within that group. Upon a successful save, Centralized Configuration inserts a group level configuration to the database. See "Understanding How to Enable Centralized Configuration for EnterpriseOne HTML Servers" in the Server Manager Guide for details.
- Log in to the Server Manager Console.
- In the Configure section, click Centralized
Configuration to access the details.
Note: Make sure you have required drivers and certificates installed to allow the JAS instances and the Server Manager Console to connect with the database.
- In Centralized Configuration page, complete the following
fields:
Field Value Username Enter the username to use for centralized configuration when connecting to the configured database. Password Enter the password to use for centralized configuration when connecting to the configured database. Database Type Use the drop-down menu to select a database where the centralized configuration table is stored.
For the purpose of this OBE, we will select Oracle Database as the Database Type.
Note: Tnsname.ora field is populated when you select Oracle Database and the Use TLS field is populated when you select either IBM UDB, AS/400, or SQL.Owner Enter the database object owner where the centralized configuration table is stored. Server Enter the server name where the centralized configuration table is stored. Database Name Enter the database name where the centralized configuration table is stored. Physical Database Enter the physical database name where the centralized configuration table is stored. Server Port Enter the database server port where the centralized configuration table is stored. Data Source Name Enter the database server port where the centralized configuration table is stored. Use TLS The Use TLS option appears for selection after you select either IBM UDB, AS/400, or SQL. Select the check box if you want a secure TLS connection for the selected database. Tnsname.ora The Tnsname.ora field appears for modification after you select Oracle Database in Database Type. Enter the Tnsname.ora connection details. - Click Save.
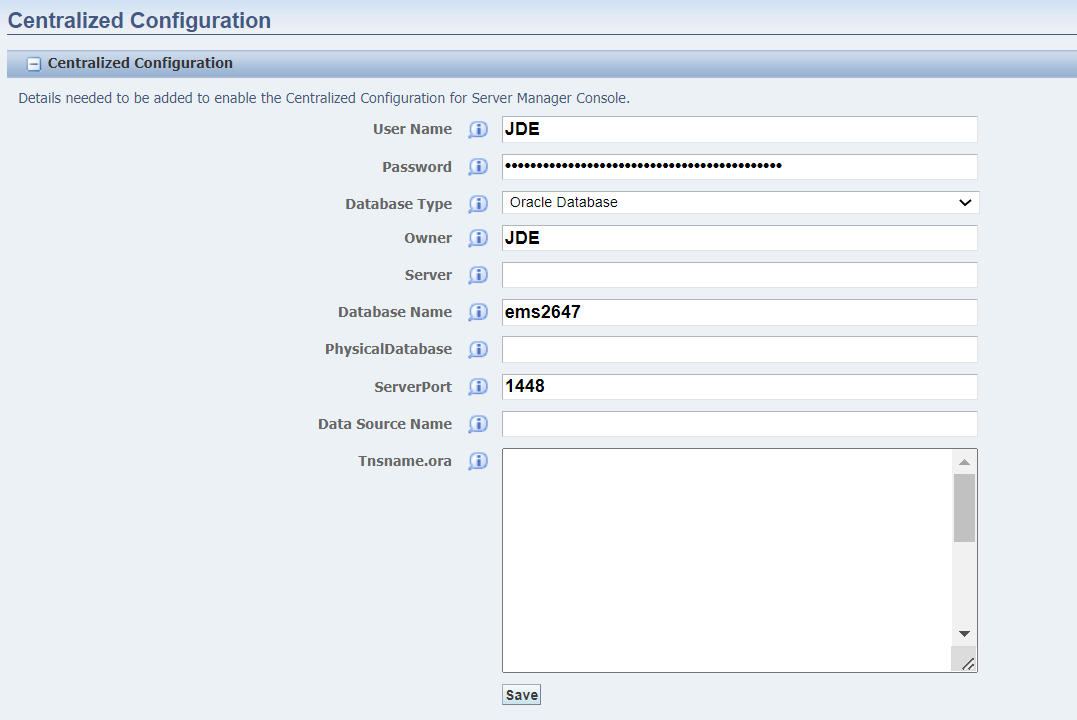
Centralized Configuration fields
 Creating
a New Server Group
Creating
a New Server Group
In this task you will create a new server group and verify that the configuration settings of the HTML and AIS servers are being inherited from the values defined in the Centralized Configuration.
Note: You must have the consoleConfig
permission to create a new server group.
To create a new server group:
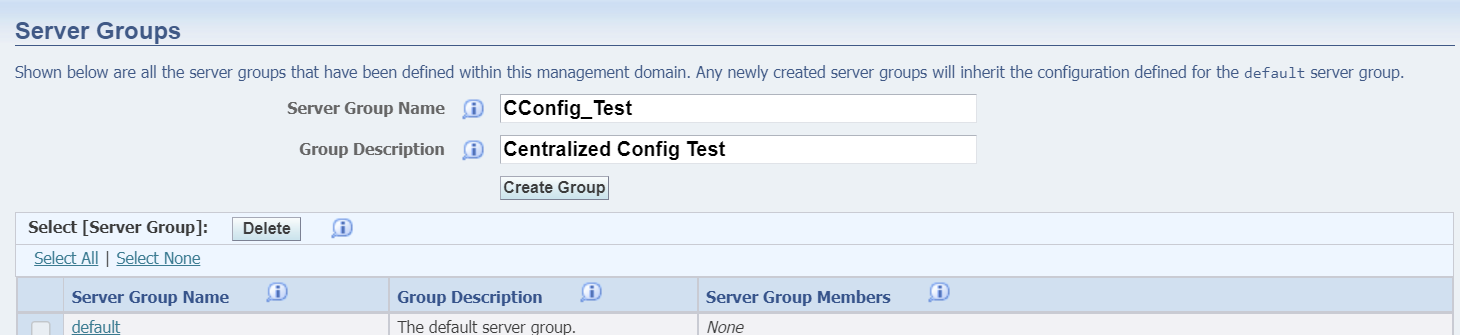
- In the Quick Links section of the Management Console, click the Server Groups link.
- On Server Groups, enter a unique name in the Server Group
Name field. We will enter
CConfig_Testfor the purpose of this OBE. - Add a Description in the Group Description field. We will
enter
Centralized Config Test. - Click the Create Group button.
- The Management Console displays the new server group, CConfig_Test in the grid.
- Open CConfig_Test to access the configuration settings.
- Navigate to EnterpriseOne HTML Server under Server Group Default Configuration section.
- Click Database to check the database configuration settings.
- Note that the Database Type is Oracle Database.
- Navigate to EnterpriseOne AIS Server under Server Group Default Configuration section.
- Click Database to check the database configuration settings.
- Note that the Database Type is Oracle Database.
 Creating
a New EnterpriseOne HTML Server Instance
Creating
a New EnterpriseOne HTML Server Instance
In this task you will create a new EnterpriseOne HTML server instance.
- Select the Managed Home in which you wish to create the HTML server instance.
- Click the Create a New Managed Instance button to create the Managed Instance in the Managed Home.
- On Create/Register a Managed Instance, Instance Type, select the EnterpriseOne HTML Server radio button.
- Click Continue.
Note: The Propagate Enterprise Server Config drop-down appears only if any enterprise server is registered within the Server Manager console. The Propagate Enterprise Server Config drop-down contains the available enterprise server instances registered with the SM console within a particular selected server group. NONE is added to the drop-down by default.
-
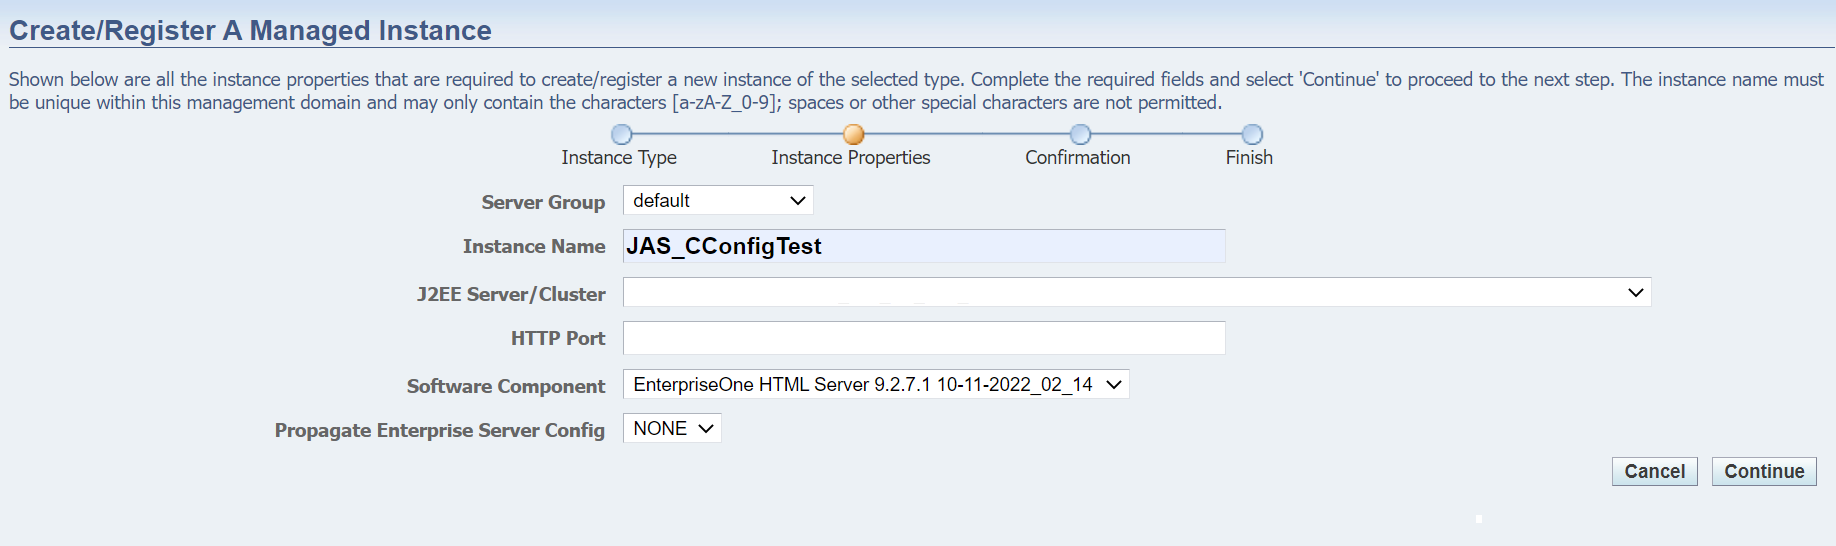
On Create/Register a Managed Instance, Instance Properties, complete these fields:
Field Value Server Group Use the drop-down menu to select the default server group. Instance Name Enter JAS_CConfigTestas the instance name.J2EE Server Use the dropdown to select a valid J2EE server. HTTP Port You must ensure that the port that you specify is available and is not being used by any other application currently installed and running on the server on which the application server is running. Software Component Use the dropdown to select the version of this Software Component that you wish to install. Propagate Enterprise Server Config By default, the selected item is set to NONE. Selecting NONE signifies that you do not wish to propagate configurations from any available enterprise server. Keep the selection as NONE. - Click Continue.
- On Create/Register a Managed Instance, Confirmation, review the key configuration items. The page displays a variety of fields depending on your application server (WAS or WLS). The values on this form must be confirmed manually. You must validate or update, as appropriate, all configuration items. Based on your selections, respective entries will be added to database.
- Click Continue.
- On Create/Register a Managed Instance, Finish, click the Create Instance button.

After the instance is created, the browser redirects to the Management Console page for the newly registered HTML Server. The server also appears as a Managed Instance in the corresponding Managed Home.
 Creating
a New EnterpriseOne AIS Server Instance
Creating
a New EnterpriseOne AIS Server Instance
In this task you will create a new EnterpriseOne AIS server instance.
- Select the Managed Home in which you wish to install the AIS server instance.
- Click the Create a New Managed Instance button to create the Managed Instance in the Managed Home.
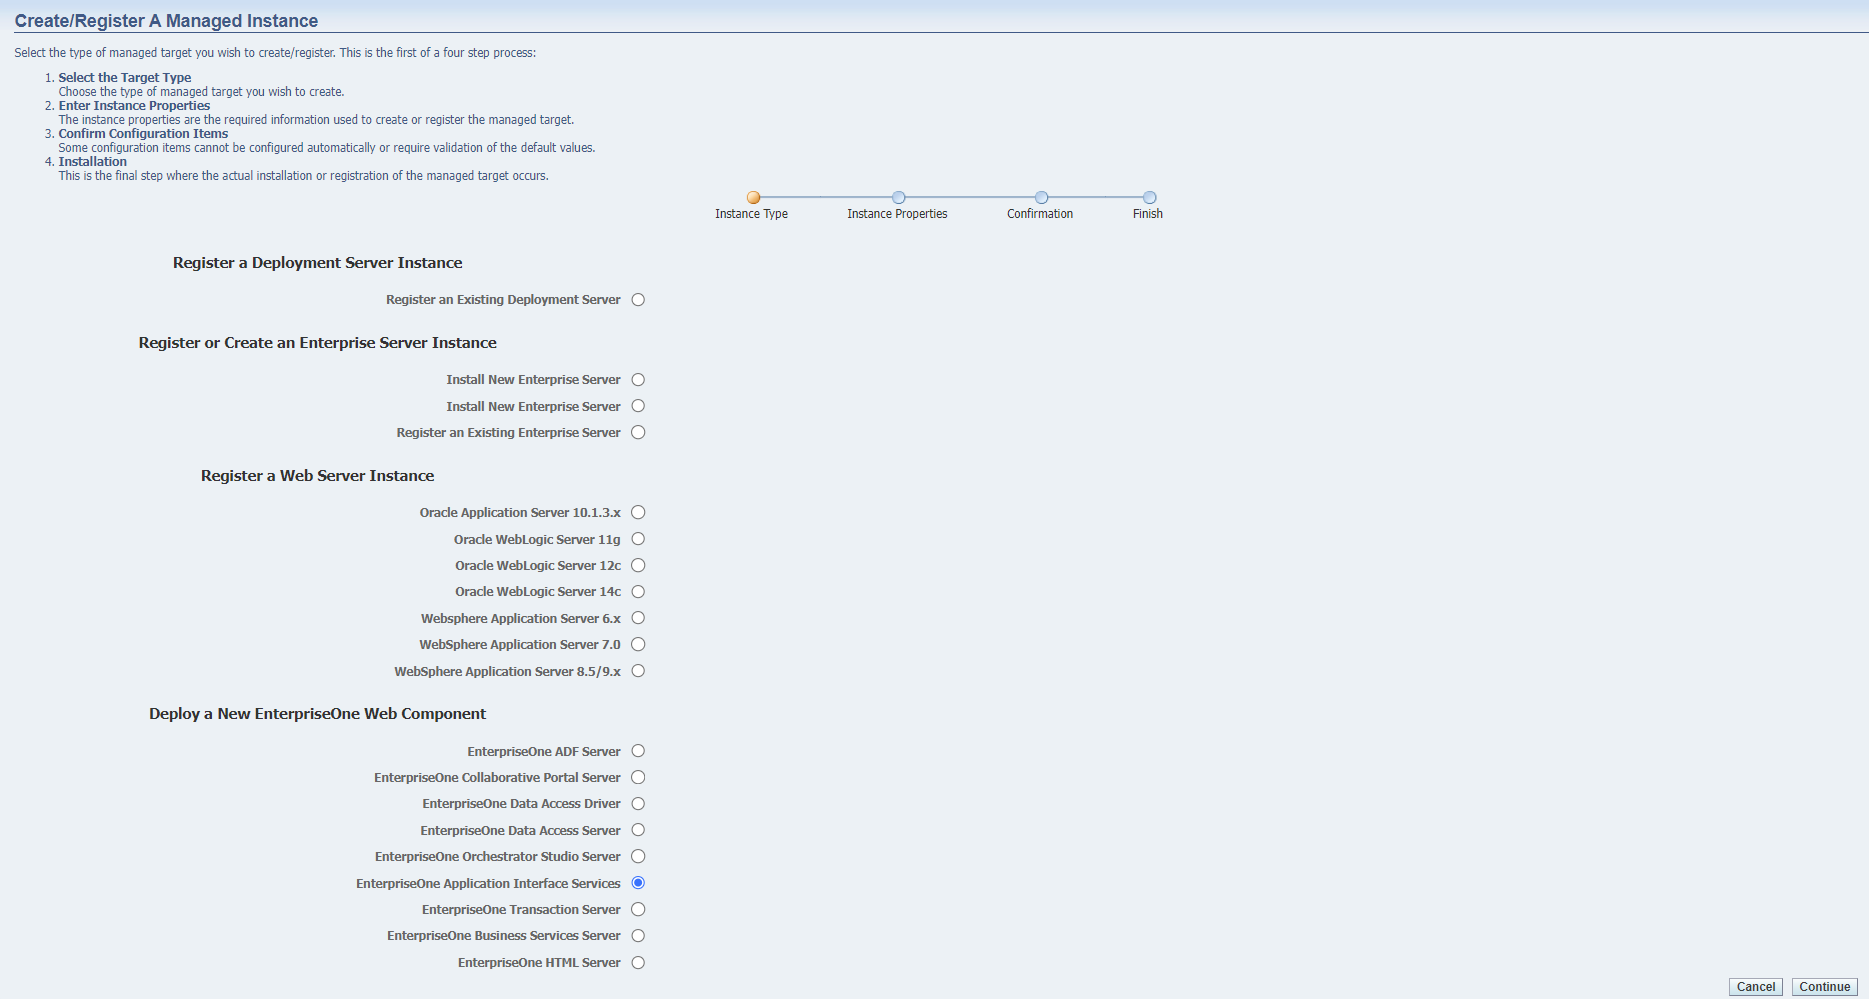
- On Create/Register a Managed Instance, Instance Type, select the EnterpriseOne Application Interface Services radio button.
- Click Continue.
- On Create/Register a Managed Instance, Instance Properties,
complete these fields:
Field Value Server Group Use the drop-down menu to select the default server group. Instance Name Enter AIS_CConfigTestas the instance name.J2EE Server Use the dropdown to select a valid J2EE server. HTTP Port You must ensure that the port that you specify is available and is not being used by any other application currently installed and running on the server on which the application server is running. Software Component Use the dropdown to select the version of this Software Component that you wish to install. Propagate JAS Settings Use the dropdown to select the JAS instance to propagate the JDBj.ini and tnsnames.ora file of the JAS instance into the AIS instance.
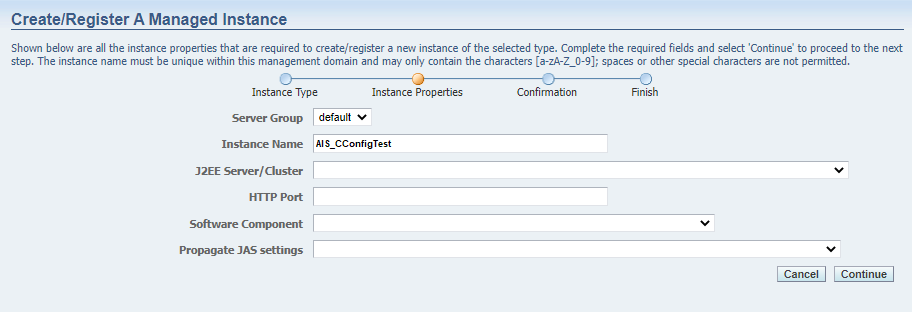
Instance properties of EnterpriseOne AIS server - Click Continue.
- On Create/Register a Managed Instance, Confirmation, review the key configuration items. The page displays the settings that are typically required to successfully start your instance. The values on this form must be confirmed manually. You should validate or update, as appropriate, all configuration items.
- Click Continue.
- On Create/Register a Managed Instance, Finish, click the Create Instance button to complete the installation of the AIS Server.
After the instance is created, the browser redirects to the Management Console page for the newly registered AIS Server. The server also appears as a Managed Instance in the corresponding Managed Home.
 Creating
a New EnterpriseOne Enterprise Server Instance
Creating
a New EnterpriseOne Enterprise Server Instance
In this task you will create a new EnterpriseOne Enterprise server instance.
- Select the Managed Home with which you wish to create the Enterprise Server as a new Managed Instance.
- Click the Create a New Managed Instance button to create the Managed Instance in the Managed Home.
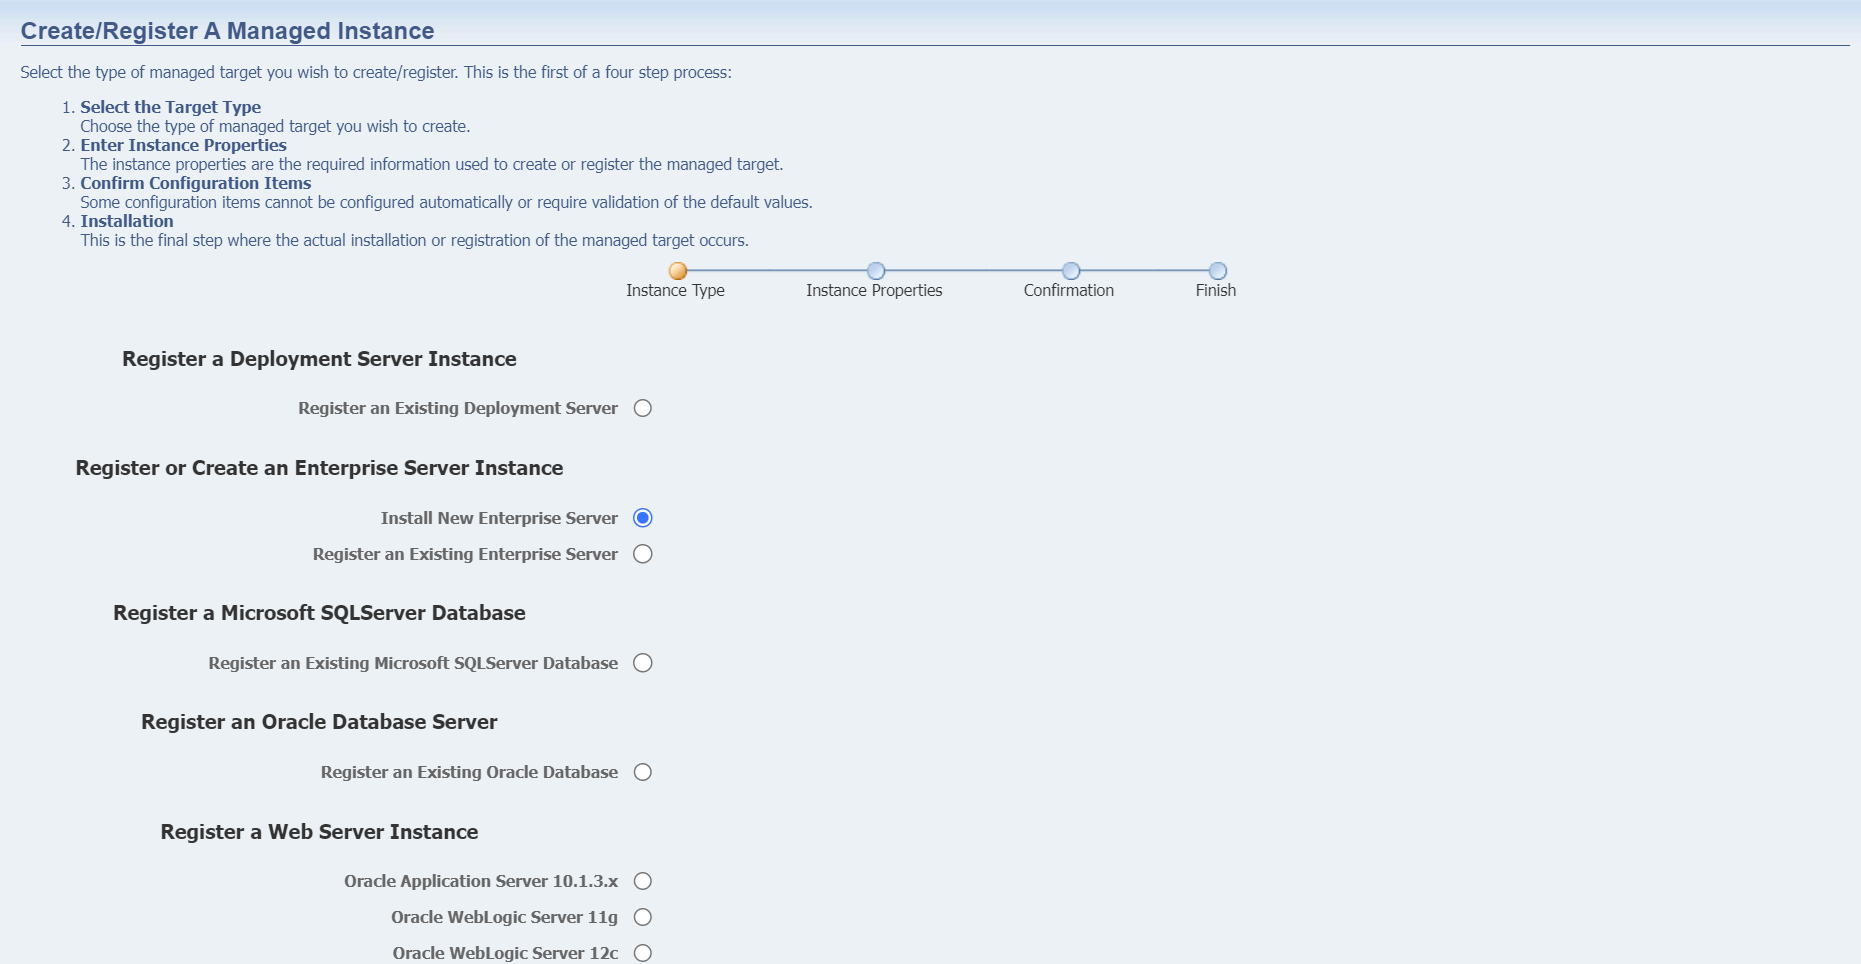
- On Create/Register a Managed Instance, Instance Type, select the Install New Enterprise Server radio button.
- Click Continue.
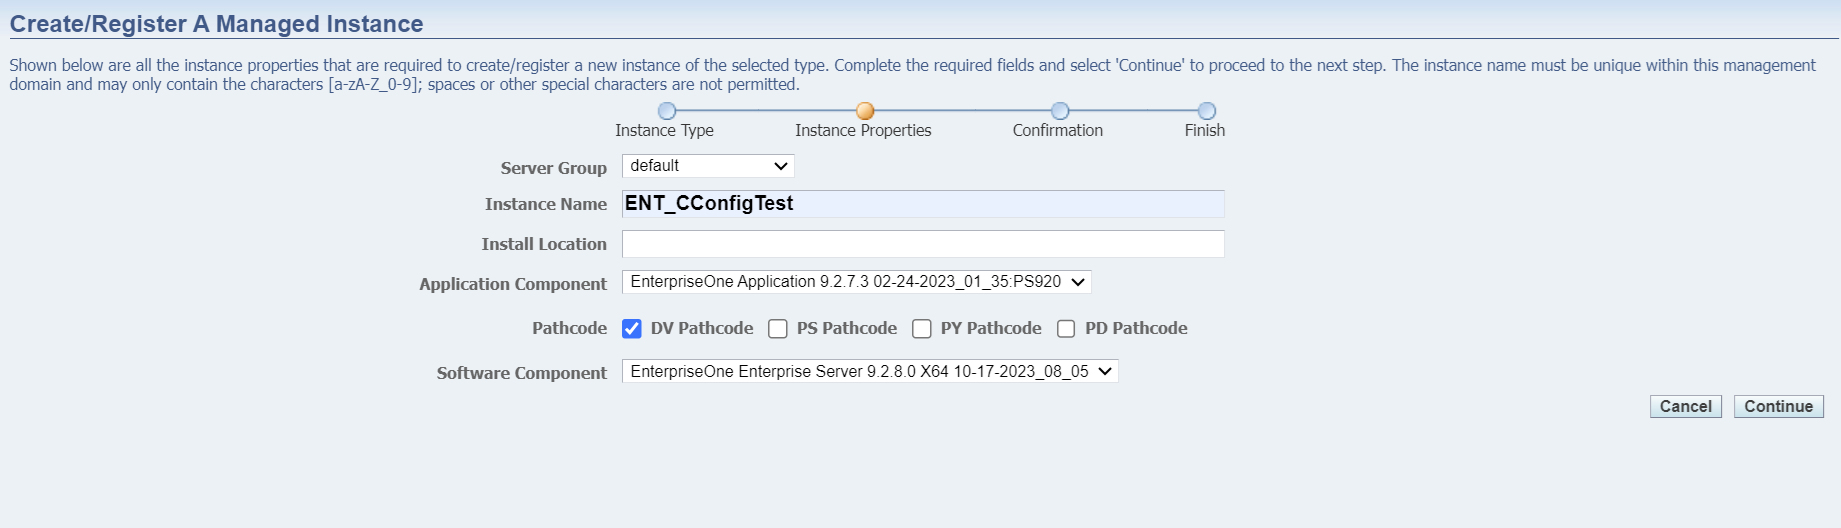
- On Create/Register a Managed Instance, Instance Properties,
complete these fields:
Field Value Server Group Use the drop-down menu to select the default server group. Instance Name Enter ENT_CConfigTestas the instance name.Install Location Enter a valid install location for the existing Enterprise Server. Foundation Component Select the required foundation component from the drop-down menu. Application Component Select the required application component from the drop-down menu that was created by package build. Path Code Path code built in the component is automatically selected, unless this is a PS package, then all path codes are available to be selected. This is used for One-Click provisioning. - Click Continue.
Note: For IBMi, ensure that you fill out the Application Path Addendum under Installation section. This will identify the Tools Release (example: 'E920SYS<addendum>') with the path code (example: 'DV920<addendum>, PY920<addendum>'). - On Create/Register a Managed Instance, Confirmation, review the key configuration items. The web page displays a variety of fields depending on the database and environments of your installation.
- Click Continue.
- On Create/Register a Managed Instance, Finish, click the Create
Instance button to complete the installation of the
Enterprise Server.
After the instance is created, the browser redirects to the Management Console page for the newly registered Enterprise Server. The server also appears as a Managed Instance in the corresponding Managed Home.
 Adding
the New HTML, AIS, and Enterprise Server Instances to the Server
Group
Adding
the New HTML, AIS, and Enterprise Server Instances to the Server
Group
In this task you will add the newly created HTML and AIS server instances to the server group and verify that the server instances are inheriting the same configuration settings that are defined in the Centralized Configuration.
- In Server Manager Console, click Server Groups.
- Click CConfig_Test.
- In the Configure Server Group page, navigate to Add Server Group Members section.
- The drop-down menu in Instance Name lists all the servers that do not belong to the current server group. Select the newly created instance, JAS_CConfigTest.
- Click Add Group Member button. The system will now display the new instance under the Server Group Members heading.
- Open the JAS_CConfigTest instance and navigate to Configuration section.
- Click any configuration head. For the purpose of this OBE, we will access Database.
- Verify that the database in the Database Type field is Oracle Database which we selected while enabling Centralized Configuration.
- In the Configure Server Group page, navigate to Add Server Group Members section.
- Select the newly created instance, AIS_CConfigTest.
- Click Add Group Member button. The system will now display the new instance under the Server Group Members heading.
- Open the AIS_CConfigTest instance and navigate to Configuration section.
- Click any configuration head. For the purpose of this OBE, we will access Database.
- Verify that the database in the Database Type field is Oracle Database which we selected while enabling Centralized Configuration.
- In the Configure Server Group page, navigate to Add Server Group Members section.
- Select the newly created instance, ENT_CConfigTest.
- Click Add Group Member button. The system will now display the new instance under the Server Group Members heading.
- Open the ENT_CConfigTest instance and navigate to Configuration section.
- Click any configuration head. For the purpose of this OBE, we will access Database.
- Verify that the database in the Database Type field is Oracle Database which we selected while enabling Centralized Configuration.
 Updating
Configuration Settings in the Server Group
Updating
Configuration Settings in the Server Group
In this task you will update the configuration settings of the newly created server group and verify that the changes are applied to the HTML, AIS, and Enterprise server instances as well.
- Access Server Groups in Server Manager Console.
- Click CConfig_Test to open the server group.
- Navigate to Server Group Default Configuration Section and click Database under EnterpriseOne HTML Server.
- From the drop-down menu in Database Type, select MS SQL Server.
- Click Apply.
- After updating the Database Type, open the newly created managed instance JAS_CConfigTest.
- The system displays a warning message along with a Synchronize Configuration button. Click the Synchronize Configuration button to sync the configuration setting changes and restart the instance.
- Navigate to Configuration and click Database.
- Verify that the Database Type is updated to MS SQL Server.
- Open the newly created managed instance AIS_CConfigTest.
- The system displays a warning message along with a Synchronize Configuration button. Click the Synchronize Configuration button to sync the configuration setting changes and restart the instance.
- Navigate to Configuration and click Database.
- Verify that the Database Type is updated to MS SQL Server.
- Open the newly created managed instance ENT_CConfigTest.
- The system displays a warning message along with a Synchronize Configuration button. Click the Synchronize Configuration button to sync the configuration setting changes and restart the instance.
- Navigate to Configuration and click Database.
- Verify that the Database Type is updated to MS SQL Server.
 Want
to Learn More?
Want
to Learn More?
- “Using Centralized Configuration for EnterpriseOne HTML Servers (Release 9.2.7)” in the Server Manager Guide.
- “Using Centralized Configuration for EnterpriseOne AIS Servers (Release 9.2.7.3)” in the Server Manager Guide.
- “Using Centralized Configuration for
Enterprise, BSSV, and Transaction (RTE) Servers (Release
9.2.8)” in the Server Manager Guide.