Entering Standard Invoices
Access the Standard Invoice Entry form.
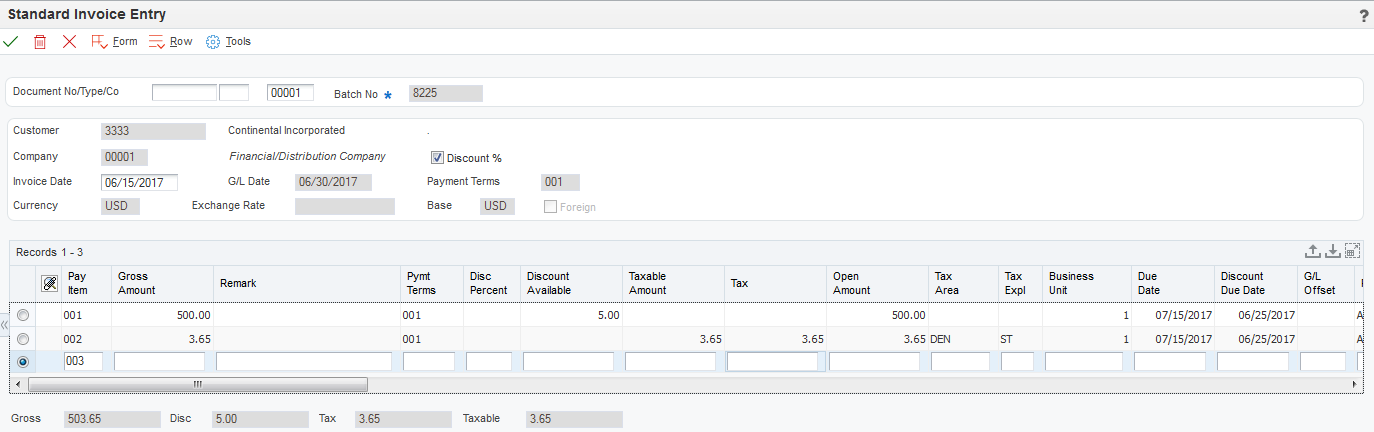
To enter standard invoices:
To assign the document number, document type, and document company, complete the Document No/Type/Co optional fields in the header area.
You should let the system assign the document number from Next Numbers, the document type from the Invoice Entry MBF Processing Options program, and the document company from the company number that you assign to the invoice. The system assigns this information when you click OK at the end of this task.
Complete the Customer, Company, Invoice Date, and G/L Date fields in the header area.
(Optional) Override the value in the Payment Terms field, if necessary.
Select Additional Info from the Form menu to access the Additional Information form.
(Optional) Override the value for any of the fields on the Additional Information form, if necessary, and then click OK to return to the Standard Invoice Entry form.
In the detail area of the Standard Invoice Entry form, complete the Gross Amount field.
(Optional) In the detail area, complete the Remark, Pymt Terms, Business Unit, Due Date, and G/L Offset fields for each pay item.
The system completes the Pymt Terms field with the value that is assigned in the header portion of the form, but you can override it for any or all invoice pay items.
Note:If you change the payment terms code after you have entered the pay item, you must clear the values in the Discount Available, Due Date, and Discount Due Date fields so that the system can calculate new values.
Click OK to access the G/L Distribution form.
If an error occurs during entry, the system highlights the first field that is in error. To view the error, select Display Errors from the Help menu.
After you enter invoice information, enter the detail lines that distribute the invoice amount to the G/L accounts. You must distribute the entire amount of the invoice, or the system issues an error message.
On the G/L Distribution form, complete the Account Number and Amount fields in the detail area for each G/L distribution.
(Optional) Complete the Explanation -Remark field, and click OK.
Note:If you are using Advanced Cost Accounting, complete the Cost Object and Object Type fields.