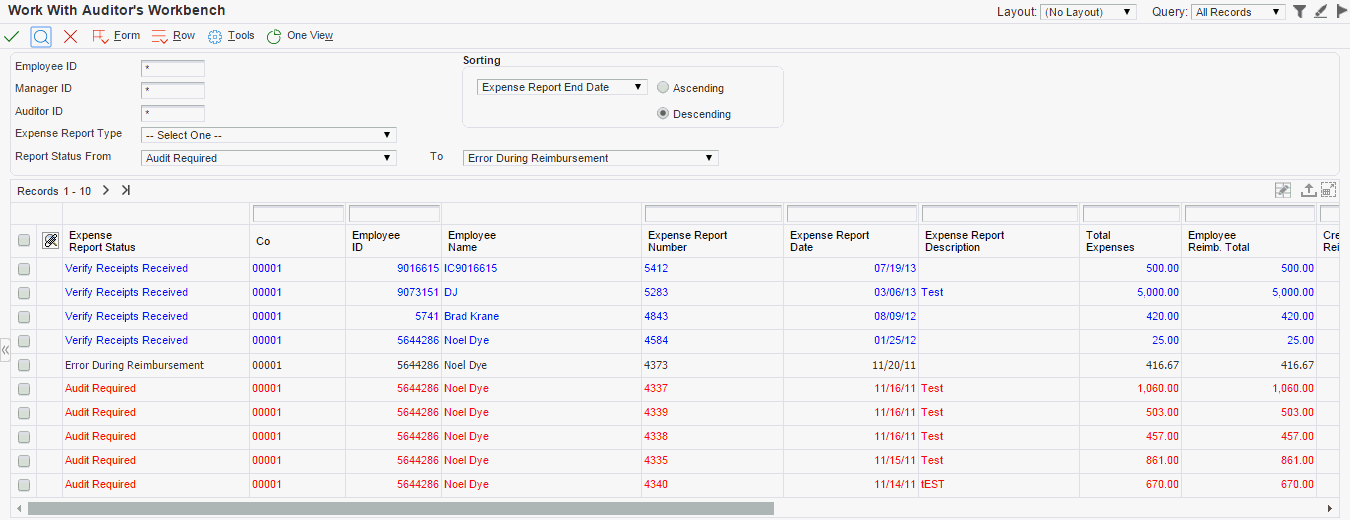
Auditing Expense Reports
Access the Work With Auditor's Workbench form.

To audit an expense report:
On Work With Auditor's Workbench, locate an expense report that requires an audit.
Perform one of these actions:
To approve the report without approving individual expenses, select the report and select Approve Report from the Row menu.
You can approve the report without approving individual expenses only when the expense report status is Verify Receipts Received and the processing option for Required Receipts is blank.
The system completes the Audit Complete Date field and changes the status of the expense report to Reimbursement Process (900).
To review individual expenses, select the report and click Select and continue to the next step.
The form that the system displays depends on the setting of the Policy Exceptions processing option.
To review credit card transactions that were applied to the expense report, select the report and select CC Expenses from the Row menu, and then enter the desired search criteria to review the transactions.
Perform one of these actions:
If the processing option is set to require an audit, the system displays the Auditor's Checklist form. Proceed to step 6.
If the processing option is set to not require an audit, the system displays the Edit Expense Report Information form. Continue to the next step.
On Edit Expense Report Information, review the expenses on the expense report.
The system provides these visual cues to assist you with the audit:
If the expense amount exceeds the audit amount in the policy, a red X appears to the left of the expense category. You can review the policy limit for the expense from the Auditor's Checklist.
If a preferred supplier was not used, as required by the policy, a green check mark appears to the left of the expense.
Perform one of these actions:
Click Accept to approve the report.
The system completes the Audit Complete Date field and changes the status of the expense report to Reimbursement Process (900).
Click Reject and continue to step 12.
When you reject an expense report, you must provide a reason. The system displays the Expense Report Messages form for you to complete.
Click Auditor's Checklist to approve individual expenses and to review policy limits. Continue to the next step.
On the Auditor's Checklist form, select one of the options to display the expense items that you want.
To approve an expense, select the expense, verify the information on the receipt, and then select Approve Expense from the Row menu.
The system marks the expense with a check mark to indicate that you approved it. If you approve the wrong expense, select Approve again to remove the check mark.
Although you can use the checklist to assist you in approving expenses, the system requires approval only for expenses that require a receipt, expenses that are policy exceptions, or expenses that are duplicate, depending on how the processing options are set.
To assist you in the audit process, the system displays the policy limit for the expense category. The system displays a policy limit amount only when the expense exceeds the audit amount established for the policy. The policy limit does not apply to expenses that exceed the daily allowance.
If the expense amount exceeds the per diem amount (that is established by the daily allowance in the policy), the system completes the Per Diem Exceeded field with the amount that exceeded the rule, as well as displays the corresponding per diem expense category.
Continue approving expense items, as necessary, and then click OK.
On Edit Expense Report Information, examine the expense report details, as necessary.
Note: Information about expense exceptions might be available. If the envelope button appears in the upper right corner of the Edit Expense Report Information form, click it to read existing comments or make additional notes about the expense report.If you have the authority and you need to revise expense report details, select the expense and change the desired information.
A processing option for the Expense Report Review/Entry program specifies whether the auditor has authority to modify the expense report.
After you review the expense report details, click one of these buttons:
Accept
The system completes the Audit Complete Date field and changes the status of the expense report to Reimbursement Process (900).
Reject
When you reject an expense report, you must provide a reason. The system displays the Expense Report Messages form for you to complete. Proceed to the next step.
Close
The system saves changes to the report, but does not change the status of the report.
On Expense Report Messages, click the options that specify the reasons that you rejected the expense report and whether you want to receive or send a copy of it to the manager.
Click the Send Message button.
If you selected Free Form Text Message, the system displays a window that you use to enter the rejection reason. Click OK when you complete your message.
Click Yes in the Confirmation window to reject the expense report.
The system changes the status of the expense report to Employee Review from Auditor and sends the employee a notification message that the report must be revised and resubmitted for approval.