Create JDBC Datasources
Use this procedure to create JDBC Datasources.
Logon to the WebLogic Administration Console.
Go to Services > Data Sources.
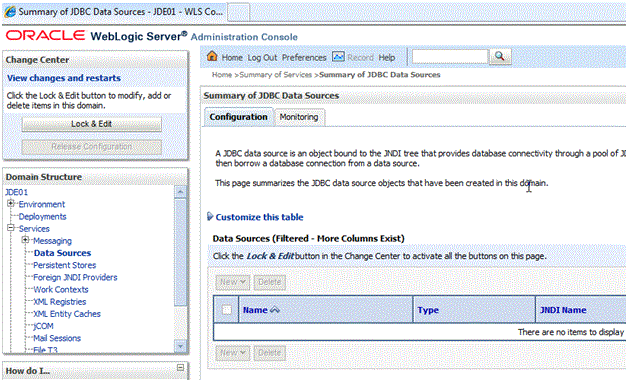
On Summary of JDBC Data Sources, click the Lock & Edit button.
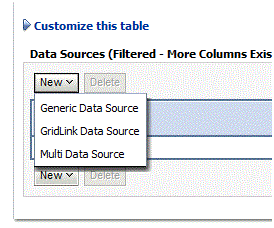
On Summary of JDBC Data Sources, in the Customize this table section, use the New pulldown to select Generic Data Source.

On Create a New JDBC Data Source, JDBC Data Source Properties, complete these fields:
Name
Enter a name for the JDBC data source.
JNDI Name
Enter a name for the JNDI.
Database Type
Use the pulldown to select your database type.
Click the Next button.
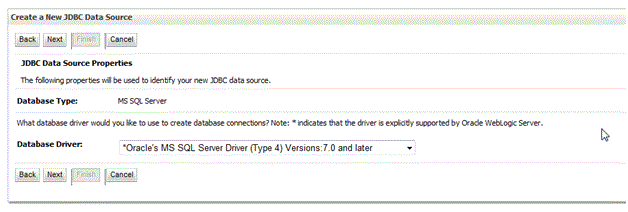
On Create a New JDBC Data Source, use the pulldown to select the driver appropriate for your database.
Note: For Oracle databases, you must select the thin driver. You cannot use an XA driver.Click the Next button.
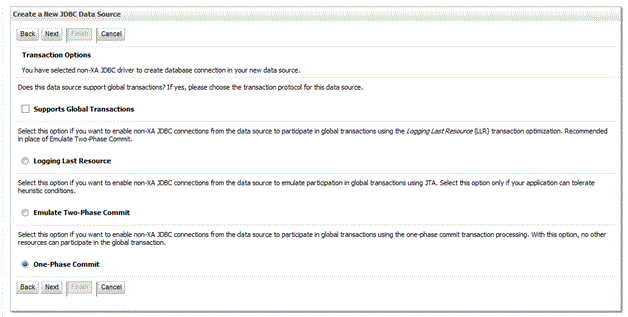
On Create a New JDBC Data Source, Transaction Options, deselect this checkbox:
Supports Global Transactions
Click the Next button.

On Create a New JDBC Data Source, Connection Properties, complete these fields:
Database Name
Enter a name for the database to which you want to connect.
Host Name
Enter the name or IP address of the database server.
Port
Enter the port on the database server which is used to connect.
Database User Name
Enter the database account you want to use to create the database connections.
Password
Enter the database account password to use to create database connections.
Confirm Password
Confirm the database account password.
Click the Next button.

On Create a New JDBC Data Source, Test Database Connection, click the Test Configuration button.
Ensure you receive this message: connection test succeeded
Click the Next button.

On Summary of JDBC Data Sources, in the list of Data Sources (Filtered - More Columns Exist), select the checkboxes for all servers in the cluster.
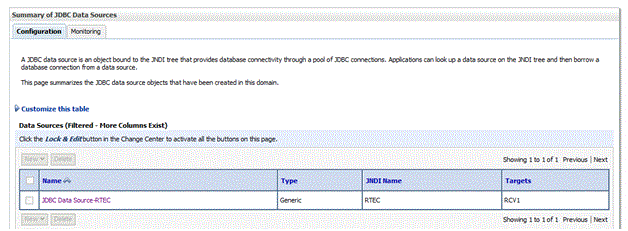
Click the Finish button at the bottom of the page.
Repeat the applicable steps in this procedure to add additional JDBC data sources.
Click Activate changes.