Creating the Linux Instance for the One-Click Provisioning Server
This section shows you how to create a Linux instance for the One-Click Provisioning Server for use by JD Edwards EnterpriseOne on Oracle Cloud Infrastructure. This instance includes the requisite Linux system.
Background
For additional information refer to Creating an Instance in the Oracle Cloud Infrastructure Documentation.
Creating a Linux Instance for the One-Click Provisioning Server
Use this procedure to create an instance for JD Edwards EnterpriseOne One-Click Provisioning Server.
- On the Oracle Cloud Infrastructure Console Home page, click the navigation menu in the upper-left corner.
- From the navigation menu, select Marketplace > Applications.
- In the Marketplace page, under All Applications, using the Search to
locate the listing for JD Edwards EnterpriseOne One-Click Provisioning Server
Image.Tip: To more easily locate this image, in the browser page, you can search for all or or part of the complete listing title, which is "JD Edwards EnterpriseOne One-Click Provisioning Server".
- Click on the Marketplace listing for JD Edwards EnterpriseOne JD Edwards EnterpriseOne One-Click Provisioning Server Image.
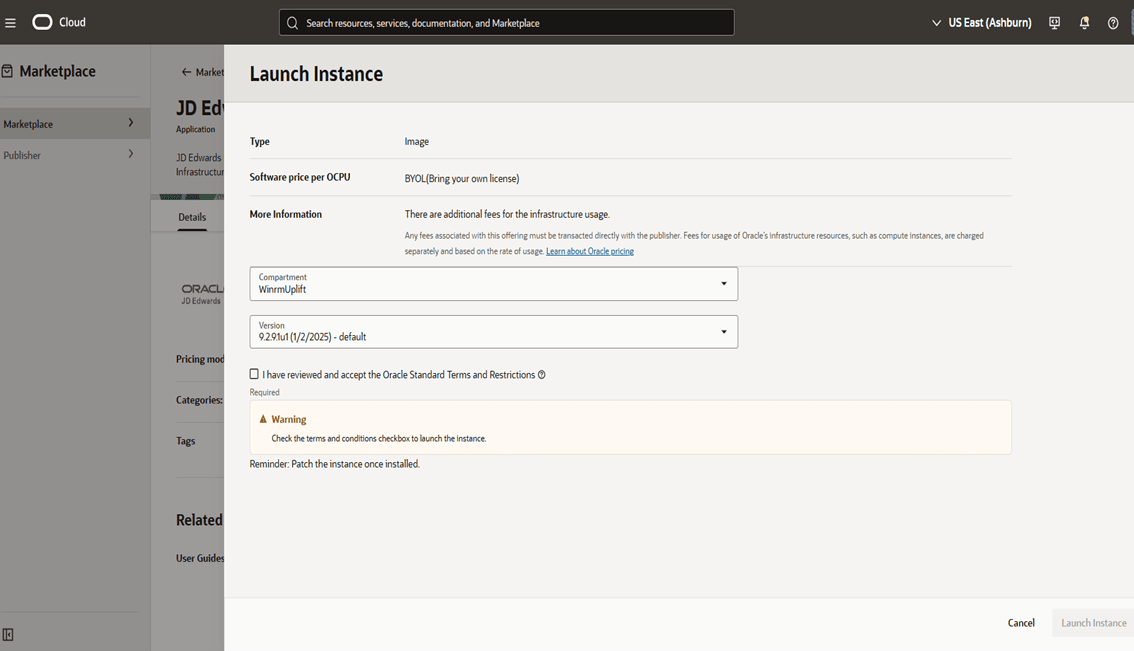
- On the Marketplace listing for JD Edwards EnterpriseOne JD Edwards EnterpriseOne One-Click Provisioning Server, in the COMPARTMENT field, use the drop down list to select the compartment that you previously created in the OBE of this Learning Path entitled Creating a Compartment.
- Also, on the Launch Instance page, you must review the Terms of Use and click the check box indicating you accept the terms.
- Click the Launch Instance button to continue.
- On the Create Compute Instance page, complete these fields:
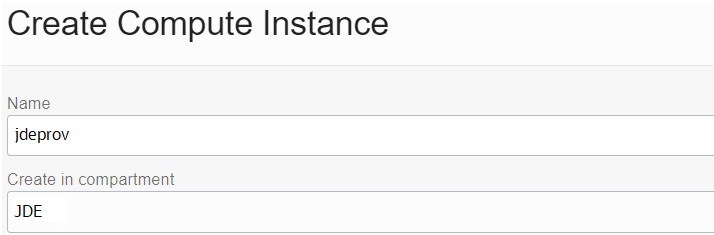
- Name
Note: The system automatically populates this field. It is recommended that you change this name to a value that you might more easily recognize. You can change the name later. The name does not need to be unique because an Oracle Cloud Identifier (OCID) uniquely identifies the instance.
The name you enter here is the display name of the instance. This will be the host name of the JD Edwards EnterpriseOne JD Edwards EnterpriseOne One-Click Provisioning Server Image server.
For example, the One-Click Provisioning Server might be called jdeprov.
Important: Special Naming Restrictions: Ensure that the host name of the JD Edwards EnterpriseOne JD Edwards EnterpriseOne One-Click Provisioning Server Image instance contains only alphanumeric values. You cannot use special characters such as the dollar sign ($), exclamation point (!), underscore (_), vertical pipe (|), at sign (@), and so on, in the host name.Machine names are limited to a maximum of 15 lower-case alphanumeric characters. This is the character count which is supported by the JD Edwards EnterpriseOne database table and application design.
Do not use a fully qualified domain name for host names. You should only specify the first node of the domain name.
If the existing hostname does not conform to these requirements, the runtime of JD Edwards EnterpriseOne will fail. If a host name does not conform to these requirements, you should permanently change the host name for your system.
- Create in Compartment
Enter the name of the compartment in which you want to create the instance. By default, the currently selected Compartment is displayed.
-
Configure placement and hardware
Click on an availability domain (AD) to select it. You can only specify a single AD.

-
Image
Because you already selected the image from Marketplace, the following image is automatically shown here. You should accept this value.

Shape
Click the Change Shape button.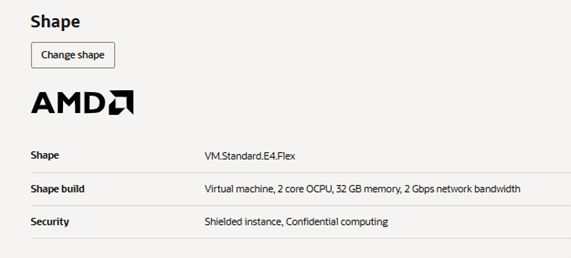
On Browse All Shapes, make the following selections:
- Instance type
Virtual Machine
- Shape series
Supported shapes are those which meet the OCPU and memory requirements listed in the OBE of this Learning Path entitled: Minimum Resource Requirements
Click the Select Shape button to save your selections.
- Instance type
-
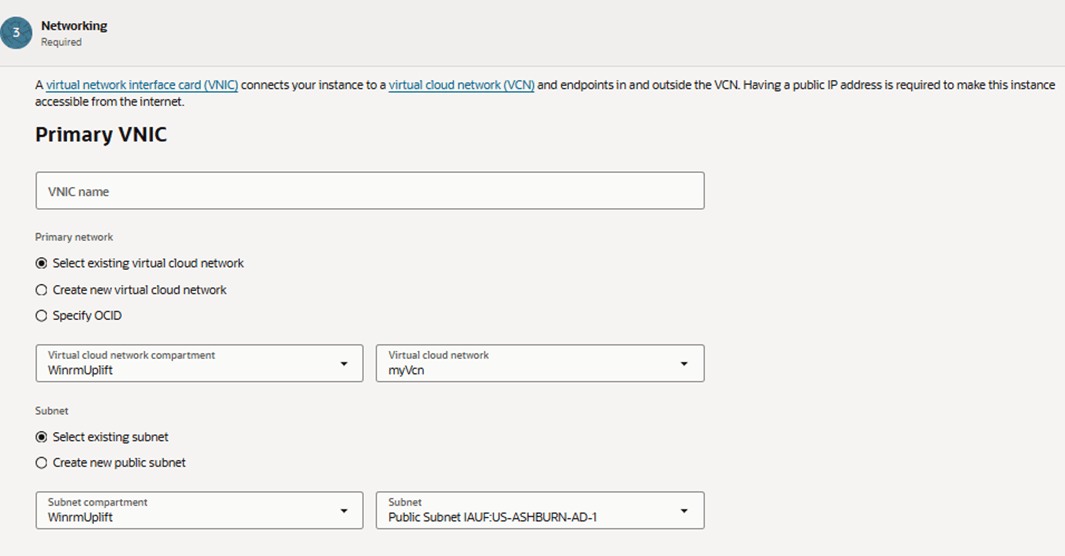
Configure networking
Verify, and if necessary, set your network settings for the instance of JD Edwards EnterpriseOne JD Edwards EnterpriseOne One-Click Provisioning Server Image. These settings include:
- Network
- Subnet
- Subnet in <Compartment>
Important: Be sure to select this radio button: Assign a public IPV4 Address.
Advanced Options
Expand the Advanced Options section and enter the Hostname. This value also appears as the Instance Name under the Basic Information section.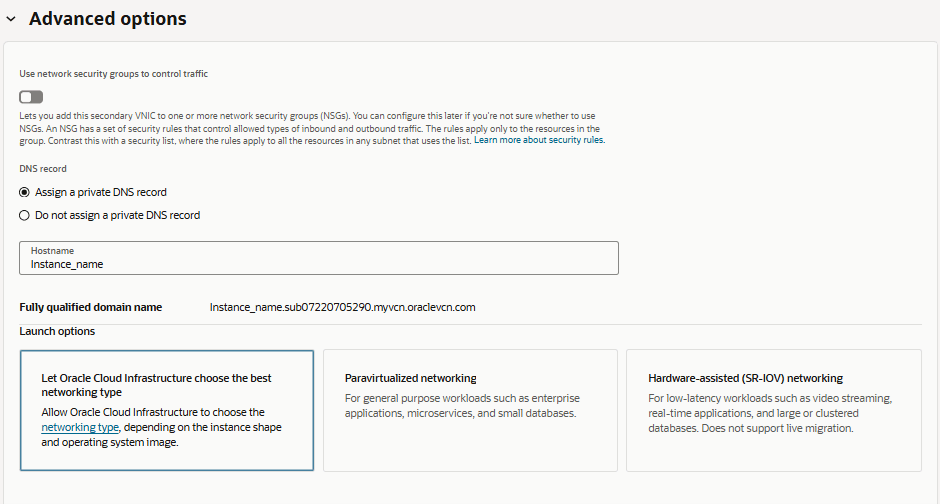
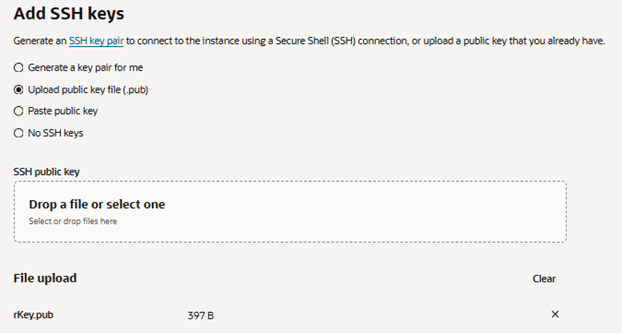
- Add SSH Keys
You must add the SSH keys that you previously created for use with JD Edwards EnterpriseOne JD One-Click Provisioning Server Image.
You can either click the Choose SSH key file option to select a file with your public (.pub) key from your computer, or choose the Paste SSH keys option to paste the key.
-
Configure boot volume
One-Click with a Compute or DB Systems (DBS) Database
You must specify a value of 100 GB. This size is required to support the install of the Provisioning Server with Pristine data (50 GB) with the remainder for use by a customer's normal data set. Further, you must enable this extended boot volume size as described below in the task Enabling the Custom Boot Volume Size.
One-Click with an Autonomous Database (ADB)
You must specify a value of 150 GB. This size is required to support the install of the Provisioning Server with Pristine data (50 GB) with the remainder for use by a customer's large data set. Further, you must enable this extended boot volume size as described below in the task Enabling the Custom Boot Volume Size.
Optionally you can choose to enable encryption using the checkbox for Use In-Transit Encryption.
-
Show Advanced Options
You do not need to set any Advanced Options.
- Name
-
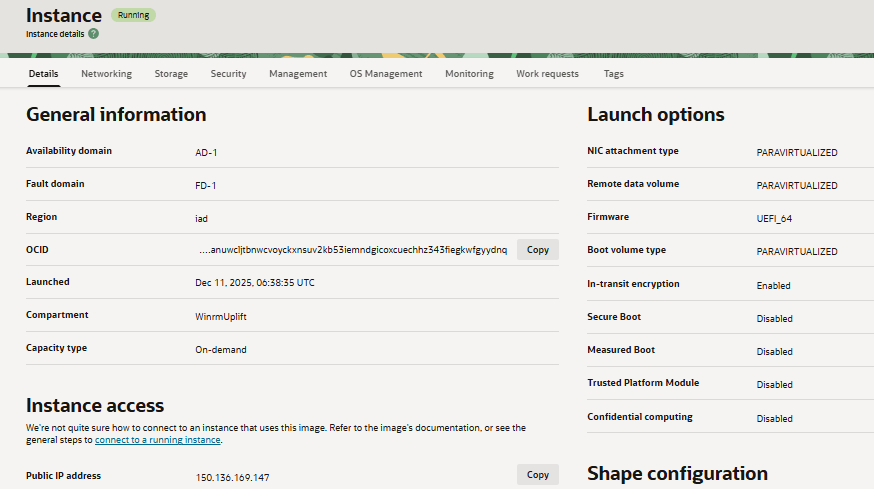
Click the Create button to create the Oracle Cloud Infrastructure instance for JD Edwards EnterpriseOne JD Edwards EnterpriseOne One-Click Provisioning Server Image.Important: After the instance is created, the system assigns a Public IP address. Make a note of this address because you will need it to connect to the instance using the SSH keys in order to complete the first-time configuration of the One-Click Provisioning Server Image for JD Edwards EnterpriseOne as described in the following section.
Enabling the Custom Boot Volume Size
If you followed the recommendation in this Learning Path and specified a Custom Boot Volume Size when you created the Linux instance for the Provisioning Server, you must run the following command (as root) to complete the resize functionality.
sudo /usr/libexec/oci-growfs -y
Setting Up the Provisioning Server
Use this procedure to set up the One-Click Provisioning Server.
- Connect to Provisioning Server Instance with public IP address and private key using Putty.
- Run the following command:
sudo ./prepareProvisionPrime.shNote: You can safely ignore access or permission errors in the console output during script execution. Such errors do not affect the successful execution of the script.Note: The Provisioning Server will reboot after running prepareProvisionPrime.sh script. - Upon completion of the reboot, run the following command:
sudo
                        ./setupProvisionPrime.sh
Important: Do not reboot the Provisioning Server after running above setup command until you change password for Server Manager Console and WebLogic Server.