Balance Sheet Case Study Task: Filter the Table Results
Note: You can access an existing layout
that was created for the One View Financial Statements feature only by using the
Manage Layout option on the Work with Statement Definition form. If you exited the
Layout Editor after you completed the last set of steps and need to re-access an
existing layout, see Balance Sheet Case Study Task: Accessing an Existing
Layout.
To filter the tables to show only a specified range of accounts, complete the following steps:
Select the original table.
Select Filter on the Table tab.
On the Filter form, select Object Account form the list for the Data Field.
Select is between from the list for the Operator field.
Enter 1000 in the first Value field, and enter 3999 in the second Value field.
Click OK on the Filter form.
Select the second table, and then repeat Steps 2-6, substituting the values 4000 and 4999 for the Values fields.
Click the Save icon to save your layout.
Caution: If you need to exit
the BI Publisher Layout Editor, do not click the Sign Out icon or you will log out
of the server. Instead, click the Close icon (the X in the upper right corner
of the window) to exit the window.
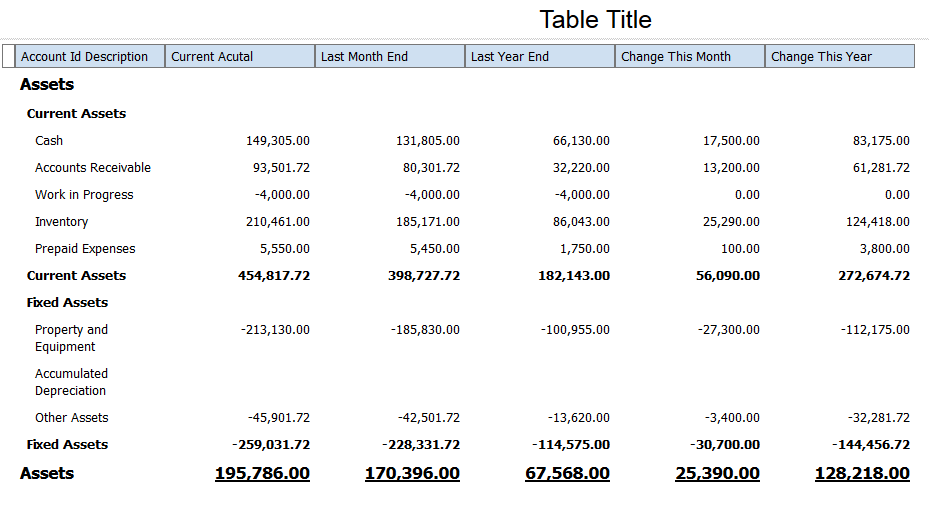
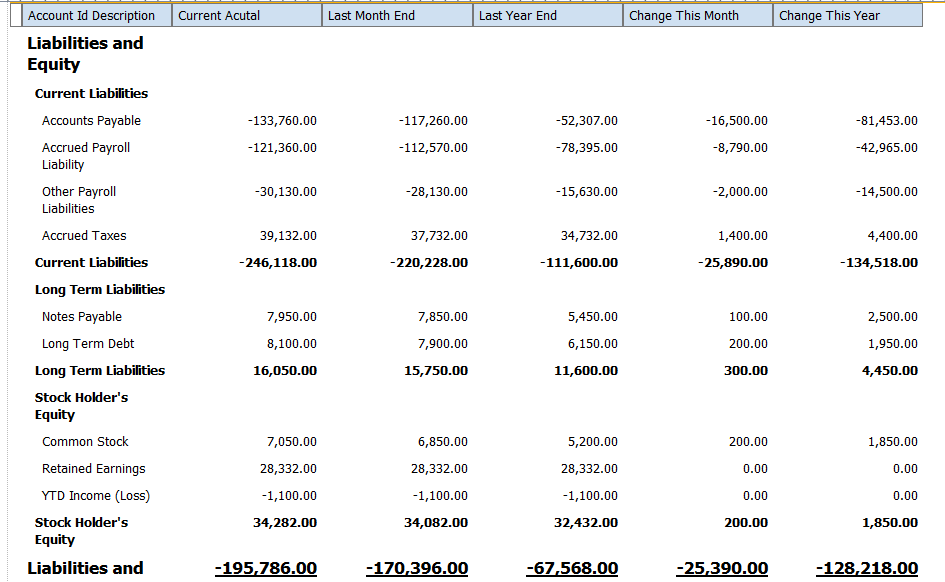
After you complete the steps in this task, your statement layout should look like the following images: