Balance Sheet Case Study Task: Sequence Accounts
The account descriptions as initially provided in the Account ID Description column are sorted by the Account ID because that is the grouping element that you selected for your row. You need to display the descriptions and account balances by the object account descriptions.
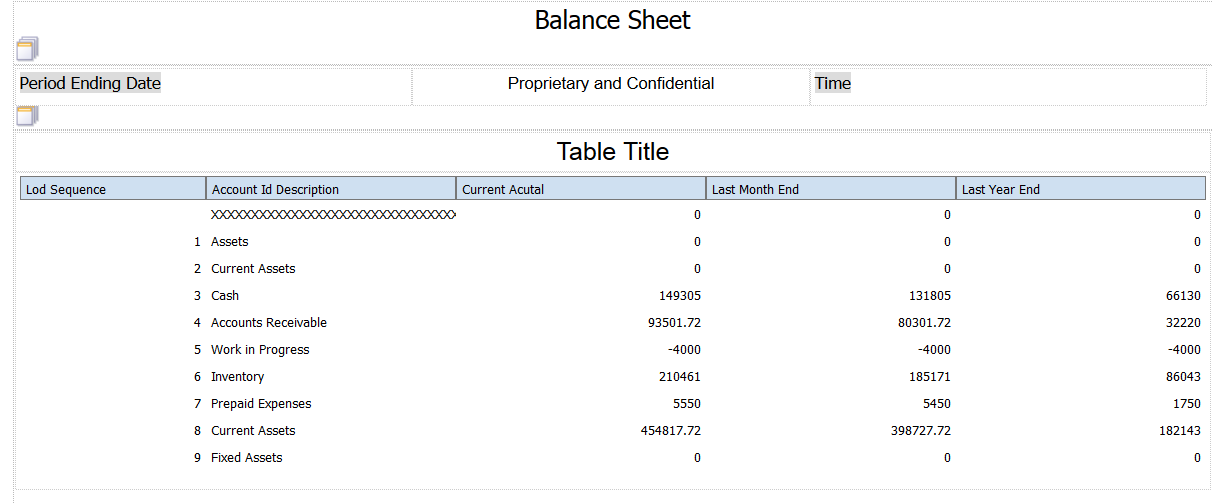
Because you selected the Enable Level of Detail Rollup option in the row definition that you set up, the Rowset section includes the Lod Sequence element. This element enables you to sort the account balances by the level of detail in your chart of accounts.
In this task, you will sequence the accounts and then remove the grid line from the column.
To sequence the account descriptions and corresponding account balances, complete the following steps:
Locate the Lod Sequence element in the Rowset section and drag-and-drop it into your layout.
The placement of the list item in the layout is not important, but placing it before the Account ID Description column will make it easier to work with the Lod Sequence element.
Select the Lod Sequence column and then click the Ascending Order icon on the Column tab of the layout window.
Click the Save icon to save your layout.
To remove grid lines:
Select the column or columns from which to remove the grid lines.
You can select multiple columns and apply the change to all of the selected elements.
In the Appearance section of the Properties tab, click in the field next to any of the border options.
For example, click in the field next to the Border Bottom field.
Instead of using the option on the Properties tab, you can also use the Set Borders option on the Table tab.
Select the Use same value for all sides check box.
Select None from the Style list and then click OK.
You will work with the column headers in a different task in this case study.
Click the Save icon to save your layout.
After you complete the steps in this task, your statement layout should look like the following image: