Configuring AIS Server over SSL on WebSphere Server (Release 9.2.4)
During the promotion of the AIS server port, the scf_<Managed_Instance_Name>.conf file is regenerated at the ..IBM/HTTPSerevr/conf location. If the SSL entries have been previously configured, the manually configured SSL changes will not be preserved as part of the promotion. Therefore, you must configure the SSL entries as a post-promotion step.
To add the SSL section to the AIS server related scf_<Managed_Instance_Name>.conf file.
Promote the AIS port using the Server Manager Console.
Take a backup of the existing scf_<Managed_Instance_Name>.conf file.
Typically, the scf_<Managed_Instance_Name>.conf file is located on the machine where the Websphere Application Server is installed at ../IBM/HTTPSerevr/conf.
Open the scf_<Managed_Instance_Name>.conf file using an editor and modify the section by adding the SSL port details and the SSLEnable, SSLDisable, and KeyFile details as shown below.
In this context, the actual non-ssl port is 26065.
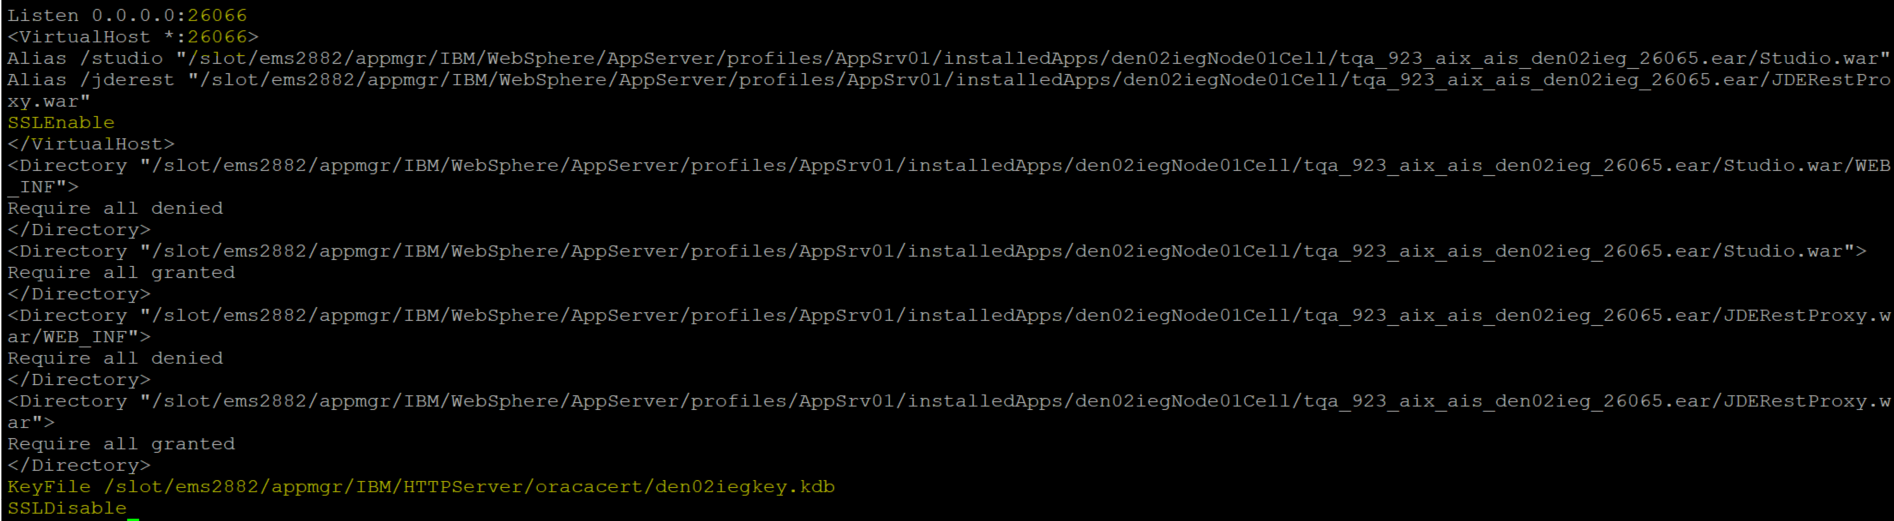
After adding the SSL section, the overall content of the scf_<Managed_Instance_Name>.conf file should look like this:
Listen 0.0.0.0:26065
<VirtualHost *:26065>
Alias /studio "/slot/ems2882/appmgr/IBM/WebSphere/AppServer/profiles/AppSrv01/installedApps/den02iegNode01Cell/tqa_923_aix_ais_den02ieg_26065.ear/Studio.war"
Alias /jderest "/slot/ems2882/appmgr/IBM/WebSphere/AppServer/profiles/AppSrv01/installedApps/den02iegNode01Cell/tqa_923_aix_ais_den02ieg_26065.ear/JDERestProxy.war"
</VirtualHost>
<Directory "/slot/ems2882/appmgr/IBM/WebSphere/AppServer/profiles/AppSrv01/installedApps/den02iegNode01Cell/tqa_923_aix_ais_den02ieg_26065.ear/Studio.war/WEB_INF">
Require all denied
</Directory>
<Directory "/slot/ems2882/appmgr/IBM/WebSphere/AppServer/profiles/AppSrv01/installedApps/den02iegNode01Cell/tqa_923_aix_ais_den02ieg_26065.ear/Studio.war">
Require all granted
</Directory>
<Directory "/slot/ems2882/appmgr/IBM/WebSphere/AppServer/profiles/AppSrv01/installedApps/den02iegNode01Cell/tqa_923_aix_ais_den02ieg_26065.ear/JDERestProxy.war/WEB_INF">
Require all denied
</Directory>
<Directory "/slot/ems2882/appmgr/IBM/WebSphere/AppServer/profiles/AppSrv01/installedApps/den02iegNode01Cell/tqa_923_aix_ais_den02ieg_26065.ear/JDERestProxy.war">
Require all granted
</Directory>

Listen 0.0.0.0:26066
<VirtualHost *:26066>
Alias /studio "/slot/ems2882/appmgr/IBM/WebSphere/AppServer/profiles/AppSrv01/installedApps/den02iegNode01Cell/tqa_923_aix_ais_den02ieg_26065.ear/Studio.war"
Alias /jderest "/slot/ems2882/appmgr/IBM/WebSphere/AppServer/profiles/AppSrv01/installedApps/den02iegNode01Cell/tqa_923_aix_ais_den02ieg_26065.ear/JDERestProxy.war"
SSLEnable
</VirtualHost>
<Directory "/slot/ems2882/appmgr/IBM/WebSphere/AppServer/profiles/AppSrv01/installedApps/den02iegNode01Cell/tqa_923_aix_ais_den02ieg_26065.ear/Studio.war/WEB_INF">
Require all denied
</Directory>
<Directory "/slot/ems2882/appmgr/IBM/WebSphere/AppServer/profiles/AppSrv01/installedApps/den02iegNode01Cell/tqa_923_aix_ais_den02ieg_26065.ear/Studio.war">
Require all granted
</Directory>
<Directory "/slot/ems2882/appmgr/IBM/WebSphere/AppServer/profiles/AppSrv01/installedApps/den02iegNode01Cell/tqa_923_aix_ais_den02ieg_26065.ear/JDERestProxy.war/WEB_INF">
Require all denied
</Directory>
<Directory "/slot/ems2882/appmgr/IBM/WebSphere/AppServer/profiles/AppSrv01/installedApps/den02iegNode01Cell/tqa_923_aix_ais_den02ieg_26065.ear/JDERestProxy.war">
Require all granted
</Directory>
KeyFile /slot/ems2882/appmgr/IBM/HTTPServer/oracacert/den02iegkey.kdb
SSLDisable
Save the file.
Ensure that the httpd.conf file at the same location has the include entry for the scf_<Managed_Instance_Name>.conf file as shown:

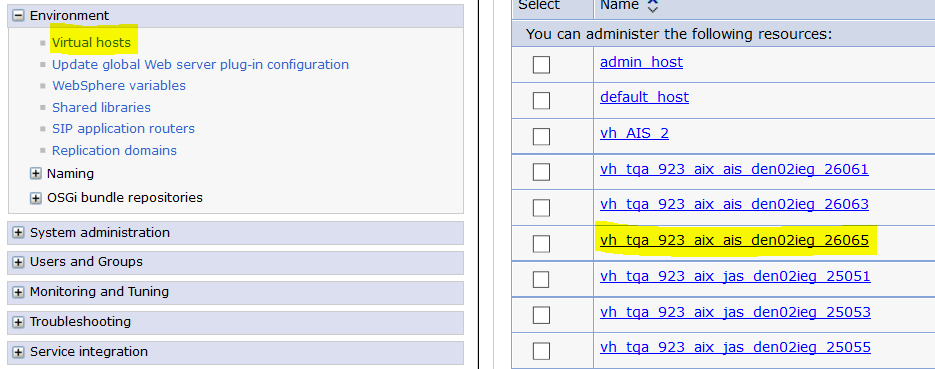
Login to WebSphere Admin Console and redirect to the virtual hosts section in the Environment menu.
Click vh_<Managed_Instance_Name>.
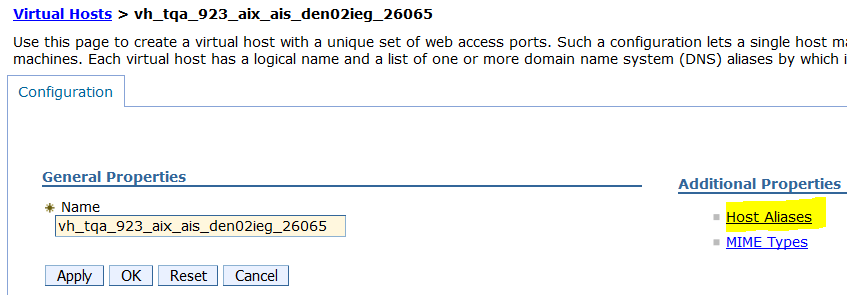
Click the Host Aliases link.
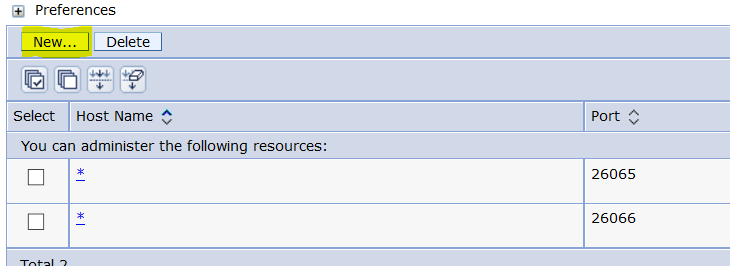
If you do not see the SSL port under Host Aliases, add it by clicking the NEW button and then save the configuration.
Navigate to Servers, Server Types, Web servers, and select the related web server.
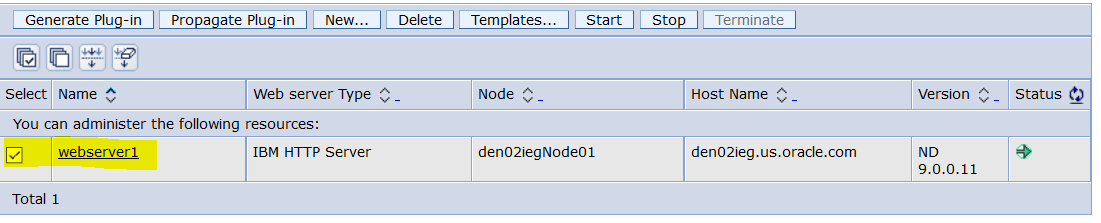
Click the Generate Plug-in button.

After the Plug-in is generated, click the Propagate Plug-in button.

Bounce the corresponding AIS server port using the Server Manager Console.
Verify that the correct location of plugin-cfg.xml file is referenced in the httpd.conf file.
Restart the IBM HTTP server.