Configuring the IBM Web Server Plug-in
After you have updated all software packages as described in the preceding section of this document entitled: Installing or Updating to WebSphere 8.5.x/9.0 Fix Pack, you must configure the plug-in. This process is performed through the IBM WebSphere Customization Toolbox. You must complete this configuration before you install the JD Edwards EnterpriseOne HTML Web Server.
Start the WebSphere Customization Toolbox using this navigation by starting the executable in this directory:
Start > Programs > IBM WebSphere > WebSphere Customization Toolbox V8.5.x/9.0 > WebSphere Customization Toolbox
/u01/WebSphere855/Toolbox/WCT/wct.shNote: If the Customization Toolbox failed to start with this error:See the log file in /root/.ibm/.WebSphere/workspace/WCT85/.metadata/.log For details on the above error, review the IBM solution.
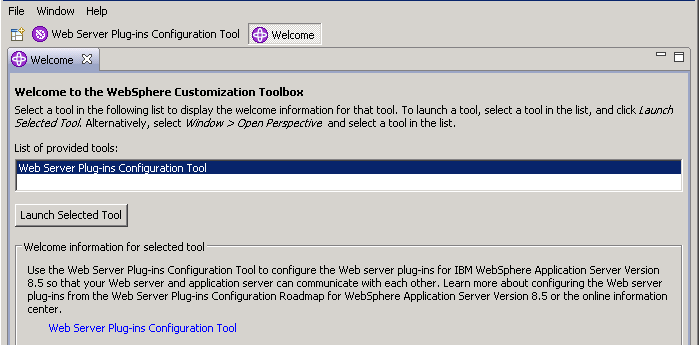
On WebSphere Customization Toolbox, Welcome, in the list of provided tools, highlight the Web Server Plug-ins Configuration Tool.
Click the Launch Selected Tool button.

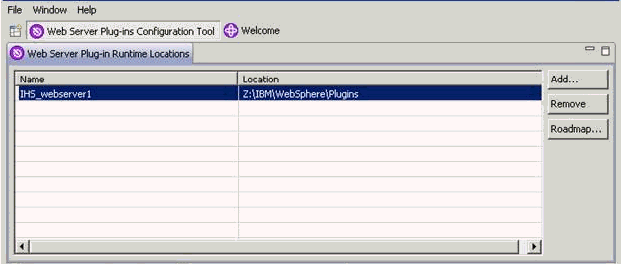
In the Web Server Plug-in Runtime Location section, click the Add button.


On Add Web Server Plug-in Location, complete these fields:
Name
Enter a name for the plug-in location. For example:
IHS_webserver1
Location
Enter the location of your plug-in. The default plug-in directory is:
Z:\IBM\WebSphere\Plugins/u01/WebSphere855/Plugins
Click the Finish button.


In the upper half of the form (shown above), verify the plug-in location that you just defined is displayed in the Web Server Plug-in Runtime Locations section in the upper half of the form.

In the lower half of the screen (shown above), click the Create button.

On Web Server Selection, choose this radio button:
IBM HTTP Server V8.5.

On Web Server Selection, choose this radio button:
IBM HTTP Server V8.5/9.0.

On Web Server Architecture Selection, choose your bitness.
On Web Server Configuration File Selection, complete these fields:
Select the existing IBM HTTP Server httpd.conf file
Enter in the location of your
httpd.conffile. For example:z:\IBM\HTTPServer\conf\httpd.conf/u01/WebSphere855/HTTPServer/conf/httpd.conf
Specify the Web server port
Specify a web server port that matches the port used by your HTTP server.
Click the Next button.

You will receive the Non-Administrative user configuration limitation screen if you are not logged on as an administrative user.
Click the Next button.

If you are signed on as an Administrative User, you will see the above screen. You can choose to create a user ID for IBM HTTP Server.
Click the Next button.

You can choose whether to use a Windows service to run IBM HTTP Server administration server. It is recommended that you select to run the Server as a Windows Service. Optionally you can change the startup type to Manual if you are not going to use the HTTP Administration server often.

On Web Server Definition name, specify a web server name. If you already have a web server defined (for example, webserver1), then you should use the same name here.


For the purposes of this guide, it is assumed that the HTTP Server and WebSphere Application Server are located on the same machine. Therefore, on Configuration Scenario Selection, the radio button for (Local) Installation location of WebSphere Application Server is selected.
Use the Browse button to locate the installation location of the WebSphere Application Server. For example:
Z:\IBM\WebSphere\AppServer/u01/WebSphere855/AppServerClick the Next button.

On WebSphere Application Server Profile Selection, use the drop-down menu in Available Profiles to select the WebSphere Application Server profile to configure with the current Web server plug-in and create the Web server definition. For example, an available profile might be named AppSvr01.
Note: If the Available Profiles field is blank and no options show on the drop down, you must Cancel from this procedure. Create a profile and either use the advanced option to automatically create a web server definition or manually create the web server in the IBM WebSphere Application Server Administrative Console. For more information on either option, refer to the IBM info center:
http://www-01.ibm.com/software/webservers/appserv/was/library/Click the Next button.


On Plug-in Configuration Summary, review the information for accuracy.
Click the Configure > button.


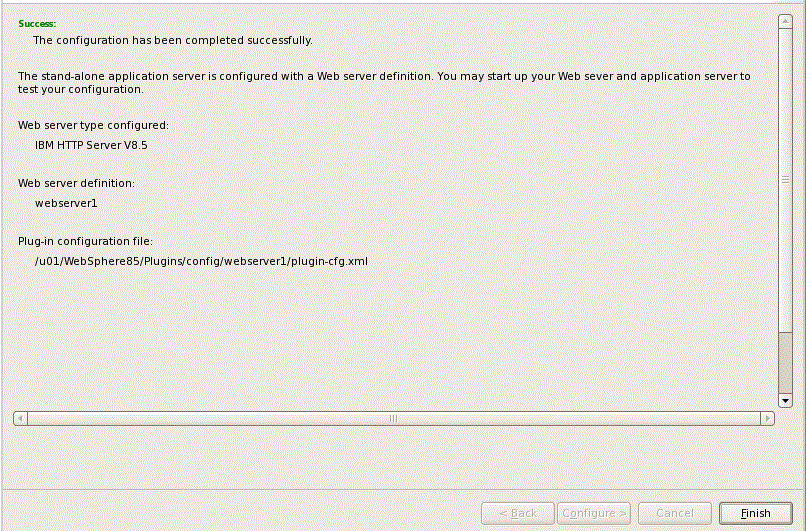
On Plug-in Configuration Result, verify that the configuration completed successfully. If necessary, follow the instructions to correct any errors.
Click the Finish button.


On WebSphere Customization Toolbox, with the Web Server Plug-in Configurations tab selected, verify that the server definition exists.