Installing WebSphere Application Server 7.0 (Using Network Deployment CD or Downloaded Image)
Complete these steps to install the WebSphere Application Server version 7.0, and then install the EnterpriseOne Web Server to that installation. The WebSphere 7.0 Network Deployment CD may be used to install WebSphere Application Server for a base or standalone configuration.
If you have not already set the display, complete this step. For example, if your local display has an IP address of 10.139.157.46:0.0, enter this command to properly set the display:
export
                        DISPLAY=10.139.157.46:0.0
Note: For Solaris only, verify that you are in the ksh shell before executing the command using theecho $SHELLcommand.If you are installing WebSphere 7.0 on Solaris with Exceed, enter this command to set the environment variable:
export
                        NO_J2D_DGA=1
Insert the WebSphere Application Server Network Deployment CD, Version 7.0 (32-bit) or extract the downloaded image into a temporary location.
Enter this command to mount the CD drive:
mount
                        /cdrom
Note: The syntax of the mount command can vary by platform, and is not required for Sun platforms.Enter this command to change to the CD drive:
cd
                        /cdrom
Run the launchpad executable from the extracted directory:
cd x:\dump\was7_windows\cd1x:\dump\was7_windows\cd1 > launchpad.exewhere
x:is the drive on which you downloaded the WebSphere 7.0 image../launchpad.sh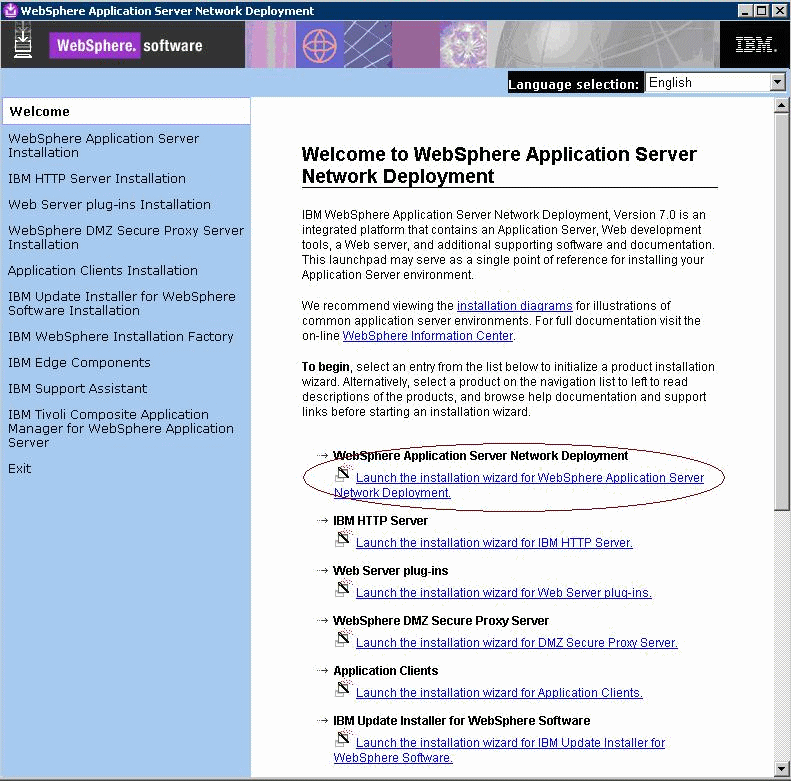
From that launchpad window, select the first link on the right panel:
Launch the installation wizard for WebSphere Application Server Network Deployment
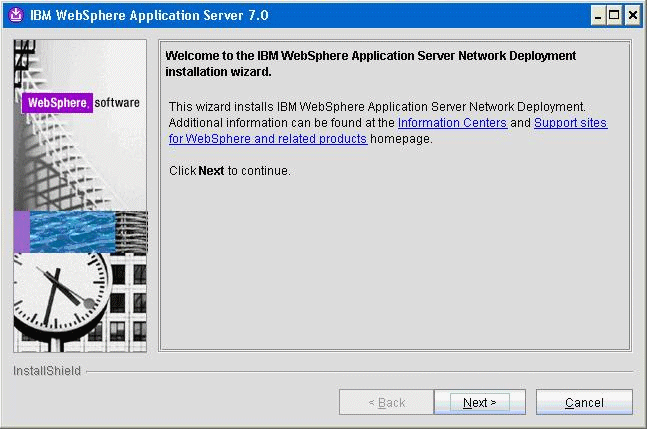
On the Welcome panel, click the Next button to continue.

On Software License Agreement, review the License Agreement and select a radio button to accept or decline.
If you chose to accept, click the Next button to continue.
If you do not accept the terms of the license agreement, you cannot continue with the installation.
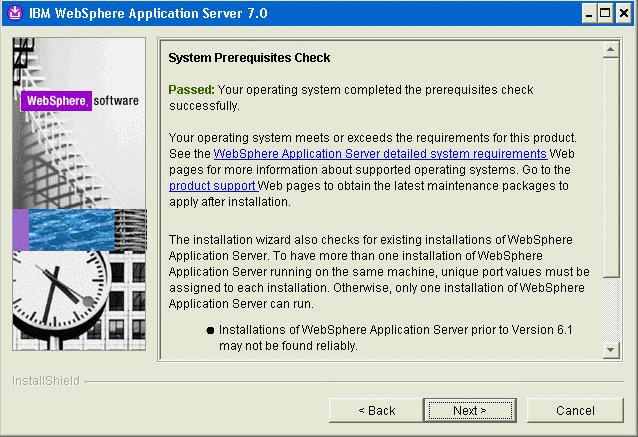
On System Prerequisites Check, the installer performs a quick system requirements check on the server. Once the check is complete and successful, click the Next button to continue.
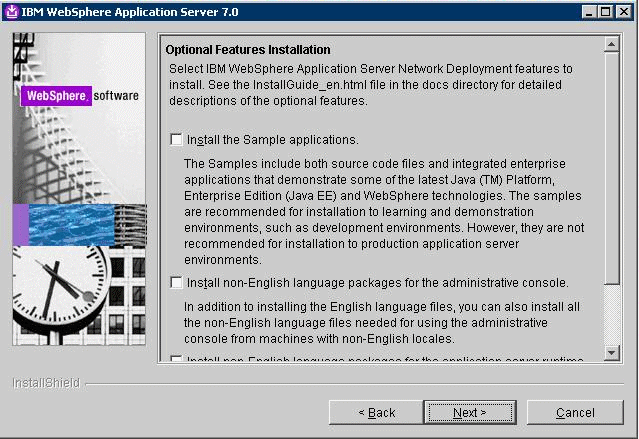
On the Optional Features Installation screen, click the Next button to continue.
Tip: For production environments, it is recommended that you not enable the Install the Sample application check box.You should enable the check box for non-English support for the WebSphere Administrative Console if applicable to your installation.
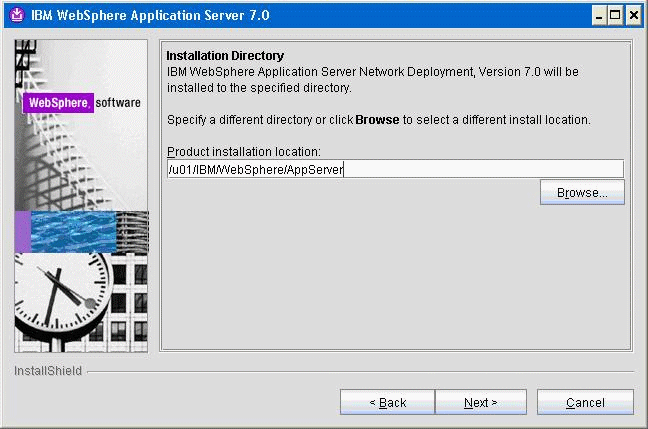
On Installation Directory, enter or browse to a valid location where you want to install WebSphere Application Server Network Deployment (the default is opt/IBM/WebSphere/AppServer). For example:
z:\IBM\WebSphere\AppServer/u01/IBM/WebSphere/AppServerClick the Next button to continue.

On WebSphere Application Server Environments, select Application Server to create a standalone application server profile and then click the Next button to continue.
Note: The Application Server environment will create a default stand-alone application server called AppSrv01 during the installation. To use federated nodes configuration, select Cell environment to create a deployment manger (such as Dmgr01) and a managed node (for example, AppSrv01) during the installation.
On Enable Administrative Security, the check box for the application server profile is checked by default. You can choose either to:
Clear the check box for Enable administrative security to disable server administrative security, or
If the check box is enabled for Enable administrative security, server administration security will be enabled and you must enter the User ID and Password
When you enable the check box the fields on this screen are enabled and you must enter valid credentials for the WebSphere administrator for this installation.
Tip: JD Edwards EnterpriseOne Business Services Server. If you are using these instructions to install a JD Edwards EnterpriseOne Business Services Server into this WebSphere instance, you must enable administrative security.Click the Next button to continue.
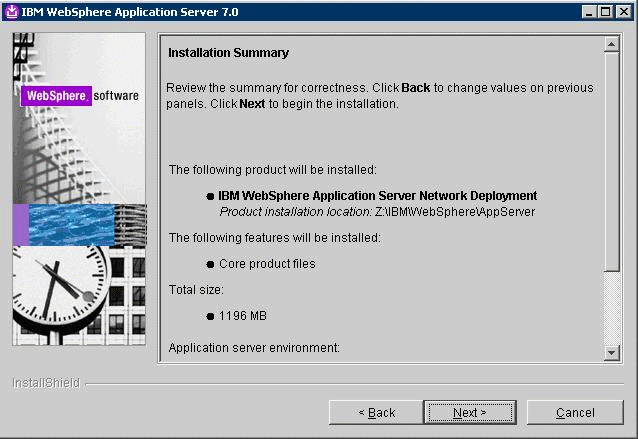
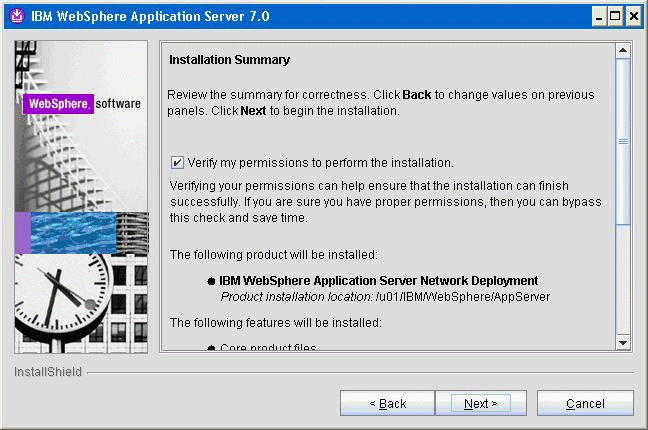
On Installation Summary, review the information and click the Next button to begin the installation of WebSphere Application Server Network Deployment.
Note: You should enable the check box for Verify my permissions to perform the installation in order for the installer to validate the permissions required for installation of the product.
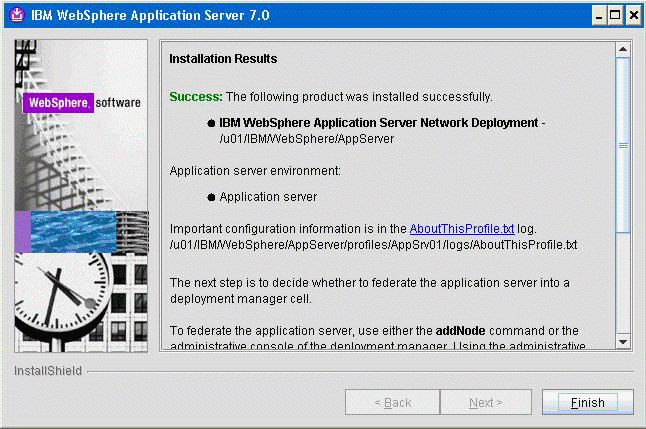 Note: On Installation Results, you can click on the AboutThisProfile.txt link to see the port assignment for this profile. Note the Administrative console port on which AppSrv01 will be running (for example, 9060). You can use Profile Management Tool to create as many profiles as you like. Each profile is a separate instance of the WebSphere running on a different set of ports.A sample of the contents of the
AboutThisProfile.txtfile is shown below: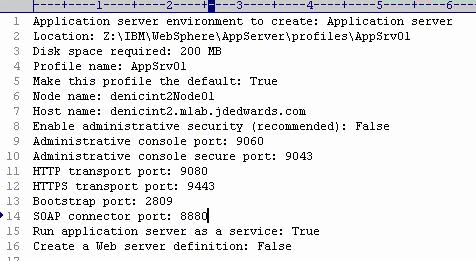
On Installation Results, click the Finish button.
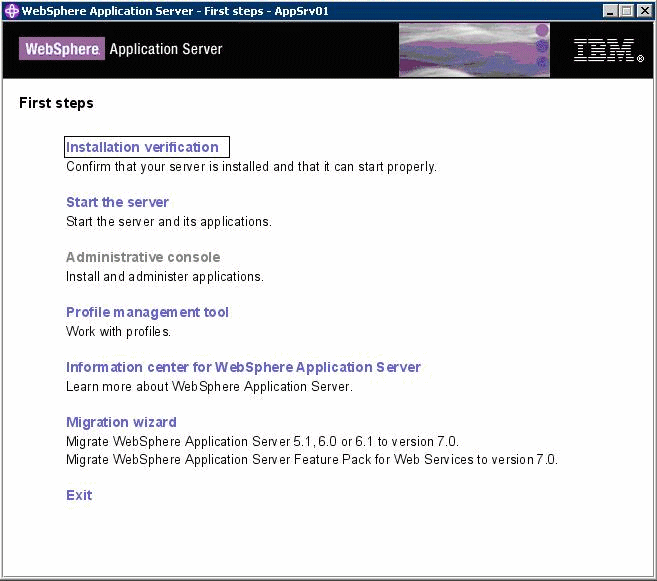
The First steps menu is launched.
On the First steps menu, click Installation verification to verify the installation.
After you click Installation verification, you can verify the success of the installation by reviewing the contents of the resulting display. For example:

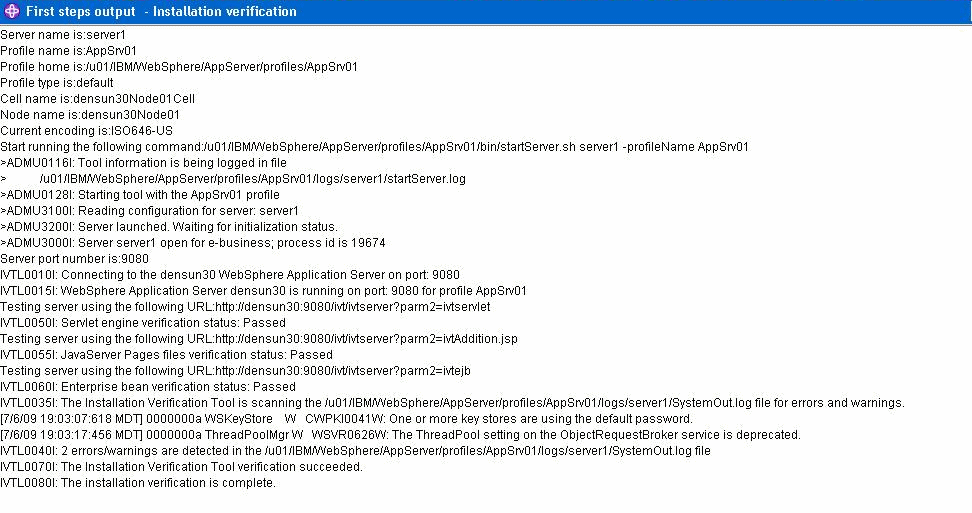
Ensure that the Installation Verification utility completes with a success message.
Close the First steps output and click Exit on the First steps screen.
This completes the profile creation activity.