Running the WebLogic Server Installer for the Server Manager Console
To install the Server Manager Console:
Log on to the machine onto which you are installing the Server Manager Management Console as a user with privileges as described in the preceding section of this guide entitled: Prerequisites for WebLogic Server.
Change to the directory in which you extracted the Server Manager Console installer as described in the previous section of this chapter entitled: Obtain and Extract the Server Manager Management Console for JD Edwards EnterpriseOne Tools.
Depending on your Tools release, launch the OUI installer according to these notes:
Release specific notes::-
JDK/JRE:
- For Tools Release 9.2.2.0 and later: A 64-bit JDK or JRE, version 1.8 or later must be installed before starting the Server Manager Console installer.
- For Tools Releases prior to 9.2.2.0: A JDK is included in the installer. Therefore, a separate JDK is not required.
Redistributables:
- For Tools Release 9.2.9 and later: No Microsoft Visual Studio Redistributables are required prior to running the Server Manager Console installer. However, you may need to install Microsoft Visual Studio Redistributables for EnterpriseOne to run. Refer to the JD Edwards EnterpriseOne Certifications for more information.
- For Tools Release 9.2.3.3 and later: Microsoft Visual Studio 2017 and 2013 64-bit Redistributables must be installed prior to running the Server Manager Console installer.
- For Tools Releases prior to 9.2.3.3: Microsoft Visual Studio 2010 32-bit Redistributables must be installed prior to running the Server Manager Console installer.
Note: One of the following requirements must be met:-
For Tools Release 9.2.3.3 and Greater: You must specify the location of the JDK or JRE on the command line. If the location is not specified, the installer will fail immediately.
-
For Tools Release 9.2.2.0 up to but not including 9.2.3.3: You can specify the location of the JDK or JRE on the command line. If the location is not specified, you will be prompted for it.
-
For Tools Releases prior to 9.2.2.0: Because a JDK is included in the installer, you will not be prompted for one.
Microsoft Windows
To specify the location of a JDK or JRE on the command line:
Open a Windows Command window with Run as administrator.
Change directory (cd) to the directory in which you unzipped the installer. For example, if you followed the recommendation in Obtain and Extract the Server Manager Management Console for JD Edwards EnterpriseOne Tools the command would be:
cd C:\SM_Agent\Disk1\installUse this command to run
setup.exefollowed by the argument-jreLocand the directory to the JDK or JRE:setup.exe -jreLoc C:\PROGRA~1\Java\JRE18~1.0_1Note:Regarding the above command:
Include a space after the
-jreLocargument.The path to the JDK or JRE must be of the Windows short form, which is 8 + 3 format.
The specified JDK or JRE directory must contain this directory and executable:
bin\java.exe
To skip specifying the location of a JDK or JRE on the command line:
Do one of the following:
Follow the instructions above to run from a Windows Command window but without the
-jreLocargument.In Windows Explorer, right-click on
setup.exein the directory in which you unzipped the installer and select Run As Administrator. For example, if you followed the recommendation in Obtain and Extract the Server Manager Management Console for JD Edwards EnterpriseOne Tools the file will be located in this directory:C:\SM_Agent\Disk1\install\setup.exe
The Windows Command window starts indicating Windows is preparing to launch the Oracle Universal Installer for the Server Manager Management Console.
Linux or Solaris
To specify the location of a JDK or JRE on the command line:
Execute runInstaller from the directory in which you unzipped the installer. For example, if you followed the recommendation in Section 3.5, "Obtain and Extract the Server Manager Management Console for JD Edwards EnterpriseOne Tools," the file will be as below. Follow runInstaller with -jreLoc and the directory to the JDK or JRE:
./SM_Console/Disk1/install/runInstaller -jreLoc
                                /u01/jre1.8.191
Note:Regarding the above command:
Include a space after the
-jreLocargument.The specified JDK or JRE directory must contain this directory and executable:
bin\java
To skip specifying the location of a JDK or JRE on the command line:
Execute
runInstallerfrom the directory in which you unzipped the installer. For example, if you followed the recommendation in Obtain and Extract the Server Manager Management Console for JD Edwards EnterpriseOne Tools, the file will be:./SM_Console/Disk1/install/runInstaller
All Platforms
The Oracle Universal Installer (OUI) Wizard begins to initialize and prepare the JVM for the JD Edwards EnterpriseOne Management Console installer. This may take a few minutes to completely initialize. When the initialization is complete, a new and separate JD Edwards EnterpriseOne Management Console installer window is displayed.
Tools Release 9.2.2.0 up to but not including 9.2.3.3. If you did not specify the location of a JDK or JRE via the -jreLoc argument, the installer prompts you to specify the location of that at a command prompt.
 Note:
Note:For the 9.2.2.0 installer, as the installer runs, it will fail if the JDK/JRE is not at least Version 1.8. Upon failure it displays the following error:
After the installer validates existence of the JDK in the specified location, the OUI installer user interface appears. All further installer behavior remains the same as previous Tools Releases.
-
On the Welcome screen, click the Next button.
On Specify Home Details, complete these fields:
Name
Enter a unique name of the Management Console. The default value is:
EOne_ManagementConsole
Note:If there is an existing installation of the Management Console with the default name, the installer will append the default name with a number to make it unique. For example, EOne_ManagementConsole1.
Path
Enter the drive and directory where you want the files installed on your Management Console. The JD Edwards EnterpriseOne Management Console installer automatically detects the root drive location on the machine and by default appends this value:
jde_home
Note:Although jde_home is the default and recommended setting, you can specify any value to replace the default value. If there is an existing installation of the Management Console the default name will be appended with an underscore and a number. For example, JDE_HOME_1.
Caution:You cannot specify a directory that already exists.
Click the Next button.
On Enter Admin Password, enter and confirm the password for the jde_admin user.
Note:The user name itself cannot be changed from jde_admin. The password must be at least eight (8) characters in length and cannot contain space or blank character values. Values are alphanumeric and these special characters: ! @ # $ _. At least one (1) special character is required in the password.
Note:The default value for the user named jde_admin is automatically populated by the Management Console installer and cannot be altered. This is the administrative user account that is associated with the Management Console.
Caution:Because there is no programmatic way to retrieve a lost or forgotten password, it is critical that you remember and safeguard this password. If the password is forgotten or lost, the only recovery is a complete reinstallation of Server Manager.
If you reinstall the Management Console and specify the JMX port the original installation was configured to use, you will retain all your managed homes and associated instances along with the configuration of those instances. However, you will lose this data:
Console configuration, which includes database information entered using the Setup Wizard and information regarding security server(s) used to authenticate users.
User Configuration, which are the added JD Edwards EnterpriseOne users and defined user groups, including their permissions.
Server Groups and associated template configurations.
Defined monitors and their associated monitor history.
Click the Next button.
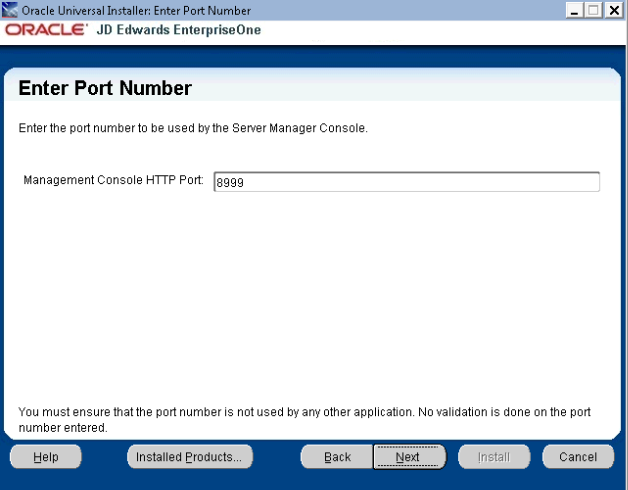
On Enter Port Number, complete this field:
Management Console HTTP Port
Enter valid unused port number for use by the Management Console.
The default value is 8999.
Caution:This port number must be available and cannot be in use by any other application on this machine. Since the installer cannot validate the port, you must be certain that these conditions are met or else the Management Console will not start.
If there is insufficient disk space to complete the installation on the Management Console target machine, the installer displays an error message.
 Note:
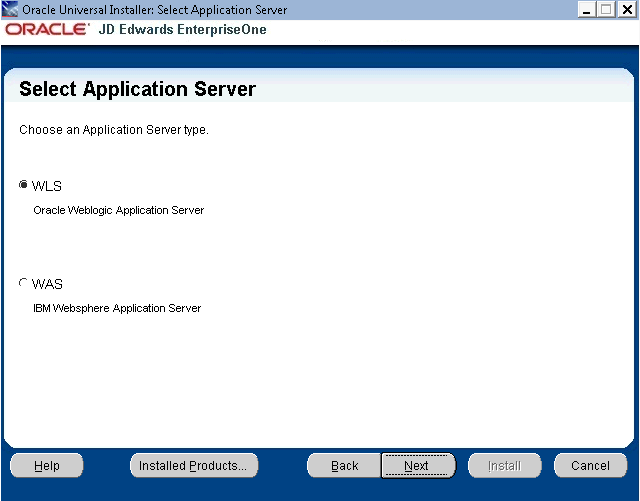
Note:If using Oracle Enterprise Linux, the above screen will not appear. The selection will default to WLS.
On Select Application Server, select this radio button:
WLS
Oracle WebLogic Application Server
Click the Next button.
On Enter Information for WebLogic Server, complete the following fields:
Install Directory
Enter the path to the WebLogic installation directory. For example:
Microsoft
WebLogic Server 11g
C:\Oracle\Middleware\wlserver_10.3WebLogic Server 12c
C:\Oracle\Middleware\Oracle_Home\wlserverWebLogic Server 14c
C:\Oracle\Middleware\Oracle_Home\wlserverLinux and Solaris
WebLogic Server 11g
/u01/Oracle/Middleware/wlserver_10.3WebLogic Server 12c
/u01/Oracle/Middleware/Oracle_Home/wlserverWebLogic Server 14c
/u01/Oracle/Middleware/Oracle_Home/wlserverHost/IP
Enter the hostname or the IP Address at which the WebLogic Admin Server is listening for http/t3 connections. This is usually the hostname/IP Address of the physical machine. For example:
<machine name>us.example.com
Node Manager Machine Name
The nodemanager machine name is not necessarily the physical machine name, but it can be the same. This is the logical name of the nodemanager machine as displayed in the WebLogic Admin Console.
Domain Port
Enter the port number on which WebLogic AdminServer is listening for http/t3 connections. This value is configured when you created the WebLogic Domain.
Admin User Name
Enter the user name of the WebLogic Server admin account.
Admin User Password
Enter the password for the WebLogic Server admin account.
Caution:The values on this form must be confirmed manually. You must validate or update, as appropriate, all configuration items. If you enter invalid values, you will have to re-run the installer with the correct values.
Click the Next button.
A popup dialog is displayed with the message that the AdminServer will be restarted during the installation. Click OK to continue or click Cancel in the next Summary panel to abort the installation if you do not wish to have the AdminServer restarted at this time.
On Summary, verify your selections and click the Install button to begin the installation.
The Install progress screen is displayed. Note that this screen displays the location of the log of this installation. For example:
C:\Program Files
                        (x86)\Oracle\Inventory\logs\installActions2011-10-18-02-15-14PM.log
On End of Installation, verify the installation was successful. The “Please remember …" section also provides the installation log location.
Click Exit to exit the Oracle Universal Installer for the Server Manager Management Console.

On the Exit dialog, click the Yes button.