Creating the Job Queue
You may set up the job queues before running the Installation Workbench. If you do not, Initial Tasks Workbench will create a default entry for QBATCH with a setting of maximum=4.
If running an Install, you can set up the queues at any stage before running a Package Build. If you set up queues after the Installation Workbench, sign onto DEP920.
To create the job queue:
Enter GH9013 in the Fast Path field and start the Job Queues program (P986130).
Click Add.

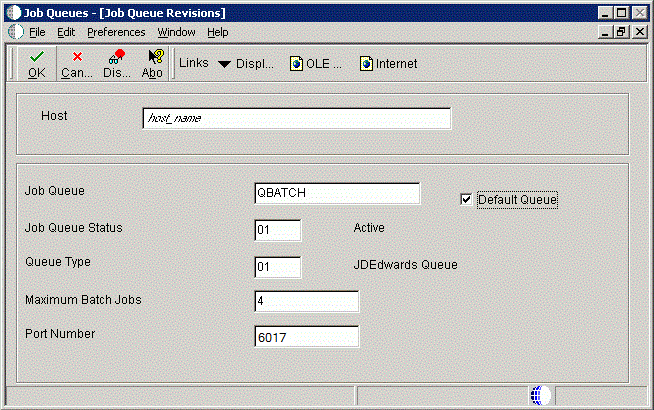
On Job Queue Revisions, add a queue by completing these fields:
Field
Description
Host
Enter the Enterprise Server name.
Job Queue
Enter the job queue name.
Default Queue
Turn on this option by clicking the check box.
Job Queue Status
Enter 01.
Queue Type
Enter 01.
Maximum Batch Jobs
Enter a value that equals the number of processors on the Enterprise Server machine.
Port Number
Enter 6017.
If you receive a Network Failed error, you can safely ignore it in this case.
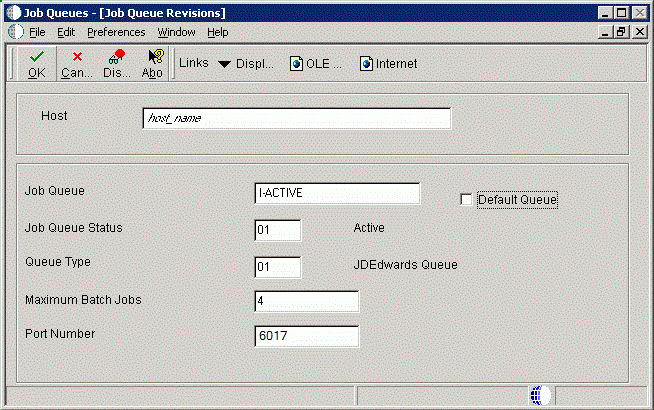
Add another queue called I-ACTIVE.

On Job Queue Revisions, add a queue by completing these fields:
Field
Description
Host
Enter the Enterprise Server name.
Job Queue
Enter the Job Queue name: I-ACTIVE.
Default Queue
Turn off this option by clicking the radio button.
Job Queue Status
Enter 01.
Queue Type
Enter 01.
Maximum Batch Jobs
Enter a value that equals the number of processors on the Enterprise Server machine.
Port Number
Enter 6017.