Deferring Index Builds During Table Conversion Workbench
Before running the Installation Workbench, you can mark specific Table Conversions to direct the TC Engine not to build indexes during those conversions. You may wish to defer building indexes on such table conversions where:
The underlying table is very large (for example, F0911)
The underlying table is very large and is converted several times during the Table Conversion Workbench. For example, if upgrading from Xe or ERP8:
F42199
F49219
F42119
F43199
F43121
F4101
F4102
F3111
F0618
You are planning to do a Unicode conversion directly after the Upgrade and before you return the system to the end users. (The Unicode conversion recreates all indexes in any case).
When you mark a table with the Defer Index flag, the TC Engine creates the primary key and any other unique keys on that table before marking the conversion as complete. In almost all cases there is only one unique key on the tables and that is the primary key. However, there are a few tables with more than 1 unique key (for example F0902 has 4 unique keys, while F4101 has 3 unique keys).
The absence of non-unique keys will not stop EnterpriseOne from working, but will have a severe impact resulting in poor performance. If you choose to defer index builds, you are responsible for creating the missing indexes once the Workbench is complete.
To use the Defer Index Build functionality, you must have the latest Planner Update and JD Edwards EnterpriseOne Tools Release on both Deployment Server and Enterprise Server. The Planner Update must be applied to the Pristine path code (PS920) and an update package must be built and deployed to PS920.
To use the Defer Index Build functionality:
Run the Custom Plan application on menu GH961.
Drill down into Upgrade Plan, highlight Table Conversions, click on Select, and go into TC Planner.
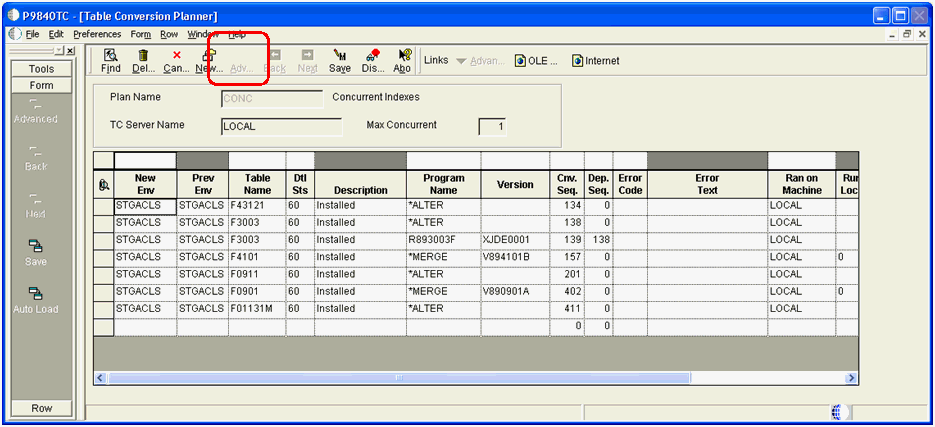
If the latest planner release is not installed on the Deployment Server, the Advanced button will be disabled as shown in this example:
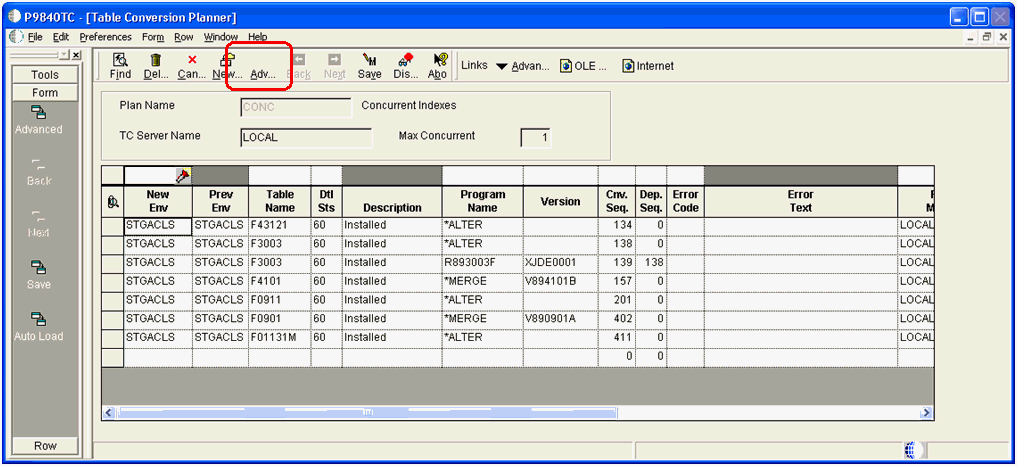
If the latest planner release is installed on the Deployment Server, the Advanced Button is available as shown in this example:
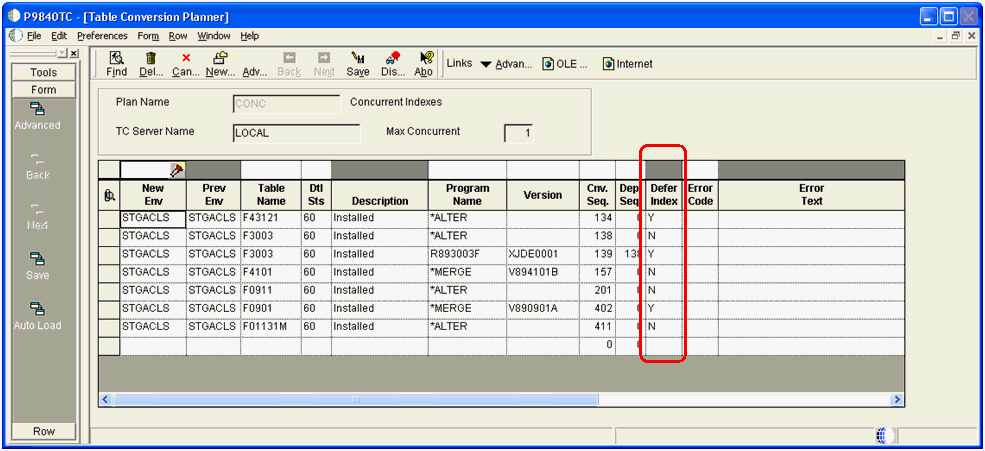
On Table Conversion Planner, click on Advanced button. As shown in the example below, a new column called Defer Index is displayed next to the Dependency Sequence column.
 Note:
Note:By default, all values for the Defer Index column are set to N (do not defer index build).
Change the value in the Defer Index column to Y for any TC for which you do not want to build indexes during the Table Conversion Workbench.
Click the Save button.
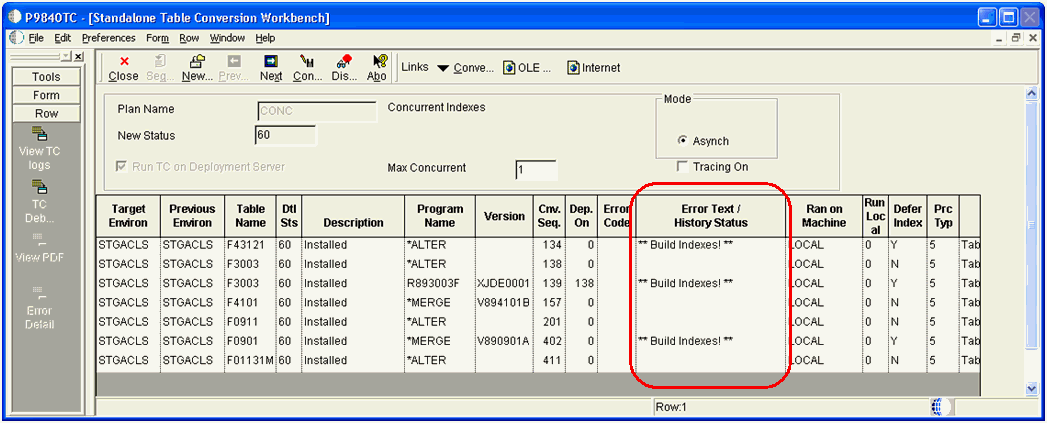
Run the Upgrade plan to execute the Table Conversion Workbench that includes your specified Defer Index settings. If the TC Workbench does not complete successfully, you will see that the Error Text / History Status field is updated with the below value for any table that was marked as Defer Index:
** Build Indexes! **
Below is an example TC Workbench where the Defer Index value was set:
For the above TC Workbench results screen, the values of the Defer Index column are:
Y
Indicates the TC Engine created the table with only Unique indexes and Primary key and returned as successful.
For TCs that have run where the "Y" was specified, you will see the ** Build Indexes! ** messages. This is not usually true for *ALTER as the TC Engine does not recreate the table for *ALTER.
N
Indicates the TC Engine completed successfully as it normally does, which includes the index build.
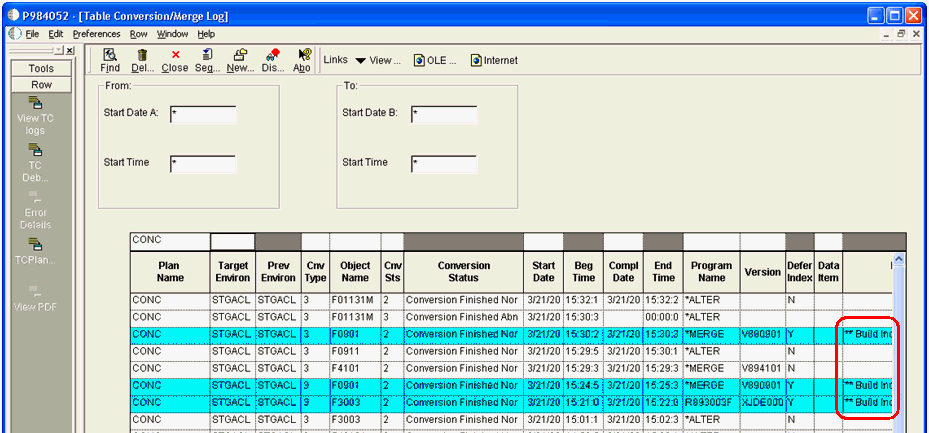
Review the Table Conversion Merge log (P984052).
If the TC ran with value set to Y, the Conversion Merge log (P984052) includes the ** Build Indexes! ** messages, as shown in the example below:
Review the R984052 report that runs at end of TC Workbench.
Each TC that ran with "Y" will have the ** Build Indexes! ** message text as shown in the example below:

It is important to remember that at the complete of the TC Workbench, prior to using the tables, you must manually create the missing indexes. To do so, you can use one of the following methods:
Method One
Using the GUI for your database (SQL Management Studio), highlight the same table in the Pristine database (for example, F0911) and generate DDL to a file.
Using the GUI for your database (Oracle Enterprise Manager), highlight the same table in the Pristine database (for example, F0911) and generate DDL to a file.
Edit the SQL statements, substituting the tablespace names, owners, and database for your target schema. For example, replace ps920dta with proddta.
Run the SQL script from your database's GUI. Note that you should delete those CREATE INDEX statements that refer to indexes that already exist on the target table. The database GUI will tell you which indexes already exist.
Using the GUI for your database (DB2 for Linux, Windows, and UNIX Control Center), highlight the same table in the Pristine database (for example, F0911) and generate DDL to a file.
Edit the SQL statements, substituting the tablespace names, owners, and database for your target schema. For example, replace ps920dta with proddta.
Run the SQL script from your database's GUI. Note that you should delete those CREATE INDEX statements that refer to indexes that already exist on the target table. The database GUI will tell you which indexes already exist.
Using the GUI for your database (System i Navigator for IBM i), highlight the same table in the Pristine database (for example, F0911) and generate DDL to a file.
Edit the SQL statements, substituting the library for your target schema. For example, replace PS920DTA with PRODDTA.
Run the SQL script from your database's GUI. Note that you should delete those CREATE INDEX statements that refer to indexes that already exist on the target table. The database GUI will tell you which indexes already exist.
Method Two
Generate the indexes on a trial run, with jdedebug turned on, and harvest the CREATE INDEX statements from the jdedebug log.
Use the GUI for your database (SQL Management Studio) to run the identified index builds as a sql script.
Generate the indexes on a trial run, with jdedebug turned on, and harvest the CREATE INDEX statements from the jdedebug log.
Use the GUI for your database (Oracle Enterprise Manager) to run the identified index builds as a sql script.
Generate the indexes on a trial run, with jdedebug turned on, and harvest the CREATE INDEX statements from the jdedebug log.
Use the GUI for your database (DB2 for Linux, Windows, and UNIX Control Center) to run the identified index builds as a SQL script.
Generate the indexes on a trial run, with jdedebug turned on, and harvest the CREATE INDEX statements from the jdedebug log.
Use the GUI for your database (System i Navigator for IBM i) to run the identified index builds as a SQL script.
Method Three
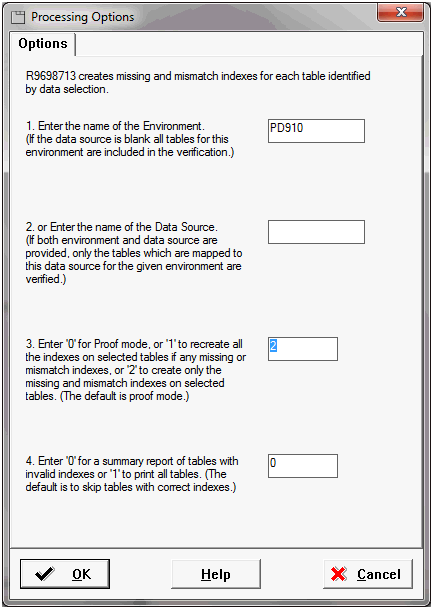
Run R9698713 and select the tables where you deferred the indexes. It will create the indexes one table at a time, one index at a time. It is possible to run different versions of R9698713 from different Release 9.2 Admin clients, selecting different tables for each version.
It is not necessary to be signed into the target environment because you can override the environment in the Processing Options. Set the value for Processing Option 3 to a value of 2 to generate only missing indexes, as shown in the screen below:
Method Four (if your business data is Unicode)
The advantage of this method is that the RSTxxx commands all do multiprocessing while building the indexes.
Save the indexes for the table marked with Defer Index from the pristine library. For example:
SAVOBJ F0911_* PS920DTA
                                *SAVF(X)
Restore the indexes to the PRODDTA library. For example:
RSTOBJ OBJ(*ALL) SAVLIB(PS920DTA) DEV(*SAVF)
                                SAVF(X) OPTION(*NEW) RSTLIB(PRODDTA)
Method Five (if your business data is not Unicode, such as when upgrading from Xe)
Temporarily create the table in another non-Unicode datasource using OMW in Release 9.2. For example, another such non-Unicode datasource is Control Tables - Prod.
Save the indexes from the non-Unicode datasource. For example:
SAVOBJ F0911_* PRODCTL
                        *SAVF(X)
Restore the indexes from the SAVF of PRODCTL to the PRODDTA library. For example:
RSTOBJ OBJ(*ALL) SAVLIB(PRODCTL) DEV(*SAVF)
                                SAVF(X) OPTION(*NEW) RSTLIB(PRODDTA)
After the restore is done, drop the "temporary" table from PRODCTL.