Entering a Plan Description
To enter a plan description:
On Installation Planner, complete the following fields:
Field
Description
Name
Enter the name of your plan.
Description
Enter the description of your plan.
Status
Select 10. This is the default value.
Install Type
Select Traditional Upgrade or Simplified Upgrade.
Note: You can only choose Simplified Upgrade for valid target releases, which are JD Edwards EnterpriseOne Applications Release 9.0 Update 2 and greater. Otherwise, the Installation Planner logic displays an error.
If the Installation Planner detects registry settings indicating a previous installation of JD Edwards EnterpriseOne has been installed on this Deployment Server, it automatically changes the Install Type to Traditional Upgrade. You can also manually change the Install Type to Traditional Upgrade or Simplified Upgrade (for supported target releases only).
If the previous installation of the Deployment Server is on a different machine, or if this installation is on a remote Deployment Server, the Install Type is set to Install. In either of these cases, you must manually change the Install Type to Traditional Upgrade or Simplified Upgrade at which point the Installation Planner prompts you for the data source information in a subsequent screen.
From Release
Enter the number of the release you are upgrading from.
For example, enter E910 for Release 9.1.
To Release
Verify that the release number is E920 (the default value).
Table Conversion Properties
Check box to run table conversions on the Deployment Server. The default is to run on the Enterprise Server.
Tracing
Turns on debug logging.
Include Languages
This is an optional selection that is only available if you have previously specified this Custom plan to install languages. Select yes if you are installing an alternate language.
Click the OK button.
Note:If you are installing the Deployment Server on the same machine as a previous release, and the Installation Planner has detected that previous release, you can proceed to the next step.
However, if you manually changed the Install Type to Traditional Upgrade or Simplified Upgrade, most likely because the previous release of JD Edwards EnterpriseOne was installed on a different machine, or this installation is on a remote, Deployment Server. In that case you are presented with the following screen in which you must enter the data source information that will enable the Installation Planner to locate the previous release.
On Data Source Revisions, complete the following fields:
Field
Description
Data Source Name
Enter the name of the System data source to be upgraded. For example:
System - 910
Data Source Use
You can accept the default value of DB.
Data Source Type
Choose the type of data source. Valid value is:
O - Oracle
Platform
Enter your platform. For example, LINUX.
Database Server Name
Enter the name of your database server on which your previous System data source resides.
Object Owner ID
Enter the name of the owner of this object.
Database Name (TNS)
Enter the Oracle database name that is in the tnsnames.ora on the machine that contains the System datasource for the previous release.
Click the OK button.
Note:If you are installing the E920 Deployment Server on the same machine (as the previous release), the Installer Planner automatically detects the local System data sources and uses it to configure your existing environment.
If you are installing your E920 Deployment Server on a different machine (as the previous release), at this point you will to proceed as described in the section of this guide entitled: Verify and Configure Data Source for Previous Release.

This form imports information from your previous system data source. The previous system data source you are upgrading from should be prepopulated. Use the Data Sources form exit to verify the data source is set up correctly.
If this is correct, click the OK button and proceed to Step 9. Click the Advanced form exit and continue with the next step. This screen sets up to copy information from the previous system data source into planner while providing some default information for the user. It is also used for spec merge and table conversions to provide access to the previous environments.
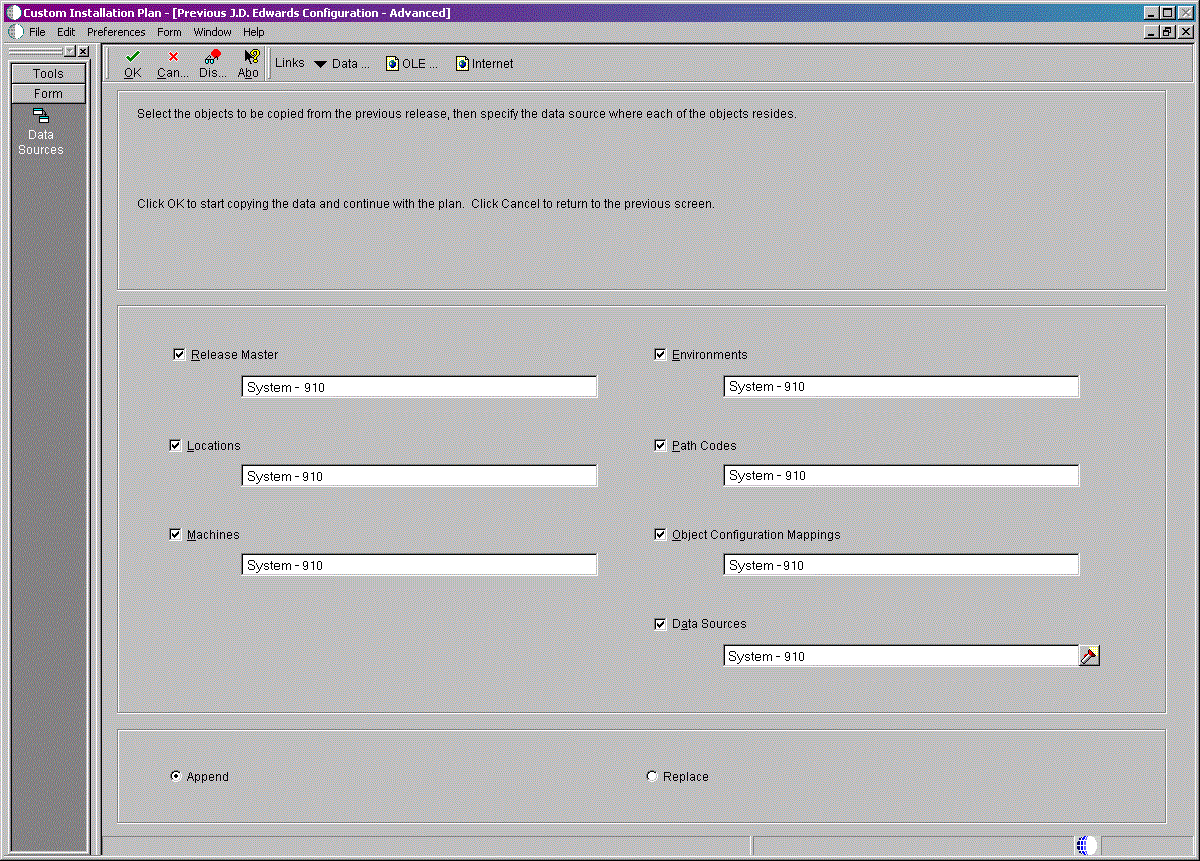
Note:IIf you want to force the system to retry the imports, click the Advanced form exit, which presents the following screen labelled Previous J.D. Edwards Configuration - Advanced. On that screen, you should enable the checkboxes for all data sources and then click the OK button, which forces the system to import the information from your previous data source. Under normal circumstances it should not be necessary to force a form import.
 Note:
Note:The Release Master checkbox may not be selected, but the release master has already been copied at this point in the process.
Select the objects to be copied from the previous release, then specify the data source where each of the objects reside.
Select the appropriate radio button for your data load:
Radio Button
Description
Append
Adds records to your existing tables. This is the typical selection.
Replace
Clears existing tables prior to loading new data.
Click the OK button.
Select one of the following options:
 Note:
Note:The above screen may not always appear for upgrades, which is preferable because the recommended method is to step through the planner rather than taking defaults. See "Caution When Choosing Take Defaults" below.
From this form, you have the option to automatically enter the locations and machines into the plan that you defined in the previous version of the software.
Choose a method for generating your plan:
To manually create your plan, click the OK button and continue with Entering Location Information.
To enable the system to automatically enter the locations and machines from the previous version, click the Take Defaults button.
The machines that were imported from the previous system data source are entered into the current plan. Skip the sections on entering locations, Deployment Servers, Enterprise Servers, and machines or servers, and continue with Entering Shared Data Source Information.
Caution when choosing take defaults:In order to ensure the validity of all subsequent plan information, it is strongly recommended that even advanced users should not choose this Take Defaults option. Instead, you should step through plan and verify that the Planner is populating information exactly as you expect to match your requirements.
To exit the plan, click the Cancel button.