Using Data Transform
Data transform allows you to create a common template and then use the same template with different data sources. Each report template contains pre-defined placeholders (XML element tags) that are used for the mapping between the layout and the xml data file. These XML element tag names must be used in order to get the proper report output. When you create a new report definition that uses a common template, you will need to create a new xsl program or use an existing xsl program that will map the data fields in the original schema to the data fields for your new report.
When using Query or Connected Query as a data source, the data schema is auto-generated by the system. These system generated tags may not match the XML element tags defined in the common template. In order to generate the standardized or common report properly, the XML data will need to be transformed to match the tags defined in the common template. To do this, an XSLT transform process will need to be applied to the incoming xml data source ahead of the standard BIP template processing.
You can manually create an xsl program or select to use the Oracle XSL Mapper directly from a link on the page. In order to use Oracle XSL Mapper, the system must be properly configured.
Launching Oracle XSL Mapper from Report Definition Template Page
To use Oracle XSL Mapper from the Create BIP Report Definitions —Template page you must:
-
Install Oracle JDeveloper. If you are using Oracle JDeveloper 11g
See Integration Broker: Prerequisites for Developing Transforms Using Oracle XSL Mapper.
-
If you are using Oracle JDeveloper 11g, you need to install JDeveloper extensions – Oracle SOA Composite Editor from Oracle Fusion Middleware Update Center.
In JDeveloper, select Help, Check for Updates.
-
Set environment variables on client machine for JDEV_HOME and JDEV_MAPPER_CLASSPATH.
-
JDEV_HOME should be set to the directory where JDeveloper was installed. For example: D:\Oracle\JDeveloper.
-
JDEV_MAPPER_CLASSPATH for JDeveloper 11.1.1.x should be set to:
<JDEV_HOME>\jdev\extensions\oracle.bpm.mapper.jar;<JDEV_HOME>\integration\lib\bpm-ide-common.jar;<JDEV_HOME>\ide\lib\javatools.jar;<JDEV_HOME>\jdev\lib\xmleditor.jar;<JDEV_HOME>\modules\oracle.xdk_11.1.0\xmlparserv2.jar;<JDEV_HOME>\modules\oracle.xmlef_11.1.1\xmlef.jar;<JDEV_HOME>\modules\oracle.javatools_11.1.1\javatools-nodeps.jar
-
-
Assign the role XMLP Service User to the Default User defined for the default local node.
See Integration Broker Administration: Configuring Nodes, Security Administration: Setting Roles.
Note:
You must reboot your machine after adding the environment variables.
Defining the Transform
To define the transform program:
-
Access the Template page in the report definition.
-
Select the Use Data Transform check box.
-
Click Upload and select the common template.
-
Click Upload and select the data schema associated with the common template.
-
Click Save.
Note:
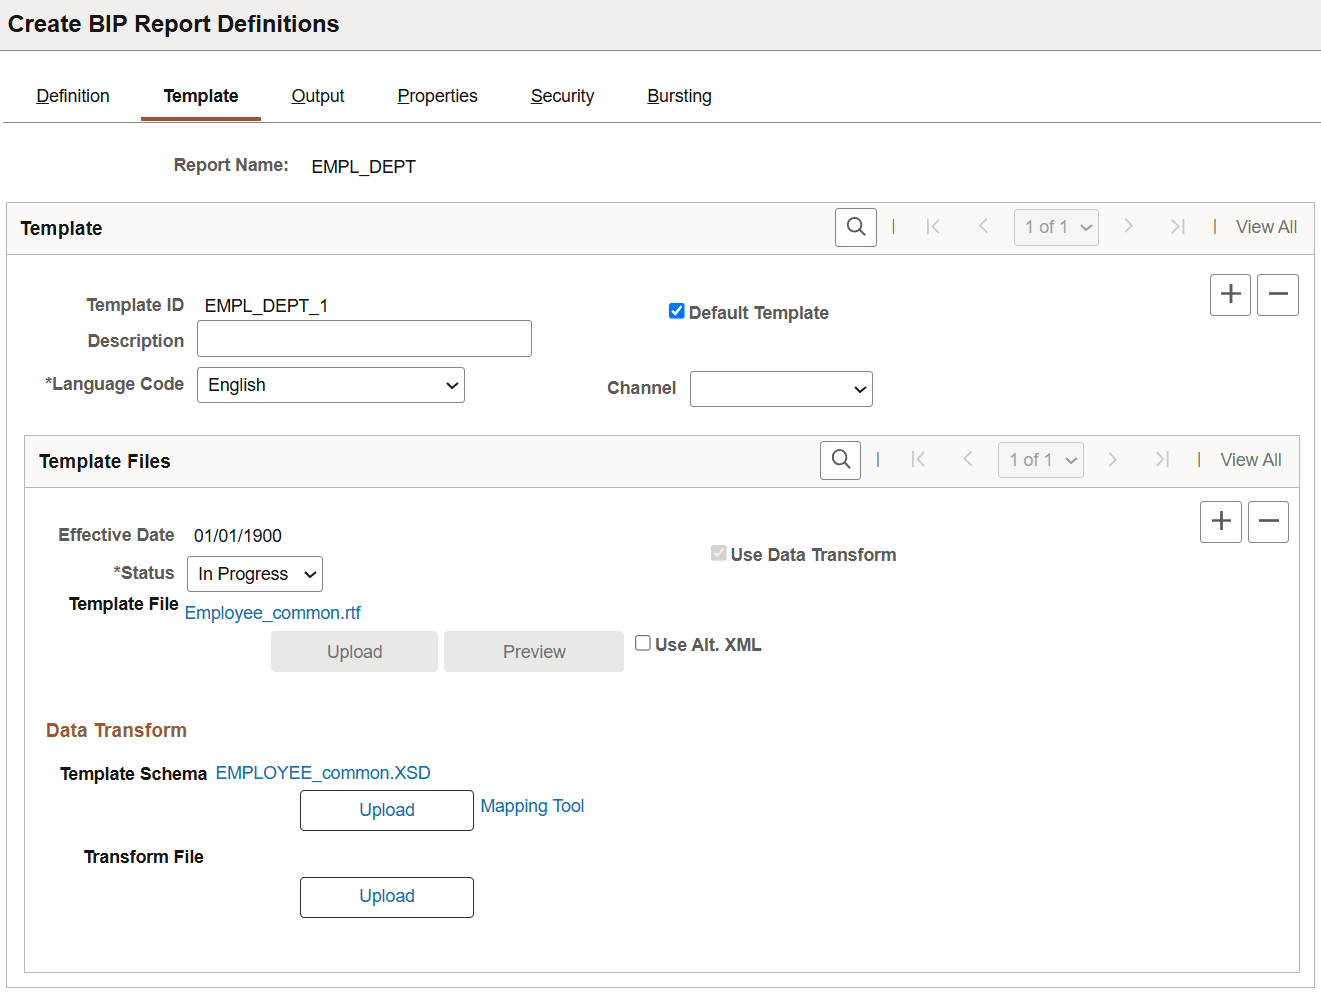
Both the data schema and template must be uploaded for the Mapping Tool link to appear when the page is saved.
-
Click the Mapping Tool link, if you want to create an XSLT program using XSL Mapper. If you already have an xsl program defined, you can skip this step and upload the transform file.
Note:
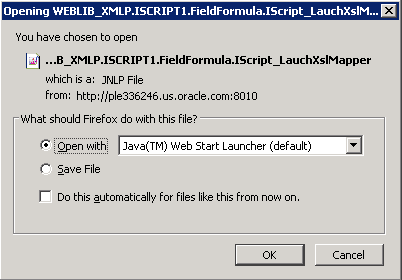
The first time you access this link, the dialog box will be presented to open with Java(TM) Web Start Launcher (default). Select the check box Do this automatically for files like this from now on and click OK.
-
Oracle XSL Mapper will open with the source and target schema.
-
Map the source fields to the target.
-
Click Save.
Note:
The xsl file is saved using the template ID name.
-
Close JDeveloper.
-
On the Report Definition page, click the Correct History button.
-
Open the Report Definition.
-
On the template page, click Preview and verify your report format.
-
Set the Report and Template Statuses to Active.
-
Click Save.
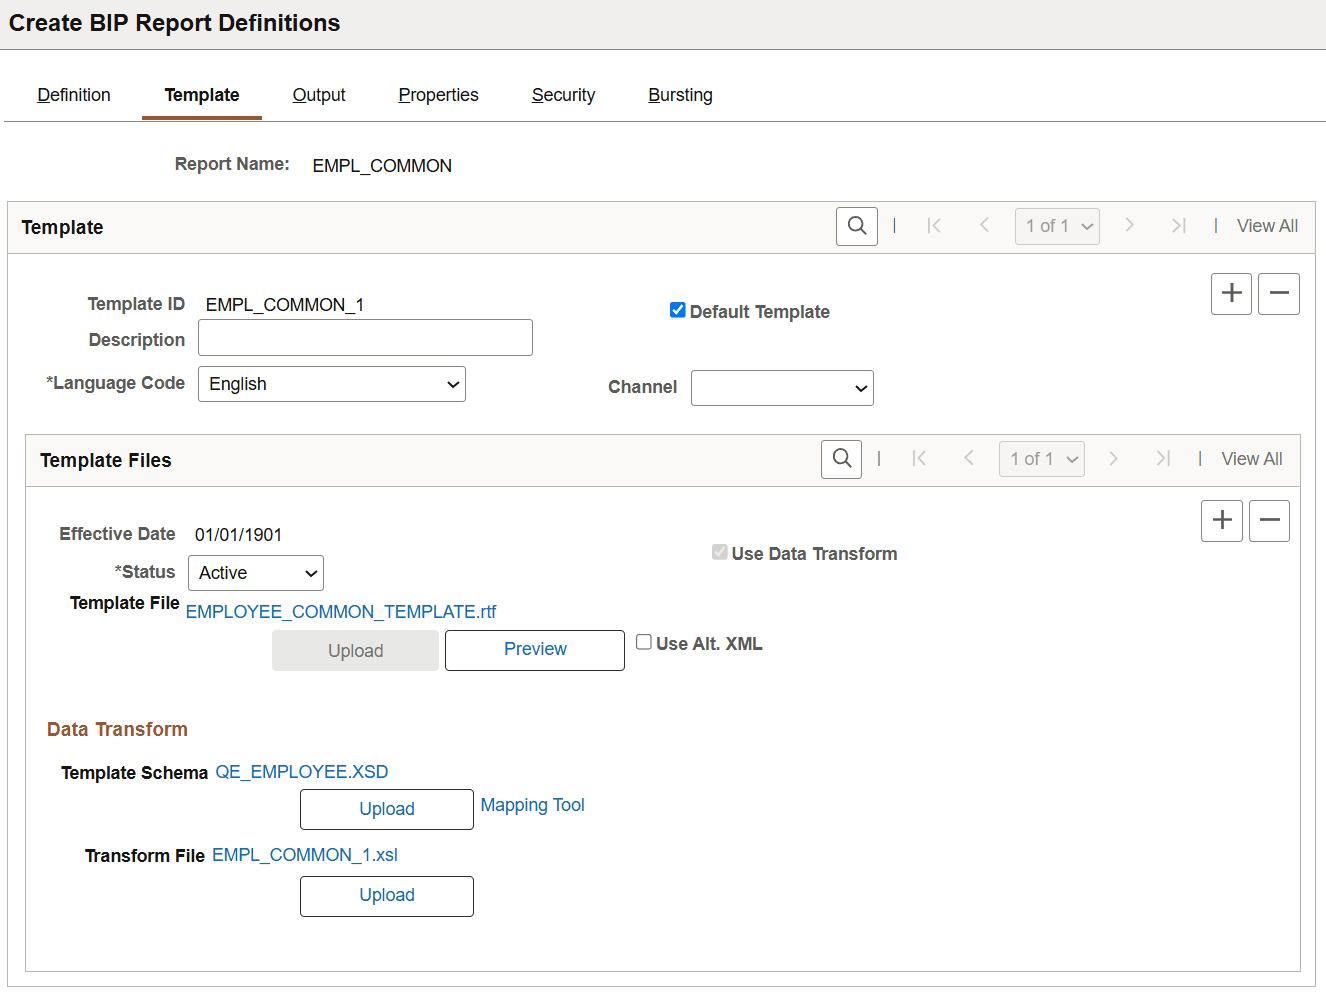
This example illustrates the Template page defined to use data transform.
Transform Example
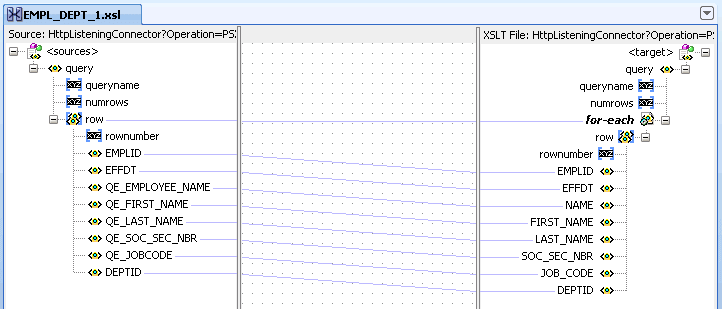
In this example, a common template is created for Employee. The tags generated from the query that will use this template, do not match the common template:
| Common Template Tags | Query Schema Tags |
|---|---|
|
EMPLID NAME FIRST_NAME LAST_NAME SOC_SEC_NBR JOBCODE DEPTID |
EMPLID QE_EMPLOYEE_NAME QE_FIRST_NAME QE_LAST_NAME QE_SOC_SEC_NBR QE_JOBCODE DEPTID |
To create the report with the query data source using the common template:
-
Select PeopleTools, BI Publisher, Create BIP Report Definitions.
-
Select Add a New Value and enter the report name, then click Add.
-
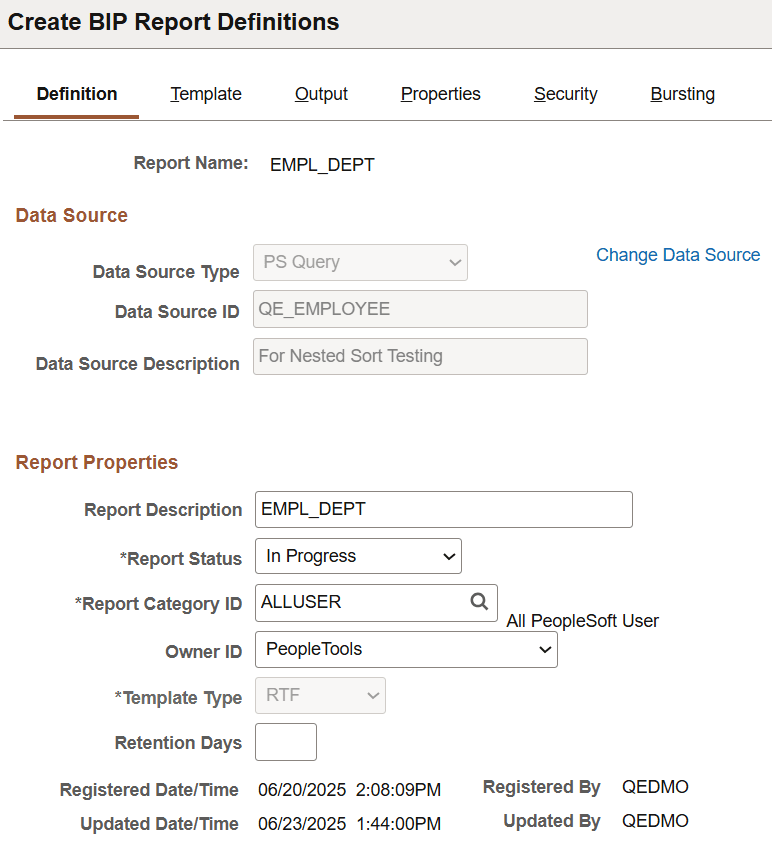
Enter a report description and category. The default template type is RTF.
This example illustrates the Create BIP Report Definitions page, which is defined to use the RTF template.
-
Select the Template page, enter the effective date and select Use Transform.
-
Upload the template file.
-
Upload the template schema.
-
Save the page.
This example illustrates the Mapping Tool link on the Report Template page.
-
Click the Mapping Tool link.
XSL Mapper will open and you can map the fields. Depending on your environment setup, you may get prompted to open a JNLP file. (JNLP : Java Network Launching Protocol)
This example illustrates opening a Java Network Launching Protocol (JNLP) file.
-
When XSL mapper opens, you make the necessary mappings between the source and target fields by dragging the field from the source to the target pane in the mapper.
This example illustrates mapping between the source and the target fields.
-
Select File, Save in XSL Mapper when you have completed your mapping.
Note:
This will automatically save the xslt file to the PeopleSoft system. The file will not appear on the page until you click Save again, or reopen the Report Definition.
-
If you want to save the xslt file locally, then select File, Save As and supply the file path.
Note:
When you use Save As to a local file, the file is not saved to the PeopleSoft system. You will need to manually upload the xslt file on the Report Definition.
-
After saving the file, you can exit XSL Mapper.
-
On the Create BIP Report Definitions page, click the Correct History button.
-
Open the Report Definition.
-
On the template page, click Preview and verify your report format.
-
Set the Report and Template Statuses to Active.
-
Click Save.