Managing Customizations
The Customization Repository is used to identify the relationships to customized objects before the change package is created. The Customization Repository is delivered empty on the PUM Source and must be populated using Change Assistant to upload the customer data.
To access the Customization Repository page, select the Customization Repository tile from the Update Manager Homepage.
The Manage Customizations Search page is displayed.
This example illustrates the fields and controls on the Manage Customizations Search page. You can find definitions for the fields and controls later on this page.
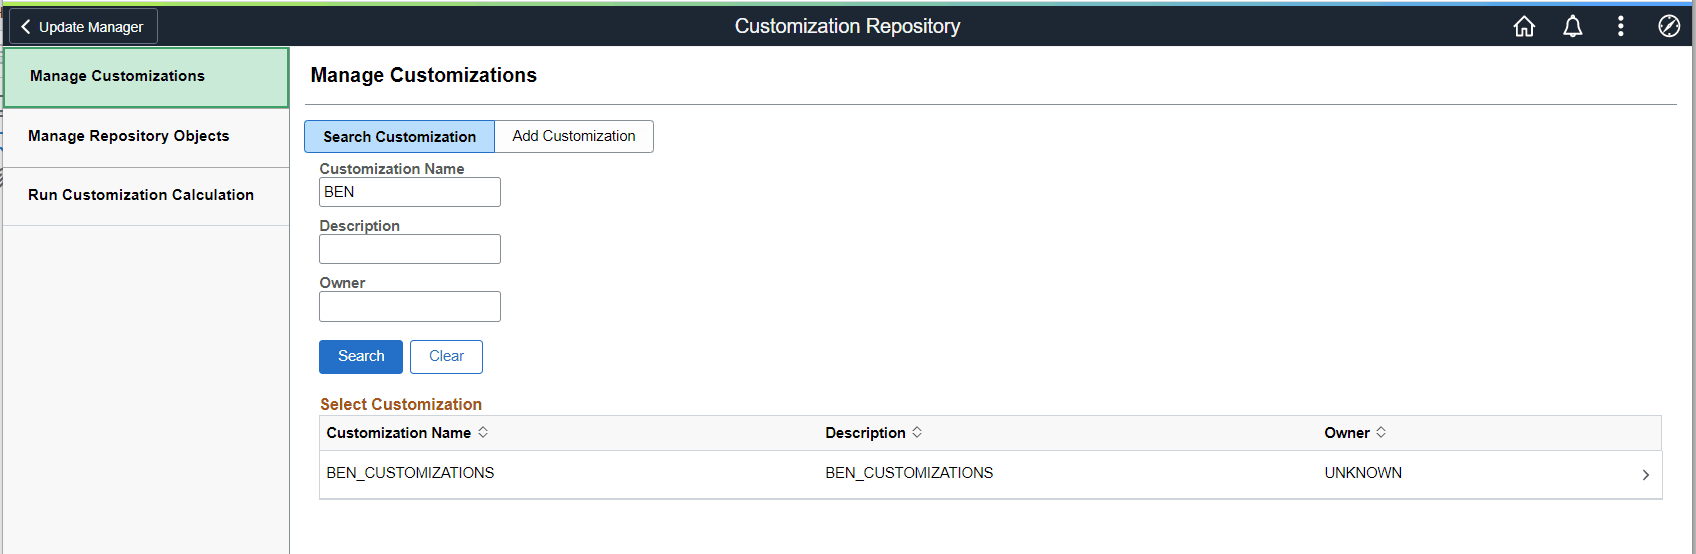
| Field or Control | Description |
|---|---|
|
Customization Name |
The Customization Name is the name used to group customizations. By default, this the name of the customization project that was uploaded to the PUM Source using Change Assistant. You can have 0–n customizations defined. Each defined customization must have a unique customization name. You can add additional Customization names using the Add Customization button to regroup the uploaded objects as needed. |
|
Description |
You can add a description on the Manage Customization page to assist in searching for customized objects. |
|
Owner |
You can add an owner on the Manage Customization to assist in searching for customized objects |
This example illustrates the fields and controls on the Manage Customizations page. You can find definitions for the fields and controls later on this page.
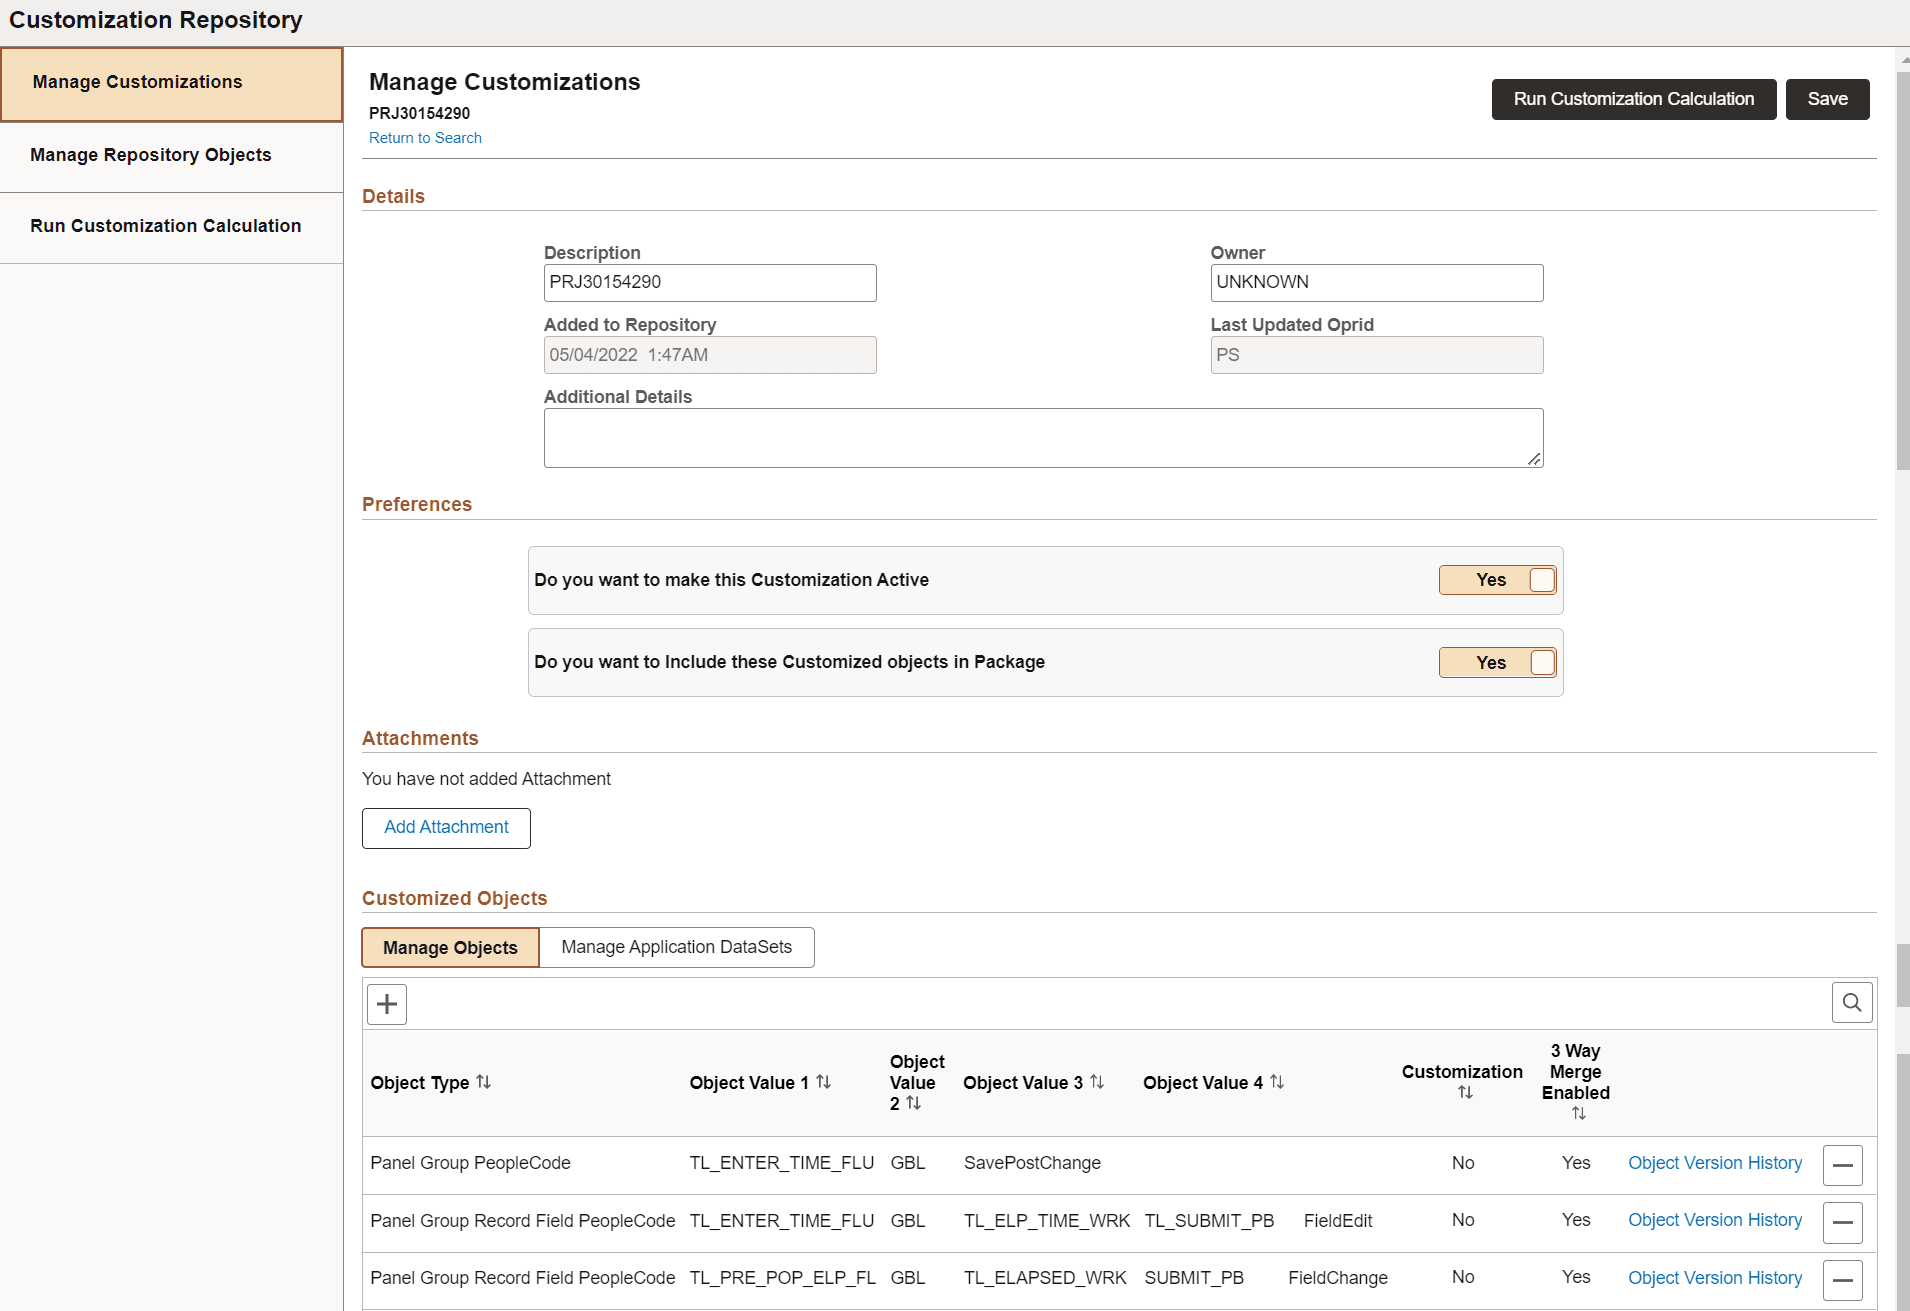
| Field or Control | Description |
|---|---|
|
Description |
Use this field to provide a more detailed description of the customization. |
|
Owner |
Specify the owner for the Customization. |
|
Added to Repository |
Read only field with the date the project was uploaded. |
|
Last Updated Oprid |
Read only field displaying the User ID that uploaded the customization. |
|
Additional Details |
Add any additional details to describe the customization objects in this group. |
|
Do you want to make this Customization Active |
Specify whether the customized objects in this Customization group are active.
|
|
Do you want to Include these Customized objects in Package |
Specify whether bug fixes which impact the customized object should be, by default, included or excluded from change package creation.
|
|
Add Attachment |
Add documents pertaining to the customization from your local. You can upload documents of type TXT, Microsoft Excel, Microsoft Word, and PDF. |
|
Customized Objects |
The customized objects grid lists the object type, object values, if it is a customization, and if 3 way merge is enabled. |
Adding Customizations
To manually add customizations:
-
Select Customization Repository from the Update Manager homepage.
-
Select Add Customization
-
Enter the Customization name and click Add.
-
Enter the details and preferences.
-
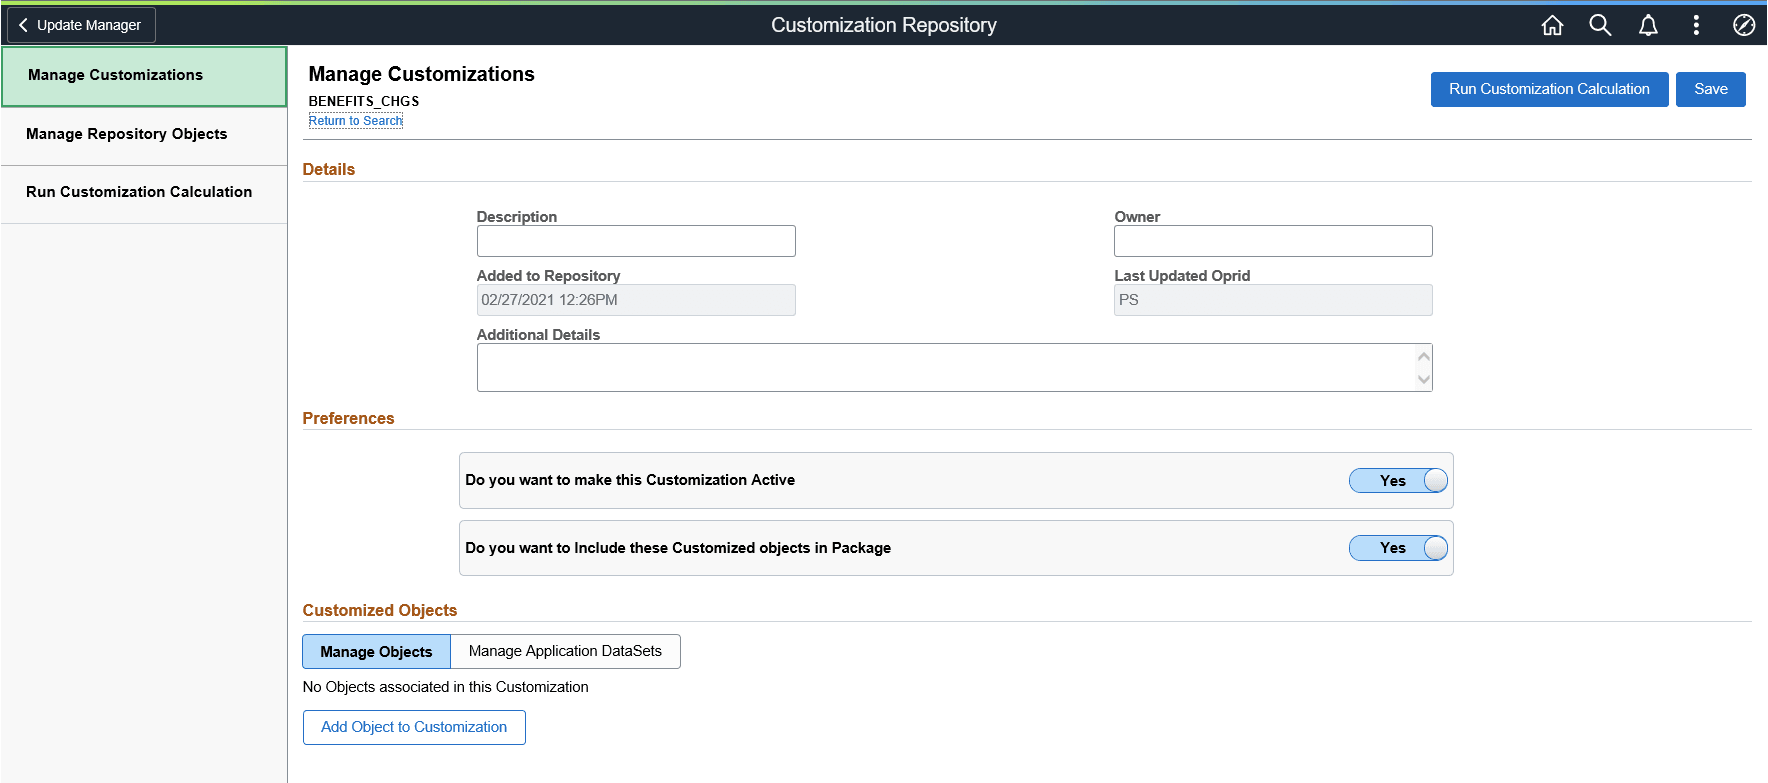
Initially, no objects will be associated with the Customization.
-
Select either Managed Objects or Manage Application DataSets.
-
Use the Add Object to Customization button to add the objects.
-
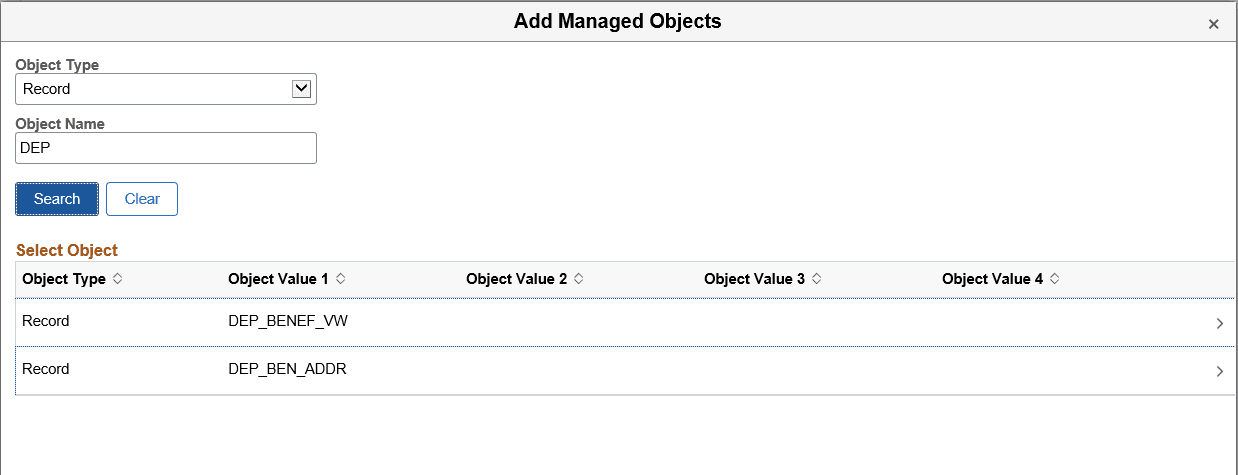
From the Add Managed Objects page or Add Application DataSets page, search for and select the objects to add.
Note:
All objects that have been uploaded to the Customization Repository are available to add.
-
Use the Add icon (+) to add additional objects to the customization.
Note:
Objects must be added one at a time.
-
Save the Customization.
-
Run the Customization Calculation.
This example illustrates the fields and controls on the Manage Customizations page for a new customization.
This example illustrates the fields and controls on the Example Add Managed Objects page. You can find definitions for the fields and controls later on this page.
Deleting Customizations
To delete an object from the Customization:
-
Select Customization Repository from the Update Manager homepage.
-
Open the Customization Name.
-
Select the – (delete row) action in the customized object grid.
-
You will be prompted that the row will be deleted when the customization is saved.
If a customization is deleted, the customization calculation must be re-run to ensure that the correct metadata exists in the database.